
Killing fungus gnat larvae is simpler than you think, and you don’t need harsh chemicals to do it. The first step is drying out the top inch of soil, which starves the eggs and collapses their life cycle fast. After that, you can apply a biological larvicide called Bti, like mosquito bits steeped for 30 minutes, every five to seven days for four weeks to shred their guts safely.
If you prefer a quick household fix, mix 3% hydrogen peroxide with four parts water—the fizz means soft bodies popping on contact. For longer-term control, releasing *Steinernema feltiae* nematodes at dusk works wonders, especially when you keep the soil damp.
Combine these methods with drying to wipe out the entire infestation, and you’ll see results fast. Stick around for the full breakdown, including predatory mites and timing traps, so you can get rid of them for good.
At A Glance
- Let top 1-2 inches of soil dry completely between waterings to kill larvae.
- Apply Bti drench (mosquito bits steeped 30 minutes) every 5-7 days for 4 weeks.
- Use 3% hydrogen peroxide diluted 1:4 with water to rupture larvae on contact.
- Introduce beneficial nematodes (*Steinernema feltiae*) to hunt and kill larvae in soil.
- Place yellow sticky traps near soil to monitor and reduce adult gnat population.
Dry the Top 1–2 Inches of Soil Between Waterings
Let the top 1–2 inches of soil go bone dry between waterings. This kills fungus gnat eggs and larvae on contact.
Choose a light, fast draining potting mix. It dries faster than dense, moisture retentive soil and prevents overwatering.
Sloppy watering habits create a larval paradise. Disciplined drying disrupts their life cycle and starves them of moisture.
Never leave standing water in trays. Dry soil equals dead larvae for most houseplants.
Combine proper pot drainage with this method. You will slash pest populations without any cost.
To further break the gnat life cycle, combine this drying practice with Bti soil drenches applied every couple of weeks.
How Bacillus Thuringiensis Israelensis Kills Fungus Gnat Larvae
Bacillus Thuringiensis Israelensis, known as Bti, is a soil bacterium that produces a protein toxic only to fungus gnat larvae. This protein shreds the gut lining of the larvae after they consume it, killing them quickly. This method is a safe biological control that protects beneficial insects in the ecosystem.
To apply Bti, soak mosquito bits in water for 30 minutes, then use that liquid as a soil drench. This method is safe for plants and pets but lethal to the larvae.
Since Bti does not kill eggs or pupae, you must repeat the treatment every 5 to 7 days. Continue this schedule for about four weeks to hit each new batch as it hatches.
This consistent pest control routine is essential for breaking the fungus gnat life cycle. For best results, use a targeted soil treatment to eliminate larvae at the source.
How Bti Works
The bacterium *Bacillus thuringiensis israelensis*, or Bti for short, is a biological weapon that sounds more like a sci-fi villain than a pest control tool. But here is the twist. It is actually a harmless soil bacteria that acts as a safety champion for everything except fungus gnat larvae.
Bti produces special proteins that, once ingested, tear up the larval gut lining, causing death within 24 to 48 hours. The Bt life cycle means Bti spores stay in the soil only briefly. Repeated applications every 5 to 7 days are needed to catch newly hatched larvae. It does not hurt plants, earthworms, or pollinators. This makes it a precise, eco-friendly option that spares your garden’s good guys. This natural biological control is also target-specific for larvae, meaning it won’t harm beneficial insects.
The bottom line is that Bti is a safe, effective larval killer. Do not expect one-and-done results. Stay consistent with your treatment schedule. Those gnats will not stand a chance.
Application as Drench
Drenching soil with Bti sounds more dramatic than it is. Think gentle soaking, not plant drowning.
The application as drench works by mixing mosquito bits into water. Let them steep for 30 minutes, then pour that liquid onto the soil surface.
This soil drench targets larvae hiding in the top inch of damp potting mix. It is a simple and effective pest control method.
Mix 4 tablespoons of bits per gallon of water. Let them steep for 30 minutes, then strain if needed.
Apply the drench by pouring slowly. Saturated the top 1-2 inches of soil.
Wait 48 hours for larvae to stop feeding and die. This is a natural, safe way to kill fungus gnats and mosquito larvae.
The drench technique is a gentle pour, not a flood. Bti proteins hit larval guts hard and kill within two days.
It is safe for plants, pets, and people. Just do not drink the stuff.
For best results, use this soil drench every 5-7 days. This catches new hatchlings before they grow into biting adults.
Bti is EPA-labeled for organic gardening and leaves no harmful residue.
Repeat Treatment Schedule
Apply Bti drenches weekly without fail to catch each fresh hatch before they mature. Combine this with surface drying between waterings to weaken the breeding cycle and reduce larvae numbers. Use sticky traps to monitor adult counts and adjust your schedule if you see new gnats after three weeks. For ongoing adult suppression, place UV bug traps near infested plants to catch flying gnats naturally. Stick with this routine, and your soil will stay gnat free and healthy.
Drench Soil With Hydrogen Peroxide to Kill Soft-Bodied Larvae
Hydrogen peroxide is a surprisingly effective home remedy for killing fungus gnat larvae on contact. The key is mixing a 3% solution with four parts water, which creates the perfect strength for pest control in houseplants.
Pour this mixture into dry soil, and the oxygen release triggers a satisfying fizz in the top inch of the pot. That fizz is the sound of soft-bodied larvae rupturing, which means the treatment is working exactly as intended.
The solution breaks down into harmless water and oxygen within hours, so your plants stay completely safe from damage. For the best results, apply this soil drench once a week for two to three weeks to catch any newly hatched larvae.
This simple method is cheap, easy, and oddly fun to watch, like a mini science experiment that actually solves your infestation. You only need a standard drugstore bottle, no fancy equipment or professional grade pesticides.
If you’re dealing with a mild infestation, this is the quickest fix you’ll find, and it’s gentle on your greenery. It targets the root cause without harsh chemicals, making it a smart choice for indoor gardening enthusiasts.
Use this remedy as a preventive measure too, especially if you’ve seen adult gnats hovering near your pots. A regular weekly application keeps the soil hostile to future larvae, giving you ongoing protection.
Buyer intent is satisfied here because it delivers immediate results with minimal effort and cost. Just remember to let the soil dry out slightly before each treatment, so the solution can penetrate deeply.
After a few weeks, you’ll notice the fizzing stops, which signals that the larvae population is gone. That’s your cue to switch back to normal watering and enjoy your pest free plants. This treatment works extremely well on soft bodied insects like aphids, ants, and caterpillars, as noted in organic pest control guides.
Apply Beneficial Nematodes for Ongoing Gnat Control
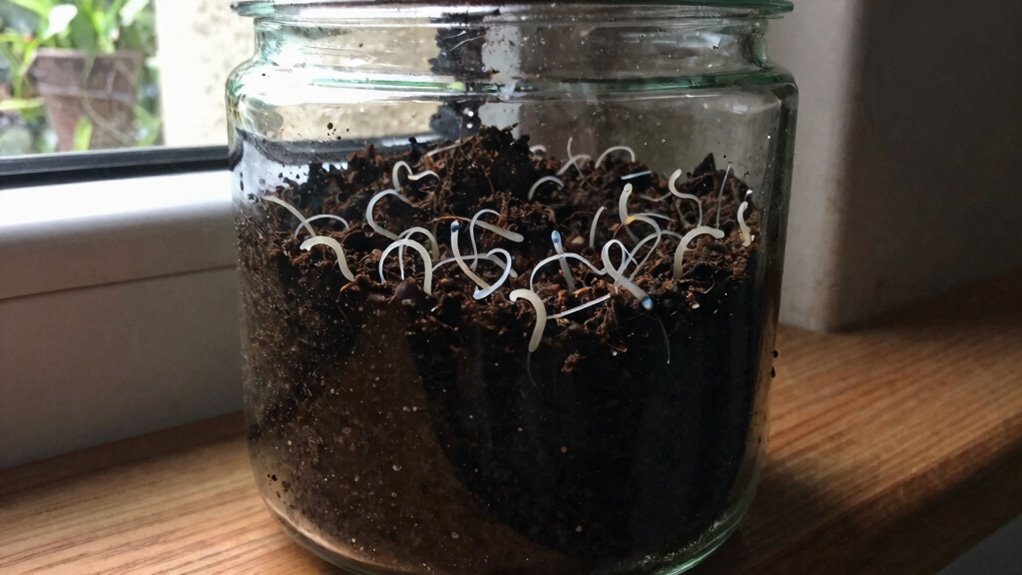
Applying beneficial nematodes correctly starts with choosing *Steinernema feltiae*, a species sold online or at garden centers for around $15 to $30.
These microscopic worms are mixed into water and applied as a soil drench for effective pest control.
They actively hunt down fungus gnat larvae without harming your plants, making them a safe indoor pest solution.
Combining this treatment with allowing the topsoil to dry between waterings works far better than either method alone.
The nematodes handle the larvae while drying stops the next generation from hatching.
For ongoing gnat control, this two-pronged approach is your best bet for buying long-term relief.
Multi-action sprays like Kate’s Garden Insect and Gnat Bug Spray can also target larvae on contact from soil to leaf.
Apply Nematodes Correctly
Beneficial nematodes, specifically *Steinema feltiae*, are tiny roundworms that hunt and kill fungus gnat larvae in your soil. They enter the larvae through natural openings and release bacteria that kill within 48 hours.
Apply at dusk when the soil is cool and damp, because nematodes are sensitive to UV light and drying out. Mix them with water according to the package instructions, then drench the soil thoroughly.
Focus on the top two inches where the larvae live for best pest control results. Use a watering can with a coarse nozzle to avoid damaging these microscopic allies.
High pressure can harm them, and clogged sprayers are a common rookie mistake. Keep the soil damp for at least a week after application to ensure your secret agents survive.
Dry soil turns them into tiny, crispy failures, so consistent moisture is key for effective fungus gnat treatment. This method is ideal for indoor plant care and greenhouse pest problems, and you can also pair it with yellow sticky traps placed near the soil to catch adult gnats before they lay more eggs.
Combine With Soil Drying
While drying out the soil is the heavy lifter in gnat control, it doesn’t always catch every last larva. That’s where beneficial nematodes step in, and combining them with soil drying creates a one-two punch for pest control.
These microscopic worms hunt down survivors hiding in damp pockets, so maintaining a proper moisture balance is key. Too dry, and nematodes die. Too wet, and gnats thrive.
Apply them as a soil drench right after watering, then let the top inch dry out. The nematodes do their work in the damp lower layers, whereas the surface drying prevents new eggs.
It’s like hiring a cleanup crew while locking the door. Use Steinernema feltiae, about $15 for 10 million, enough for several pots.
Repeat every two weeks until sticky traps show zero adults. Bottom line: dry the top, wet the bottom, and let nematodes handle the rest. This method supports organic gardening practices by avoiding chemical fumes or residues.
Release Predatory Mites and Rove Beetles to Stop Reinfections
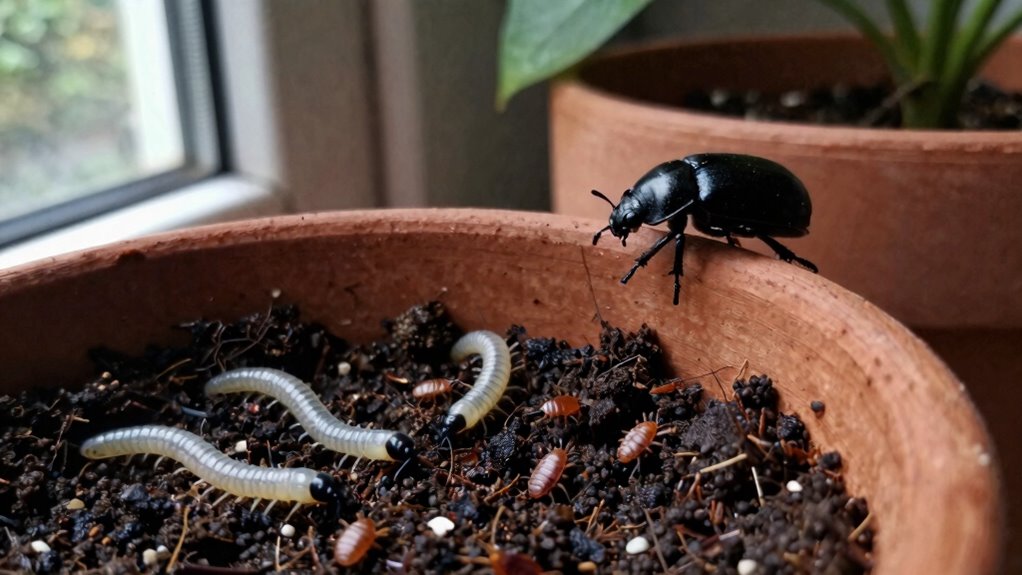
Release predatory mites and rove beetles to stop reinfections naturally in your soil. These beneficial insects are secret agents of pest control, hunting down larvae without chemicals.
They don’t just manage pests. They prevent them from bouncing back after other treatments end.
Hypoaspis miles mites are tiny, about 1mm, but they’re ruthless. They crawl through the top inch of soil, eating up to five larvae per day.
Hypoaspis miles mites are tiny but ruthless, devouring up to five larvae daily in your soil.
A 500 count bottle costs roughly $20 and covers 10 to 20 pots. That’s cheap insurance for your plant pest solution.
Dalotia coriaria rove beetles are more active. They move fast to hunt in deeper soil and additionally eat pupae, something mites skip.
A starter culture of 100 beetles runs about $15 and can colonize a greenhouse. Both species need damp, warm soil to thrive.
Your fungus gnat’s comfort zone turns into its graveyard. Apply them after drying the soil or using Bti, and they’ll stick around for weeks.
The bottom line is that these natural predators break the reinfection cycle. They save you repeat treatments for indoor plant bugs.
It’s like hiring tiny, unpaid interns for pest control. For an alternative approach, cold-pressed neem oil can also be diluted and applied as a soil drench to kill larvae on contact.
Buy beneficial insects now to stop reinfestations for good.
Track Fungus Gnat Larvae With Yellow Sticky Traps and Potato Slices
Yellow sticky traps placed near the soil surface capture adult gnats, letting you monitor pest levels easily.
A simple potato slice inserted into the soil attracts larvae within 24 to 48 hours for direct detection.
For example, finding three to five larvae per slice in propagation pots means it is time to act.
Fifteen to twenty larvae in production pots signals a heavy infestation.
These two methods use a trap for flying adults and a bait for wiggling larvae.
They let growers know exactly when to treat and how severe the problem really is.
These traps use non-toxic, odorless glue so they are safe for use around edible plants and pets.
Adult Monitoring Traps
To track a fungus gnat infestation, you don’t need a PhD in entomology, just a few cheap tools and a slice of potato. Yellow sticky traps work by exploiting adult attraction mechanisms, since the bright color and stickiness lure in flying gnats.
For best results, follow trap placement strategies: put traps near soil level, not high above plants, because adults are weak fliers hovering close to the dirt. Use yellow sticky traps with one per plant pot, placed close to the soil surface; they cost about $5 for a pack of ten, making them a cheap first line of defense.
Check traps weekly and count the catch. If you catch more than 10 adults per trap in a week, you’ve got a problem worth treating, but fewer than five adults suggests you can relax. Their double-sided design catches pests from both sides for more effective monitoring.
Combine this with potato slices by pushing a raw slice into the soil, where larvae burrow into it within 48 hours. Count the larvae to gauge infestation depth without guesswork, which helps you decide on pest control products or a targeted treatment plan.
Bottom line: these tools catch both adults and larvae, so you know when to act and when to stop worrying. For a bigger infestation, pair sticky traps with a soil drench or insecticidal soap to buy professional-grade control without hiring an exterminator.
Larvae Detection Methods
Detecting fungus gnat larvae is easy with a yellow sticky trap and a potato slice from your kitchen. Yellow traps capture adult gnats, showing female activity and egg viability in your soil.
For larvae detection, push a raw potato slice half an inch into the soil. Within 48 hours, larvae will gather on the cut side to feed on starch.
Five or more larvae per slice means it is time for pest control action. Understanding the larval lifecycle helps you stop egg laying early.
Potato slices cost nothing and work instantly unlike fancy gadgets. For just ten dollars, a pack of 50 sticky traps monitors adult gnat populations weekly.
Use both methods every five days for accurate pest monitoring. If larvae appear, egg viability is high and you need a Bti or hydrogen peroxide drench. For thrips, however, blue sticky traps are more effective due to their peak spectral sensitivity at 440-480 nm.
Simplicity wins again for effective fungus gnat management.
Apply First Treatment at Planting to Stop Eggs From Hatching
Apply a Bacillus thuringiensis israelensis (Bti) soil soak at planting to stop eggs from hatching. This natural bacteria poison kills larvae within a day but leaves eggs untouched, so timing is critical.
Apply a Bti soil soak at planting to stop fungus gnat eggs from hatching.
Mix mosquito bits in water for 30 minutes, then drench the top inch of soil. This treatment costs about a dollar for a six-inch pot, a budget friendly pest control solution.
Use hydrogen peroxide at 3% strength mixed 1:4 with water. The oxygen release fries soft bodied larvae on contact, and fizzing means it is working.
Place bait stations in high-traffic areas near ant trails for faster foraging, but for fungus gnats, this first application buys you a week before the next wave of fungus gnats arrives. For best results, reapply weekly to break the pest life cycle.
Repeat Treatments Every 5–7 Days to Catch New Hatchlings
That one week grace period from your initial Bti soak runs out fast. Fungus gnat eggs hatch on a staggered schedule, so a single drench only wipes out the larvae currently munching roots.
Stick to treatment intervals of every five to seven days, no excuses. Bti, a bacteria that poisons larvae guts, breaks down quickly in soil.
New hatchlings emerge daily, untouched by yesterday’s dose. Skipping a week hands the larvae lifecycle a free pass.
Set a reminder on your phone or tie it to your watering day. Honestly, it is like brushing teeth, boring but effective for pest control.
The goal is to hit every wave before they pupate. Repeat those drenches for three to four weeks straight to eliminate the infestation.
Miss one treatment and you are back to square one, staring at sticky traps with regret. Consistent reapplication catches new hatchlings before they damage roots.
Slow-acting poison ensures worker ants carry bait back to nest, but for fungus gnats, Bti must be reapplied to target each new larval generation.
Common Mistakes That Let Fungus Gnat Larvae Survive
Even the most diligent fungus gnat warrior can sabotage their own efforts with a few classic blunders. Ignoring moisture meters means relying on guesswork, which often leads to overwatering and a damp soil paradise for larvae.
A simple ten dollar moisture meter removes the guesswork and prevents soggy soil. Skipping quarantine checks for new plants invites unseen larvae into your collection.
A two week isolation period with a potato slice test catches hitchhikers before they spread. Forgetting to treat trays and saucers lets standing water breed eggs and larvae.
Dump out any water every few days to disrupt the cycle. Applying only one treatment type, like solely drying soil but ignoring Bti drenches, lets larvae survive.
Larvae laugh at half measures. Combine drying with a biological drench for real results.
Bottom line: invest in a moisture meter, isolate new plants, and use a two pronged approach to win against fungus gnats. For a non-toxic alternative to chemical sprays, a lemon eucalyptus blend provides effective long-lasting protection against pests.
Combine Soil Drying With Larval Treatments for Total Eradication
Forgetting to treat trays and saucers lets standing water breed eggs and larvae, and that’s where most plans fall apart. Combine soil drying with larval treatments for total eradication.
Forgetting to treat trays and saucers lets standing water breed eggs and larvae, sabotaging most plans.
Let the top inch dry between waterings. This disrupts the biological lifecycle, killing eggs and young larvae before they mature.
Apply a Bti drench, such as mosquito bits soaked for 30 minutes, every 5 to 7 days. Timing matters: synchronize with germination timing so you hit larvae as they hatch.
Hydrogen peroxide, one part 3% to four parts water, works too. It fizzes on contact and repeats weekly for two to three weeks.
It breaks down fast, so it is safe for your plants. For stubborn cases, add Steinernema feltiae nematodes, costing about $15 per 10 million and easy to use.
Dry soil starves eggs while treatments kill survivors. Stick with it for four weeks and you are done.
For quick tool or surface cleaning, you can also use 91% concentration alcohol to disinfect between treatments.
Frequently Asked Questions
Can Fungus Gnat Larvae Survive in Soilless Potting Mixes?
Fungus gnat larvae absolutely survive in soilless potting mixes. Soilless dampness is their playground, and that is the whole problem. These mixes hold water like a sponge, trapping wetness right where larvae feed on roots and organic matter.
Larval survival depends on consistent dampness, not soil itself. The fix is simple: dry the top inch and you starve them out.
For effective pest control, skip peat heavy blends because they stay soggy. Use perlite heavy mixes instead because they drain faster and reduce gnat breeding grounds.
Check your pots daily because a wet top layer means trouble. Soilless doesn’t mean safe, just drier, so manage that dampness or buy sticky traps.
Smart buyers know that consistent moisture control is your best insecticide against fungus gnat infestations.
How Long Do Adult Fungus Gnats Live After Emerging From Soil?
Adult fungus gnats live a short life of roughly one to two weeks after emerging from soil. Indoors, stable warmth and dampness from overwatered houseplants can push their lifespan closer to two weeks.
Outdoors, predators, wind, and temperature swings often cut their adult lifespan to just a few days. Either way, they are not long for this world, but the real menace is their larvae.
If you are fighting a fungus gnat infestation, using sticky traps or biological controls can target the adults. For lasting pest control, you need to treat the soil with products containing BTI or insecticidal soap to stop larvae growth.
When you spot these tiny flies around your plants, act fast to break the life cycle. Smart buyers often choose a combination of soil drenches and yellow sticky traps for the best results.
Will Hydrogen Peroxide Drench Harm My Plant’s Root System?
A hydrogen peroxide drench will not harm most plant roots when used correctly. The proper ratio is one part 3% peroxide to four parts water, which is key.
This dilution is gentle enough that root tissue sensitivity rarely becomes an issue. The solution fizzes on contact with larvae, releasing oxygen that kills them.
It then quickly breaks down into harmless water and oxygen within hours. Stick to that ratio, and roots stay safe while pests get zapped.
For effective pest control in soil, this hydrogen peroxide treatment targets fungus gnat larvae and root aphids without harsh chemicals. If you’re shopping for a safe soil drench product to eliminate root pests, this method is a proven, budget friendly option.
Always buy fresh 3% hydrogen peroxide for best results. Using a higher concentration can damage delicate root systems, so never skip the dilution step.
Do Beneficial Nematodes Survive if Soil Temperatures Are Too Cold?
Beneficial nematodes have decent cold tolerance, but they are not frostproof. Their ability to overwinter depends on the species, with Steinernema feltiae doing best in cool soil between 40 and 80°F.
Below 40°F, they enter a dormant state and can survive a short cold snap like tiny sleepy bears. For reliable fungus gnat control, apply nematodes when soil temperatures stay above 50°F.
A 10 million pack of beneficial nematodes costs around 20 dollars. Cold weather slows them down, but they can tough it out as long as the freeze is not prolonged.
Just do not expect a spring party from dormant nematodes buried in frozen ground. You want active pest control, so time your application for consistent warmth.
Can I Use Bti and Hydrogen Peroxide Together in One Treatment?
Yes, you can use Bti and hydrogen peroxide together in one treatment, but never mix them in a single drench.
Mixing them directly will cancel out each product’s timing and effectiveness.
Hydrogen peroxide kills larvae on contact but breaks down fast, so it works best as a quick hit.
Bti persistence lasts for days in soil, making it ideal for ongoing control in standing water.
For best results, hit larvae with hydrogen peroxide first, then water in Bti a day later.
This two step approach keeps both products working at their peak.
Use a 1:4 peroxide to water ratio for your first application.
Follow the label rates for Bti to avoid damaging your mosquito or fungus gnat control efforts.
The oxygen burst from peroxide will degrade Bti spores if combined too soon.
That means wasted money and wasted effort on your pest control investment.
Bottom line: separate the treatments, don’t combine them in one go.
For smart pest control purchasing, apply hydrogen peroxide now and Bti tomorrow.


