
Finding an ant nest in your house doesn’t require demolition—just smart detective work.
Follow the steady stream of workers backward from their food source to spot the hidden entry crack and any nearby sawdust piles.
Listening for faint rustling in drywall can also reveal carpenter ants excavating damp wood, a common problem in 2025 homes.
We’ve rounded up the best pest-control supplies to help you pinpoint and seal those nests fast, plus helpful notes on what’s actually worth buying.
Scroll down for the full product guide.
At A Glance
- Follow worker ant trails backward from food to locate the colony’s entry crack.
- Listen for faint rustling or crackling sounds inside walls, indicating active galleries.
- Inspect damp, rotting wood, leaky areas, and baseboards for frass and sawdust piles.
- Look for winged ants or discarded wings on windowsills, signaling a mature nest.
- Use a dampness meter to identify moisture zones where carpenter ants likely nest.
Spot Early Signs of a Carpenter Ant Nest
A quiet house can be misleading, so early carpenter ant nest detection requires a sharp eye. Piles of dead ants near windows are a clear warning sign that a colony is active nearby.
Frass, which looks like fine sawdust from their tunneling, often appears along baseboards and is a strong indicator of infestation. Winged ants inside your home signal a nuptial flight, meaning a mature nest is established and ready to expand.
Start your pest control inspection by checking for damp or rotting wood, since these ants are drawn to moisture. Discarded wings piled on windowsills after a swarm are a dead giveaway that reproductives have emerged.
Damp wood draws them in, but piled wings on windowsills reveal the swarm has already emerged.
If you spot a single ant, follow its trail, but a steady stream of workers is a far more reliable lead for locating the nest. Remember, carpenter ants don’t eat wood; they hollow it out to create galleries, much like an illegal construction site.
For effective carpenter ant removal, act before they damage your home’s structure, because they are destructive tenants. Professional ant extermination services can handle a mature colony, but early intervention saves you costly repairs. If you prefer a DIY approach, delayed-action baits are highly effective for colony elimination.
Check hollow doors, porch pillars, and attic beams for small holes or sawdust piles, as these are prime nesting spots. You can also tap on wood surfaces and listen for a hollow sound, which indicates internal excavation.
Moisture control is your first defense, so fix leaks and improve ventilation to make your property less inviting. If you need carpenter ant pest control fast, look for a local exterminator experienced in colony elimination.
Catching these signs early is the first step toward a thorough home inspection and lasting protection. Stay observant, and you’ll stop them before they remodel your house into sawdust.
Track Trails and Listen for Rustling Sounds in Walls
Tracking ant trails is the most reliable way to locate the nest, since those lines of workers act like a highway map to their front door.
Follow them back from the food source and you will often end up at a crack in the wall or a gap in the baseboard, which is your entry point for pest control.
If the trail disappears into a wall void, press your ear against the drywall and listen for a faint rustling or crackling sound.
That noise is the colony moving around inside, and it is a dead giveaway that the nest is right there.
This simple inspection technique helps you pinpoint the infestation for targeted treatment.
For effective ant control, knowing where to apply bait or spray is half the battle.
After locating the nest, pesticide-free glue traps placed along the baseboard can provide passive, long-lasting control without chemical sprays.
Track Ant Trails
Following the moving column works better than stalking any individual scout. Those lone wanderers get confused, but the main trail knows the way.
For nighttime tracking, grab a flashlight with a red filter: ants can’t see it. Wait until dark, when most species ramp up activity.
Watch closely. Over days, you’ll see shortcut emergence, the trail straightening as pheromone traffic increases.
That’s your highway to the nest. Follow it backward from the food, past the baseboard crack, right to the colony’s door.
Don’t rush; move slowly, keep the light low. Ahead, you’ll see the crack they use.
Mark it with tape. You’ll find entry points for pest control, often near dampness.
Bottom line: patience and a red light beat frantic poking. Mark the route, then plan your attack.
Listen for Rustling
Up inside the wall cavities, past the insulation and the occasional forgotten wire, a faint rustling can give the whole game away. That sound, like crinkling paper or a slow, deliberate shuffle, is classic carpenter ant behavior.
These pests do not eat wood. They excavate it, carving smooth galleries for their colony.
That crackling you hear is them working. A tiny demolition crew at 2 a.m. To stop them, deploy bait stations along baseboards and other hidden paths they travel.
To listen properly, press a glass against the wall. Or use a cheap stethoscope.
Focus on areas near windows, door frames, or anywhere you’ve seen frass. A steady, dry rustle is your target.
Termites sound different. They produce more of a gentle tapping noise.
If you hear it, you’ve found your target zone. The bottom line is trust your ears.
They are telling you exactly where to drill for effective pest control treatment.
Follow the Zigzag to Find the Exact Entry Point
One common mistake is assuming ants take a straight line. In reality, they wander in a chaotic zigzag pattern, which actually reveals a lot about their origins.
That meandering isn’t random. It’s the result of ants sniffing out the quickest path while following and reinforcing pheromone trails left by scouts.
When you see that distinctive weaving motion, you are watching a trail being built. Once you spot the zigzag, your job is to trace it backward to the source for effective pest control.
The following steps simplify the chase. First, place a bait like a dab of honey on a sticky note to interrupt the trail temporarily.
Watch for the confusion when the chemical signal breaks. Their path will widen as they search for the lost scent.
Identify the unfocused point where the ants seem lost. That spot marks the true entry crack for a targeted ant control solution.
The moment the line becomes chaotic is your exact entry clue. Mark that spot for a permanent seal. For long-term defense, perimeter bait placed around your home’s foundation can deter future colonies.
Destructive sprays defeat the purpose of your inspection. Instead, seal that precise find with a quality caulk or barrier to stop future invasions.
Why Does Moisture and Decaying Wood Attract Carpenter Ants?
Damp wood is essentially prime real estate for carpenter ants, as moisture softens it and makes digging easier. Decay then invites fungi, creating an irresistible food source for these pests.
Though ants don’t plan on hitting a salad bar, that mold signals a soft, inviting spot to hollow out into a nest. For effective pest control, you need to target moisture and rotting wood directly.
At the end of the day, your crawlspace’s leaky pipe isn’t just a plumbing issue. It’s a welcoming mat for an entire colony’s new headquarters.
Call a professional pest control service to inspect for moisture damage and prevent further infestation. Acting early can save your home from costly structural repairs.
Moisture Softens Wood
A common misconception is that carpenter ants eat wood for nutrition. They actually don’t consume the timber at all; they simply excavate it to build their nests.
These pests are industrious diggers, and they strongly prefer wood that has already been softened by moisture. Damp, water-damaged lumber acts like a welcome mat for their colony, making nest creation far easier.
Softened wood is much simpler for their powerful mandibles to carve into smooth, rounded galleries. This ease of nesting is a primary reason they target areas with leaks, poor drainage, or condensation.
Another key factor is humidity control. Damp timber helps maintain the high moisture levels that carpenter ant larvae and eggs need to thrive and develop properly.
As a side benefit, moist conditions often encourage wood-decay fungi to grow. This fungal growth provides a bonus food source for the ants, even though their main diet is proteins and sugars.
If you suspect an infestation, look for fine sawdust piles and faint rustling sounds inside walls. These signs clearly show that they’ve found a damp dig site, and acting quickly can prevent structural damage.
Professional pest control can pinpoint hidden moisture sources and treat the colony directly. In addition to fixing leaks, improving ventilation and addressing the underlying moisture problem are key.
Buying a dehumidifier for basements or crawl spaces is a practical investment that reduces the appeal of your home’s framing. Remember, moisture control is your first line of defense against these excavators. Maintaining humidity levels between 50 and 60 percent further discourages these pests.
Regular home inspections after heavy rains help you catch water damage before carpenter ants move in. Sealing exterior gaps and replacing rotten wood promptly eliminates their prefabricated nesting material.
If you’re already seeing damage, schedule a local exterminator assessment to address both the insects and the underlying dampness issue. Early intervention saves you from costly repairs and keeps your structure sound.
Decay Produces Fungi
Softened wood sets the stage, but decay brings in the main act.
When dampness lingers, fungal decay kicks in and breaks down the wood’s structure.
That is when mold growth shows up, and carpenter ants come running as ever opportunists.
They do not eat the wood, you see, they eat the fungi and other organic goodies that decay produces.
It is like a free buffet, and they are the first in line.
So if you have a damp spot, you have a potential ant magnet.
For treatments in such moist areas, look for powders that offer dampness resistance to maintain effectiveness.
Check for soft, crumbly wood and that musty smell as your clue.
Fix the dampness, and you will likely send the ants packing.
Fixing a small leak costs a few bucks, but rotted beams are pricey.
Bottom line: dry wood means no fungi, no mold, no ants.
Damp Wood Excavation
A carpenter ant does not wake up craving a mouthful of two by four. That would be like you deciding to eat your coffee table.
Instead, damp wood is their ideal real estate. Moisture damage softens lumber, making tunneling effortless.
Decayed wood offers a cozy, humid home. They are not eating the structure, they are excavating it.
You will know by the telltale piles of wood shavings left behind. Why does dampness lure them so strongly for nesting?
Consider three things. Softened fibers let workers carve galleries with less effort.
Fungal decay releases nitrogen, a nutrient ants seek. Persistent moisture keeps the nest environment stable.
If you spot shavings near a crawl space or basement, schedule a pest control inspection. Professional treatment stops wood destroying insects before structural repairs are needed. For a natural alternative, food-grade diatomaceous earth can be applied around entry points to kill ants on contact.
Inspect the Top Indoor Nesting Spots
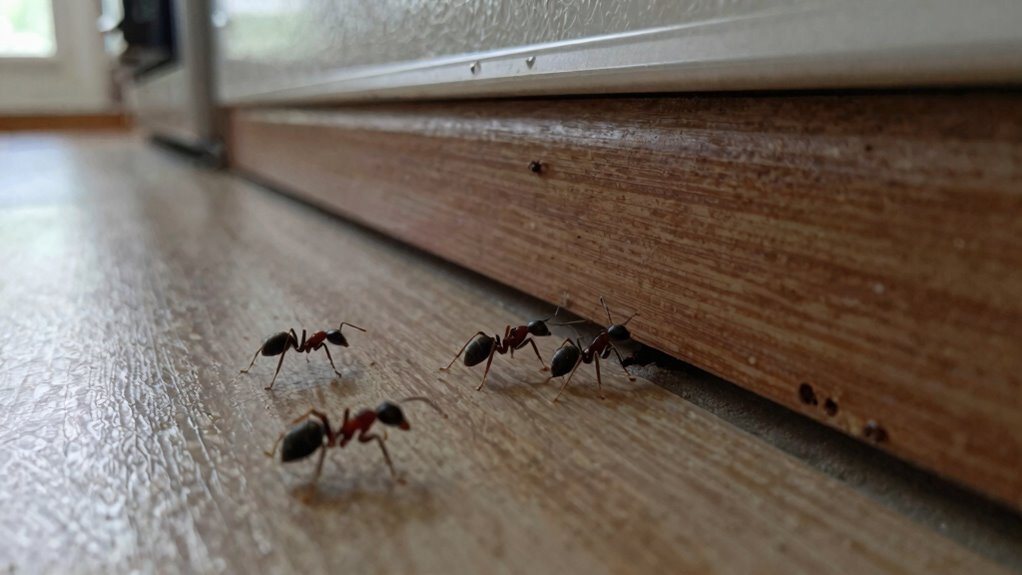
Though everyone checks the baseboards first, the real action often happens in the places you’d rather not stick your head.
Look inside wall voids, behind cabinet kick plates, and under foam insulation boards.
Dampness softens wood, and decay produces fungi.
Both are ant magnets for a serious carpenter ant infestation.
Check around leaky dishwasher drains, under bathroom tile edges, and near window frames with condensation.
Leaky dishwasher drains, bathroom tile edges, and window condensation—prime carpenter ant hideouts.
Carpenter ants love hollow door frames and baseboard gaps where they tunnel easily.
Any damp-smelling spot deserves a flashlight and screwdriver for pest inspection.
Check inside drop ceilings and above recessed lighting.
Ants love warm, quiet voids for nesting.
A cheap dampness meter at $25 helps identify suspicious zones without tearing everything apart.
For instance, pinless moisture meters use electromagnetic waves to scan behind finished surfaces without leaving unsightly holes.
Listen for faint rustling to locate the colony.
Hear crackling and you have found the main nest.
Fix the leak to eliminate the dampness.
This solves the ant problem and prevents future wood damage.
Check Outdoor Ant Nests That Connect to Your House
Now that indoor leaks are handled, the problem is not solved if the parent colony lives outside. That unused woodpile by the fence, or the decaying tree stump near the foundation, often holds the main operation.
These outdoor nests connect to your house through invisible foraging trails, usually along pipes, utility lines, or the edge of the slab. Rotting wood like a stump or old log touching the siding is a prime carpenter ant headquarters.
Check under walkway slabs and patio pavers for flat, sandy nests, which is a classic pavement ant setup. Look for small soil mounds against the concrete base of the foundation, where dirt is being excavated.
That treat line leads them straight in. A quick sweep of these hotspots beats playing whack-a-mole with satellite colonies indoors. To keep these outdoor colonies from returning, consider placing diatomaceous earth as a mechanical barrier along their trails.
Why Finding the Parent Colony Beats Satellite Nests?
Treating only satellite nests indoors is like trimming weeds without pulling the root. It feels productive for an afternoon, but the main colony keeps producing workers.
Satellite nests are just outposts with no queen. The parent colony holds the egg laying monarch, and she can spawn workers for decades.
A queen termite can clock twenty five years, easily outliving your service warranty. You knock down one satellite nest, and the queen backfills it from her main fortress.
Imagine paying rent on a farm you don’t own. That is your entire pest control spray budget.
Instead, trace the worker trails, find the parent colony, and eliminate the source. Once the parent colony is found, applying boric acid to the trails can eliminate the nest as ants transport it back. No queen means no new satellite nests.
Simple math gives you fewer headaches. Chase the root with professional termite treatment, not the symptom.
When Should You Call a Professional for Hidden Nests?
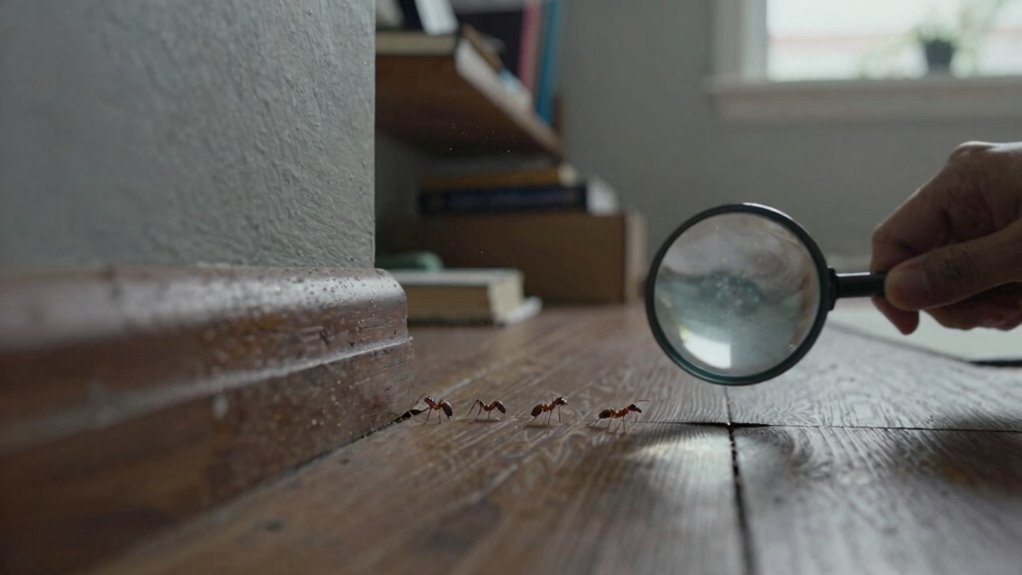
How much time are you willing to spend on a nest you cannot even see? If you have spent weeks tracking trails and still hear rustling at 2 a.m., that is your cue to stop guessing.
DIY limitations become obvious when colonies hide inside wall voids or under slabs. For instance, most indoor sprays only last about a month, making three weeks of DIY a losing battle against hidden colonies. Hidden colony detection requires tools most homeowners do not own, like thermal imaging.
Call for expert pest control intervention when these signs appear. First, you have tried baits and sprays for three plus weeks with zero decline.
Second, you hear persistent crackling inside walls or ceilings. Third, structural wood shows damage, sawdust trails, or hollow sounds.
Professional pest control runs $150 to $500 for full inspection and treatment. That beats replacing a load bearing beam or dealing with costly structural repairs.
Your bottom line is simple. If your gut says this is beyond me, it is.
Save DIY for visible pests. Call a professional pest control technician for hidden nests.
Seal the Gaps and Stop Ants From Returning
Once the colony is gone, the real work begins, and sealing gaps becomes the unsung hero of long term ant prevention.
Every crack, every crevice, and every tiny gap around pipes or windows is a welcome mat for the next wave of invaders.
Apply a good silicone sealant to those spots, which costs about $5 a tube and lasts for years.
Check the foundation too, since ants love crumbling concrete and will exploit any weakness there.
| Gap Location | Sealant Type | Cost |
|---|---|---|
| Window frames | Silicone caulk | $5–$8 |
| Pipe entries | Expanding foam | $7–$10 |
| Door thresholds | Weatherstripping | $10–$15 |
For gaps that need a stronger barrier, pack them with stainless steel wool before applying sealant.
Pair your sealing with indoor ant baits placed near high traffic zones, and use natural repellents like vinegar or peppermint oil as a deterrent.
No glue trap or spray beats a fully sealed house, so focus on exclusion before anything else.
Seal everything, then relax, because ants hate a locked door just as much as you do.
The bottom line is simple: seal first, bait second, and you have won the war against future infestations.
For professional grade results, also inspect utility line entries and garage edges where pests often sneak in.
Buyer intent often centers on permanent fixes, so investing in durable sealants and weatherproofing pays off immediately.
Frequently Asked Questions
Can Ants Cause Structural Damage Beyond Wood Hollowing?
Yes, ants can cause structural damage beyond wood hollowing. Carpenter ants weaken beams, but their tunneling creates ant foundation erosion and small voids that let dampness in.
That dampness rots framing over time, creating a slow and costly problem. Worse, they nest inside interior wall voids, leaving frass and debris that blocks airflow.
This trapped moisture invites termites or mold, compounding the damage and pest control issues. Think of it as a slow, sneaky demolition crew working behind your walls.
The real fix is expert pest control that identifies the parent nest, not just the satellite colony. Bottom line: treat moisture, eliminate the entire colony, or watch your foundation settle in ways you won’t like.
For effective structural pest management, target the moisture source and use proven ant removal products. That way you protect your home from hidden damage and avoid expensive repairs.
What Is the Best Ant Bait to Use Indoors?
The best indoor ant bait is a gel-based formula like Terro T300B, because it works slowly and lets foraging ants carry the poison back to the nest. This delayed action is what actually wipes out the entire colony, not just the workers you see on your counter.
For safety, choose non toxic pest control options that still get the job done. Look for active ingredients like borax or boric acid, which are low risk for kids and pets when used correctly. You can find this type of indoor ant killer for roughly $8 per 4 pack, making it a budget friendly buy for homeowners.
A key trick in effective ant control is scent masking, since ants avoid strong smelling baits that trigger their alarm signals. Pick a neutral gel bait that ants cannot detect as a threat, so they will feed on it without hesitation. For the best results, squirt a dime sized blob of gel bait near ant trails, not in open food prep areas where contamination is a concern.
Placement matters for eliminating ants indoors, so focus on baseboards, under sinks, and along windowsills where workers march. One drawback is that this method takes a week or more to fully destroy the nest, so patience is essential for complete pest removal. Bottom line, Terro gel beats sugary traps for colony killing, especially if you want a professional grade ant killer without calling an exterminator.
For ongoing home pest control, rotate your bait stations every few weeks to prevent bait aversion. This keeps the ant colony from becoming resistant, and it increases your chances of a permanent fix. If you see live ants after week two, reapply fresh gel, because old bait loses its moisture and palatability.
How Quickly Can an Ant Colony Grow Inside a Home?
Fast, scarily fast. Within a single season, a home ant colony can explode to tens of thousands of ants.
The queen, especially carpenter ants, can live for decades. She turns your walls into a non stop baby machine.
Dampness, crumbs, and warm walls fuel this growth. Colony numbers can double every few weeks if you ignore the signs.
You might see one scout ant today. Then a hundred workers tomorrow, marching through your kitchen.
The key is acting fast with a professional pest control treatment. Check damp baseboards and seal all entry gaps immediately.
Bottom line: don’t wait, or these squatters will take over your house. Contact a local exterminator for a targeted ant baiting plan today.
Are Ant Pheromone Trails Harmful to Humans or Pets?
No, ant pheromone trails aren’t harmful to humans or pets, and they don’t pose a real toxicity risk in your home.
These trails are mostly water and fatty acids, essentially chemical footprints that evaporate quickly.
Even if your dog licks the baseboard, residue toxicity is practically zero, so it’s more like dried salad dressing than a hazard.
That said, those pheromone paths work like a dinner bell, attracting more ants that could bite or sting, but the danger comes from the insect, not the chemical itself.
For effective pest control, focus on breaking the trail by wiping surfaces with soapy water or a vinegar solution, then sealing entry points.
If you want a long term solution, consider using ant baits or gel treatments that target the colony rather than just masking the scent.
This approach reduces the ant population at the source, which is smarter than relying on sprays that only repel.
When shopping for pest control products, look for slow acting baits with ingredients like borax or hydramethylnon, as these let foragers carry poison back to the nest.
Always check labels for pet safety, and place baits in areas your dog or cat can’t reach, like under appliances or near baseboards.
In short, the trail itself is harmless, so clean it up without panic, but the ants are the only real risk you need to manage.
Do Ultrasonic Repellents Effectively Deter Ants From Nesting?
No, ultrasonic repellents don’t reliably deter ants from nesting. Their ultrasonic frequency range fades fast and gets blocked by walls and furniture.
Ants simply walk around these devices without being affected. Most pest repellent research focuses on rodents, not insects like ants.
Studies show ultrasonic devices have minimal impact on ant colonies. For $25, a plug in might shoo mice, but ants completely ignore it.
The best ant control solutions involve fixing dampness and sealing cracks. That is the real fix for keeping ants away.
Bottom line: skip the gadget and grab caulk for effective pest prevention.


