
How to Dispose of Infested Food Safely starts with a simple shift in mindset: treat those pantry invaders like a biohazard, not everyday trash. Skipping this step can lead to contamination risks that go far beyond a few ruined crackers.
The good news? Proper disposal doesn’t require a hazmat suit—just a few precise moves that keep your home safe and your local facility compliant. You’ll learn how to neutralize droppings, seal the food correctly, and navigate landfill rules without the headache.
No sweeping, no guesswork, and no hidden fines.
Stick with this guide, and you’ll get a clear, step-by-step breakdown that turns a messy problem into a quick, safe cleanup.
At A Glance
- Wear rubber gloves, N95 mask, and goggles before handling infested food.
- Wet droppings with bleach disinfectant spray to prevent airborne hantavirus particles.
- Seal infested food in heavy-duty bags, double-knot, and wipe bag with disinfectant.
- Label sealed bags “NOT FOR SALE” with date and reason like “rodent damage”.
- Dispose in a dedicated, clearly marked condemned bin destined for landfill acceptance.
Spot the Warning Signs of an Infestation
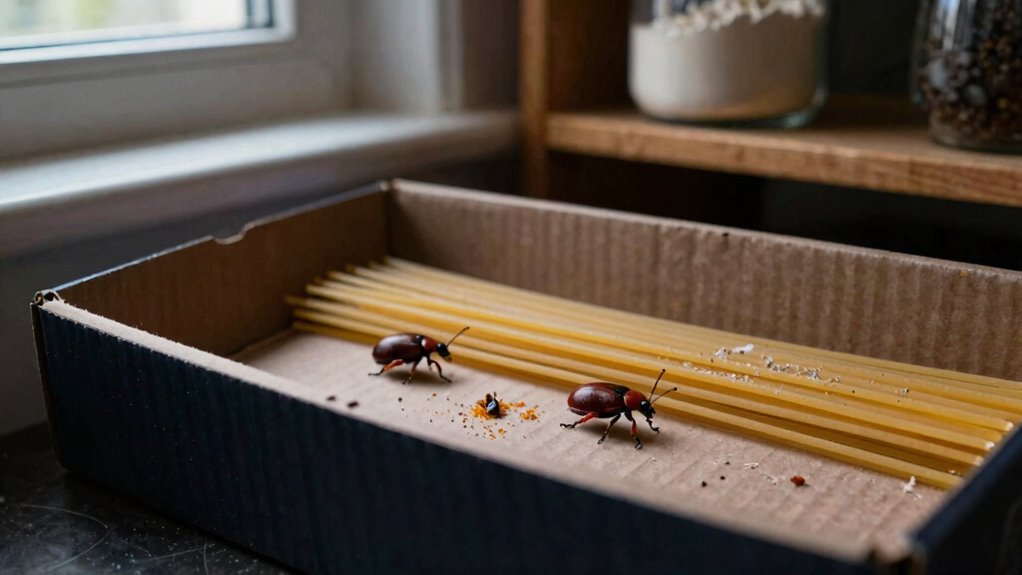
You do not need a detective’s license to spot an infestation, but a sharp eye and a flashlight help. Infestation cues often hide in plain sight, like gnaw marks on cardboard or tiny droppings near shelving.
A faint musty odor is another common sign. Visible contamination is the giveaway: live insects crawling in flour, webbing in cereal, or larvae stuck to packaging.
A faint musty odor is common; visible bugs, webbing, or larvae are the true giveaway.
Check seals and folds closely, because ripped bags or stained boxes scream trouble. That is not seasoning, it is a red flag for pest activity.
Mold or foreign bits inside a sealed pouch means you should toss it with no debate. Water damage from floods or leaks also seals a food’s fate, even if the bag looks intact.
These signs mean the product is compromised, period. Spot them early, and you save yourself a bigger cleanup later.
When in doubt, throw it out to protect your home from a full blown problem. Combining traps with disposal disrupts breeding cycles without relying on harsh poisons.
What Gear You Need Before Handling Infested Food
The first thing you reach for before dealing with infested food is a pair of rubber gloves. Cheap disposable ones work fine, and you also need a mask.
An N95 mask, costing about a dollar each, filters hantavirus particles from dusty droppings. Store these items in a labeled bin near your cleanup zone.
Smart gear storage saves frantic searching mid-crisis. Add a bleach based disinfectant spray at four dollars a bottle to wet droppings before wiping.
This prevents airborne crud from spreading. Heavy duty trash bags are essential, since thin ones tear under greasy gnawed packaging.
Skip the broom entirely because sweeping aerosolizes danger. Bottom line: prep a dedicated kit with gloves, N95 mask, spray, and thick bags.
You will handle the mess safely and avoid regrets. Pest control starts with the right pest management gear for sanitary food storage. Using airtight side-locking lids with silicone gaskets on replacement containers will prevent future pest and moisture problems.
Why You Should Never Sweep Rodent Droppings?
Sweeping rodent droppings might seem like common sense, but it actually stirs dangerous viruses into the air. Inhaling these particles can lead to serious respiratory illnesses from hantavirus exposure, making pest control cleanup critical for safety.
The proper approach for rodent waste removal is to wet the droppings with a disinfectant spray first. Let the solution sit for several minutes to kill any pathogens before wiping.
This wet wiping method traps particles instead of sending them airborne. For the best results use a broad spectrum disinfectant labeled for hantavirus and wear protective gloves.
Professional pest control services recommend this technique for all attic or garage cleanups. Always ventilate the area and avoid using a vacuum until all droppings are fully moistened and removed.
Hantavirus Aerosolization Risk
After decades of handling pantry disasters, the lesson is clear: never sweep rodent droppings under any circumstances. Doing so launches tiny virus particles into the air, turning a simple cleanup into a serious health risk.
Hantavirus, once airborne, can be inhaled deep into the lungs, causing severe respiratory illness. The real danger isn’t the droppings themselves, it’s the invisible airborne transmission that sweeping creates.
Instead of disturbing the mess, homeowners should wet the droppings thoroughly with a disinfectant spray labeled for rodent cleanup. Then carefully wipe with paper towels, trapping the virus before it becomes a threat.
This damp-wipe method is the professional pest control standard for rodent waste removal. It keeps hantavirus particles from becoming aerosolized, which is exactly what you want during a mouse infestation cleanup.
Sweeping is effectively launching death dust into your breathing zone. Wet cleaning is safe, smart, and science-backed for protecting your family’s lung health.
If you need rodent proofing services or a full attic disinfection, call a local exterminator before touching anything. They have the right PPE and containment tools to handle contaminated areas safely.
Remember: if you sweep, you’re not cleaning, you’re just redecorating with lung-damaging particles. Bottom line: never sweep, always dampen, wipe, and dispose of the paper towels in a sealed bag.
For a do-it-yourself approach, stock up on enzyme-based cleaners and disposable gloves, then follow the wet wipe routine every time you find fresh urine trails or droppings.
Buy a HEPA vacuum only for rodent dust, but never use it on dry droppings without pre-wetting. Your best bet is to avoid any dry disturbance altogether.
If you suspect hantavirus exposure, such as fever or muscle aches after a cleanup, seek medical care immediately and mention the rodent contact.
Keep your pantry shelves sealed in plastic bins and check behind appliances monthly to catch infestations early. That way, you’ll never face the temptation to sweep in the first place.
For prevention, place bait every 15 to 30 feet near active rodent trails using tamper-resistant bait stations to stop infestations before droppings accumulate.
Proper Wet Cleaning Methods
While it might seem harmless, sweeping rodent droppings is actually one of the most dangerous things you can do during a cleanup. That is because dry sweeping aerosolizes hantavirus, sending it straight into your lungs.
The only safe approach is proper wet cleaning. Misting droppings with a bleach solution first, then wiping them up with paper towels and a mop.
Never vacuum unless it uses a HEPA filter, which costs around $200. Spray don’t sweep with a 1:10 bleach-water mix sprayed on droppings, wait five minutes, then wipe with disposable towels.
Mop in one direction starting at the cleanest area and move outward, avoiding recontamination. Dispose of materials sealed by placing all used towels and gloves in a plastic bag, seal it, then double-bag before trash.
These prevention measures like misting instead of sweeping and using disposable tools keep the virus contained. Bottom line: treat every dropping as a biohazard, not a dust bunny.
How to Contain Infested Food Without Cross-Contaminating
Infested food should be moved away from all preparation zones right away to protect your good stock.
A dedicated condemned area, clearly marked and off-limits to kitchen traffic, is the best place to hold these items.
Every package you keep must be labeled “NOT FOR SALE” in bold letters to prevent accidental use.
This simple step ensures no one mistakes it for safe product during a busy shift.
Seal infested items in a heavy-duty pest control bag before storing them in the condemned space.
This containment stops pantry pests like weevils or moths from spreading to dry goods nearby.
Always inspect incoming shipments for signs of contamination to avoid buying infested stock in the first place.
For storage tips, many pest management experts recommend rotating older stock to the front and discarding any damaged packaging immediately.
Using containers with airtight lids and locking buckles can also prevent pests from detecting odors and entering stored items.
Separate From Prep Areas
Once infested food is found, move it far from any food prep or storage area immediately. You need to set up clear infestation isolation zones without delay, like quarantining a sick patient away from healthy stock.
Following a strict cross contamination protocol means crumbs, droppings, or pests from the bad batch cannot reach fresh ingredients. Bag the infested food in heavy-duty plastic and double seal it to trap any escaping pests.
Wipe the bag with a disinfectant before moving it so you do not drag contamination through the facility. Use a separate, clearly marked cart or bin just for hauling spoiled food to its temporary holding spot. Airtight seal mechanisms like silicone gaskets and locking hinges can help prevent pests from re-entering your storage areas after disposal.
Your prep counters stay clean and your staff stays safe. This approach helps your kitchen avoid a full blown infestation sequel.
Designate Condemned Storage
Now the infested food has been bagged and moved away from prep areas. It heads to condemned storage, a designated location that is isolated, locked, and clearly marked.
This space, often a separate room or locked cabinet, prevents cross-contamination. No food destined for sale, employee snacks, or even pet food should ever enter here.
Keep it simple with one dedicated bin lined with a heavy-duty bag for all infested items. Label the exterior with the date and a bold “CONDEMNED” sticker.
Use a separate refuse container, like a 32-gallon wheeled bin with a tight lid, for larger volumes. This guarantees no stray crumbs travel back to the kitchen.
The bottom line is this. A rigid, separated condemned storage area stops pests from spreading and keeps your facility safe. To further prevent re-infestation, consider installing a tamper-resistant bait station nearby for ongoing protection.
Label “NOT FOR SALE” Clearly
Label it before you lose track. Grab a marker, a label gun, or even duct tape and a sharpie, whatever works.
Slap “NOT FOR SALE” on every infested package, bin, and box. This prevents accidental sale and keeps your team from grabbing the wrong product during pest control cleanup.
Proper product labeling is critical here. It is your first line of defense against cross contamination.
Use bold, waterproof labels so they survive damp storage or cleaning sprays. Add the date and reason, like “rodent damage” or “insect infestation,” for clarity.
Log the batch numbers for easy recall during customer communication or credit claims. Boric acid powders last for weeks if kept dry, but they must never be applied near food prep areas or edible products during cleanup. Bottom line: clear labeling saves time, avoids confusion, and keeps everyone safe.
Don’t skip it. This protects your inventory and your reputation.
How to Clean Infested Food Safely With Disinfectants

The short, crushing answer is that you don’t actually clean infested food with disinfectants, no matter how much bleach you own. Those contaminated items belong in the trash, not in a homemade cleanup project.
The short, crushing answer is that infested food belongs in the trash, not a cleanup project.
For safe pest control after an infestation, focus on surface cleaning instead of saving the food. Apply a disinfectant like quaternary ammonium to countertops and shelves, letting it sit for the full dwell time listed on the bottle, usually 5 to 10 minutes.
Then wipe down the area to remove droppings and spilled crumbs. The infested food itself must go straight to the garbage for health and safety reasons.
This approach is cheaper and safer than attempting food salvation. It also prevents any stern visit from a health inspector.
Use targeted pest control products around the pantry to stop future invasions. For thorough prevention, seal all dry goods in airtight containers right after disposal.
Always read product labels for proper surface dwell times and disinfection methods. Remember, your goal is a clean kitchen, not a chemistry experiment with bug eggs.
Applying a gel bait like Combat Max with Fipronil can provide colony elimination and up to 90 days of protection.
When to Denature Infested Food With Bleach
Denaturing infested food with bleach works for small volumes like a few pounds of flour or sugar in a sealed bucket.
For large volumes such as pallets of bulk grain or hundreds of cans, a commercial denaturing service or industrial shredder is safer and more practical.
Always wear gloves and goggles, and work in a ventilated area.
Never mix bleach with ammonia or acidic foods, except you want to create a science fair you cannot attend.
Small Volume Denaturing
Applying a cleaning product like bleach to small volumes of infested food is a task no one wants, but skipping it invites bigger problems.
For small amounts like a few pounds of flour or a box of cereal, direct denaturing works best as a pest control measure.
Perform a quick texture assessment. If the food feels crumbly or sticky from an infestation, treat it immediately to eliminate pantry pests.
Use a bleach concentration of roughly 10% by mixing one part bleach with nine parts water. Thoroughly soak the food inside its original packaging to ensure complete denaturing.
Bleach kills pathogens on contact, rendering the food unsafe for scavengers and preventing re-infestation. Soaking the packaging prevents accidental opening during disposal of infested goods.
This method is only for small volumes. Large batches require separate handling to avoid contamination.
Once soaked, seal the container and mark it for disposal. This method safely destroys the infested material without creating airborne contaminants.
For easy pest management, bleach denaturing is a quick, effective, and required step for small volumes. Always buy pest-proof containers to store future food items, and consider an OMRI-certified kit to treat nearby cracks and crevices where pests may hide.
Large Volume Denaturing
When should you break out the bleach for a mountain of infested food, not just a bag of flour? For large volumes, bleach denaturing becomes essential when the food is too contaminated for donation or composting.
Rodent infested grain or insect ridden pasta poses composting challenges because pathogens survive decomposition. Even vegan alternatives like soy or grain products cannot be safely composted after heavy pest contamination.
Bleach mixed at one cup per five gallons of water turns that pile into a soggy, inedible mess. This pest control step guarantees no animal or person can scavenge the waste.
You pour the solution over the food, let it soak, then seal it in a covered dumpster. This prevents legal headaches and keeps your facility clean and compliant.
Use bleach only when other disposal methods fail, but do not hesitate when they do. Big problems need big solutions, and bleach is that solution for total food waste sterilization.
Safety Precautions Required
Before you grab the bleach and start turning infested food into a science experiment, take a moment for safety. It is not glamorous, but it beats a trip to the emergency room.
Denaturing works for all food, including items with a Genetically Modified label or a fancy Organic Certification. Gloves and goggles are not optional, as bleach fumes demand serious ventilation.
A calm, careful routine prevents mishaps and keeps your pest control efforts effective. Ventilate the room by opening windows or using fans, because bleach fumes can overwhelm you faster than a bad pun.
Wear rubber gloves and goggles to avoid splashing bleach on your skin. Mix bleach with water at a 1:10 ratio to avoid chemical burns or surviving pests.
The bottom line is to treat bleach like a blunt tool, effective but unforgiving. Stay methodical to avoid injury and buy the right supplies for safe pest removal. For handling bleach safely, 70% isopropyl alcohol can also be used to disinfect tools and surfaces after disposal.
How Much Bleach to Use for Different Food Volumes
When treating infested food with bleach, the goal is to make it smell like a pool for effective pest control.
For small volumes of 1 to 5 gallons, use 1/4 cup of 8.25% sodium hypochlorite bleach per gallon of food.
This amount prevents scavenging by rodents or insects without wasting money.
For medium loads of 5 to 20 gallons, add 1/2 cup of bleach per gallon and seal the lined bin tightly.
Large volumes over 20 gallons require 1 cup per gallon, placed in a locked outside dumpster to avoid attracting pests.
For bulk amounts of 55 gallons or more, use 2 cups per gallon and schedule a licensed hauler pickup to ensure safe disposal.
Too little bleach risks re-infestation from nearby pests, while too much is wasteful.
Aim for that chlorine sting in the air as your reliable indicator you have it right.
Always soak the food visibly before sealing the container to neutralize any moth larvae or pantry bugs.
A covered refuse container works for small jobs, but bulk waste needs professional hauling to prevent environmental issues.
Pheromone-based traps are a safer, non-toxic alternative for ongoing pest monitoring.
What to Document Before Disposing Infested Food
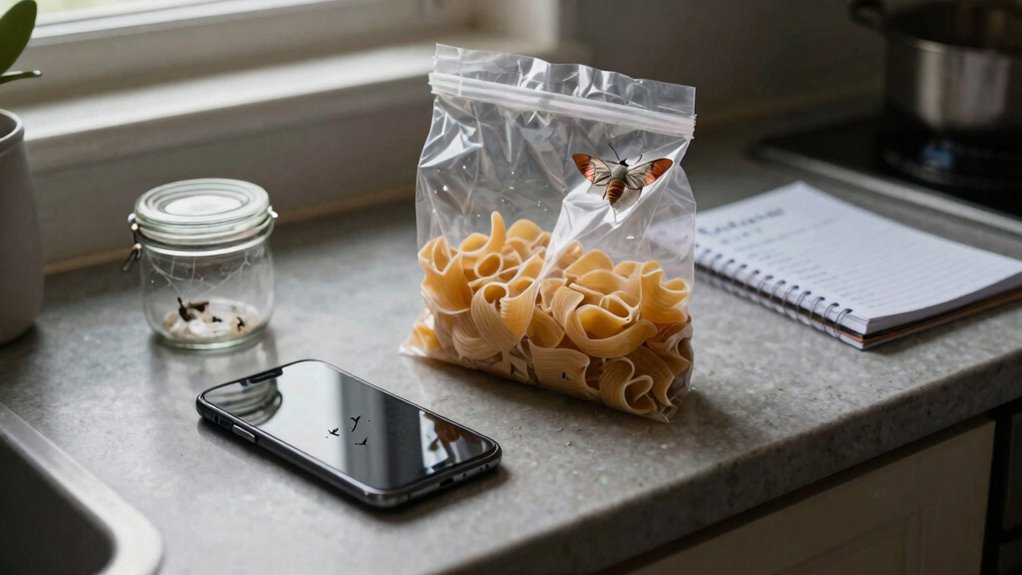
- Product specifics: Write the brand, lot number, and packaging condition like “gnawed cardboard, 50-lb bag.”
- Cost breakdown: Estimate replacement value, say $200 for 40 pounds of flour, to speed up claims.
- Disposal trail: Note which bleach product you used and how much, ensuring denaturing was thorough.
Bottom line: skip this paperwork, and you’re asking for a regulatory audit.
To prevent pest reinfestation, document every step before you throw anything away.
Record the rodent activity signs you noticed, like gnaw marks or droppings, near the infested food.
Use a commercial pest control log to track your sanitation efforts for insurance or health inspections.
Include your pest management professional’s recommendations for future food storage prevention.
This paperwork protects your business from fines and speeds up your pest control claim process.
Always double check that your bleach ratio meets local disposal guidelines for food contamination.
Note that most effective traps use a funnel or one-way entry to prevent insects from escaping, ensuring safe disposal of the infested materials.
How to Transport Infested Food to a Landfill Legally
Transporting infested food to a landfill legally means you must avoid spreading contamination at every step. Pest control compliance starts with verifying that your chosen landfill accepts infested materials, since some sites require prior approval for rodent or insect contaminated loads.
Call the facility ahead of time to confirm their permits and avoid rejection at the gate. You also need to complete waste manifests, which are official records of what you dump and where it came from, so treat them as your paper trail for disposal.
Call the facility ahead to confirm permits and complete waste manifests as your paper trail.
Fill out those manifests before leaving your facility, and keep them accessible during transport for any inspection. Seal your transport vehicle with tight covers or locked bins to prevent leaks, spills, or any escape of pests along the route.
A loose bag of flour with live weevils flying off a truck is a bad look and a legal liability, so use a secured, covered truck for the haul. Schedule your drop-off early in the day to meet same day disposal requirements and avoid fines for delayed depositing.
Review the landfill’s rules for infested food acceptance one more time before you load up, and double check that your waste manifests match the exact volume and type of material. If you follow these steps, you will stay on the right side of waste management laws while keeping pest problems contained.
Always keep a copy of your permits and manifests in the cab for quick access if an inspector stops you. This process protects both you and the environment from unintended pest spread, so treat it as a standard part of your disposal routine. Using weather-resistant, UV-stable adhesive for orchard traps can similarly ensure long-lasting containment without environmental harm.
How to Store Refrigerated Infested Food After Containment
A few key steps will keep refrigerated infested food secure after it is bagged and sealed. Proper refrigerated storage is the backbone of good pest containment logistics, preventing a bad situation from becoming a facility-wide problem.
Designate a dedicated punishment fridge for nothing but infested stock. Think of it as a time-out corner, but colder and slightly more fragrant. No sharing with the employee lunch.
Seal everything in a hard-sided, lidded container. A heavy-duty plastic tote with a locking lid is perfect for stopping pest leaks and controlling smells.
Log the freezer-burned evidence by taping a checklist to the container’s door. Note the date, time, and food type to document your infestation containment for a paper trail colder than the room.
This method helps you buy pest control supplies and manage food storage without spreading the problem. Buy durable containers and fridge locks for long term food safety. Plant-based formulas with essential oils are safer for use near stored infested food if a leak occurs.
Mistakes That Could Get a Facility Cited for Infested Food
Facilities mishandling infested food risk citations, fines, and even shutdowns faster than a rodent can chew through cardboard. A common mistake is mixing condemned food with regular trash. That is a ticket just waiting to happen.
Another mistake is skipping denaturing. Bleach costs pennies, but a fine for improper pest control can cost thousands.
Neglecting landfill contracts is a costly blunder. Many landfills reject infested waste without prior approval.
Showing up unannounced means a rejected load, a citation, and angry phone calls. Failing to document disposal for insurance claims invites trouble too.
No records mean no reimbursement from pest-related losses. Regulators see gaps as red flags during inspections.
Label everything “NOT FOR SALE” and denature it fully. Confirm landfill acceptance in writing before any disposal.
Keep detailed logs for every step of the process. For facilities using traps, integrating no-touch disposal methods can help maintain hygiene and prevent cross-contamination during pest removal. Skip these steps and the facility gets cited faster than a mouse finds a cracker.
Final Steps for Compliant Infested Food Disposal
The final stretch of infested food disposal is where paperwork meets payoff or penalty if done wrong. This last step demands precision, not panic.
Secure final landfill agreements in writing, confirming your load is accepted. No handshake deals with the dump, ever.
Create compliance audit trails with a dated log of every item, from dented flour bags to rodent-gnawed pasta boxes. This satisfies even a scrutinizing regulator.
Dated logs of every dented bag and gnawed box satisfy even the most scrutinizing regulator.
Double-check denaturing by pouring bleach into opened packages and mixing with a stick until unappetizingly unrecognizable. This prevents scavengers from scoring a snack, just as slow-acting poison ensures worker ants carry bait back to the nest before dying, allowing for complete colony collapse.
Confirm transport covers all state fees, as many landfills charge extra for contaminated waste. Then submit your records to local health authorities.
Done right, you avoid citations. Done wrong, that audit trail becomes your track record of regret.
Bottom line: seal the file, not your fate.
Frequently Asked Questions
Can I Claim Insurance for Infested Food Disposal Costs?
Yes, you can claim insurance for infested food disposal costs, but your policy’s fine print decides everything. Most commercial policies cover sudden, accidental contamination like a single rodent event, while gradual infestations such as long‑ignored pantry moths are typically excluded.
To improve your odds, look for a “spoilage” rider or contamination endorsement in your policy documents. Without that rider, expect a denial for pest control claims tied to recurring bug problems or delayed cleanup.
Document every step of the disposal process: photos of the infested food, itemized disposal receipts, and denaturing logs like bleach mixing records. This proof is your strongest weapon when filing a pest control insurance claim for rodent droppings or insect larvae.
Buyer‑intent red flag: if your policy lacks a spoilage clause, you’ll likely get a rejection letter with dry humor about “gradual neglect.” Smart move is to verify your coverage before an infestation hits, then invest in preventive pest control products like sealed storage bins and pheromone traps.
For commercial kitchens, a proactive pest management plan with monthly inspections and digital logs can make claims far easier to approve. Pair that with documented disposal costs, and you turn a messy infestation into a smoother reimbursement process.
What if Birds or Bats Contaminate Food, Not Rodents?
The sanitation process is fundamentally the same, only the source changes. Bird guano and bat urine are just as hazardous as rodent waste for food contamination.
You will still need to suit up with rubber gloves and a mask for safety. A bleach solution in your cleaning mix will kill any lingering pathogens.
So don’t let the bird or bat source ruffle your feathers. The bottom line: treat any contaminated food as a total loss.
Follow the same safe disposal steps you would for rodent contamination. If you need professional pest control products, look for bird and bat exclusion tools like netting or ultrasonic repellers.
Buyers often ask for antimicrobial cleaners rated for avian waste. Choosing the right disinfectant now can prevent future cleanup headaches.
Do I Need a Special License to Transport Infested Food?
Generally, no special license is required to haul infested food yourself, but you should always check local regulations because they vary wildly.
Some counties demand waste manifest forms to track the load from kitchen to landfill, especially for large quantities of pest ridden goods.
Think of it like speeding: legal until a pest control inspector spots you, but the risk isn’t worth it for commercial operations.
For complete peace of mind, hire a licensed disposal company that handles all the paperwork and keeps you out of hot water with health authorities.
Small loads of contaminated food often skip the red tape, but big or commercial hauls need formal documentation and proper waste tracking.
If you are searching for pest control products to prevent infestations in the first place, focus on exclusion and sanitation solutions.
Buyer intent matters here: you want to avoid fines and protect your business reputation.
Whether you need rodent proof containers or professional fumigation services, schedule a consultation with a licensed exterminator.
How Long Can I Store Infested Food Before Disposal?
The short answer is: store it no longer than 24 hours. That’s your safety window for containing the infestation.
After that, spoilage signs like smells or leaking mean you need immediate pest removal action.
This strict containment timeline exists to stop pests from spreading through your home or business.
Keep it in a sealed, labeled bin away from food prep areas. If you need a heavy duty garbage can or pest proof bags, choose options that rodents and insects cannot chew through.
Waiting longer risks bigger contamination and a bigger cleanup headache. That is why professional pest control experts recommend scheduling a licensed landfill disposal right away.
Bottom line: one day max, then out it goes. For ongoing prevention, look into pest monitoring traps or an infestation treatment kit to stop the problem before it starts.
Can I Donate Infested Food if Contamination Is Minor?
No, infested food should never be donated even if contamination seems minor. The moral dilemma is clear: passing unsafe food to vulnerable people isn’t right.
Health risks like salmonella or hantavirus from rodent droppings can’t be seen with the naked eye. Think of it like a milk carton with a tiny leak; you wouldn’t donate that.
Minor damage often hides major problems that require professional pest control solutions. The simple rule is this: if it’s questionable, trash it.
For long term results, invest in rodent exclusion and food storage products from trusted suppliers. Donate money, not potentially hazardous food, and keep your pantry pest free with reliable traps and sealants.


