
Getting rid of termites in walls isn’t about spraying and hoping for the best—it’s about wiping out the entire colony hiding inside. If you’ve noticed mud tubes or hollow-sounding wood, you’re already dealing with a silent infestation that won’t go away on its own.
The good news is you have two proven options: a liquid barrier that turns your foundation into a poison delivery system, or bait stations that slowly starve the nest. A professional trenching job can run $1,000 to $2,000 and last up to a decade, while bait stations cost around $300 to $500 per year.
Both work, but the right choice depends on your home’s setup and how fast you need results. Stick with us—we’ll break down exactly what each method involves and how to avoid common mistakes that make treatment harder.
At A Glance
- Liquid soil barriers create a continuous chemical wall around the foundation for five-plus years.
- Rod-injection drills holes every 16 inches and sprays non-repellent termiticide directly into wall voids.
- Bait stations installed every 10 feet deliver slow-acting poison, eliminating colonies over months.
- Professional fumigation or heat treatment is required for drywood termite infestations.
- Fix all moisture issues and seal gaps to prevent future termite entry and damage.
Is It Termites in Your Walls? Look for These Telltale Signs
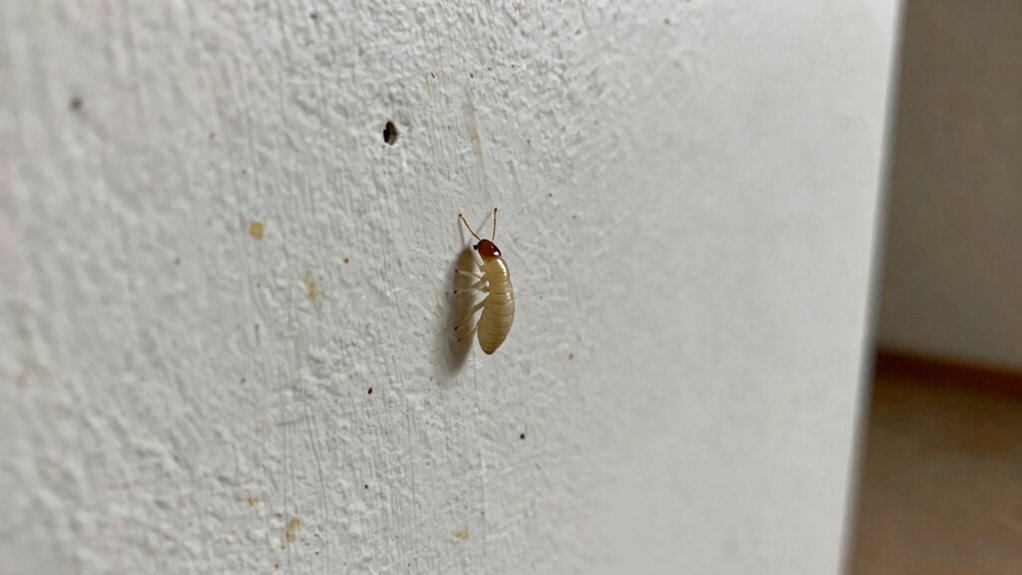
How do you know if termites have taken up residence in your walls? Check for mud tubes on foundation walls, which are pencil sized highways made of soil.
Check for pencil-sized mud tubes on foundation walls—termite highways made of soil.
Tap wood near baseboards; a hollow sound means termites have been snacking inside.
Discarded wings near windowsills often signal swarmers, the reproductive stage of a termite infestation.
Additionally watch for frass, small wood colored pellets, which indicate drywood termites.
Beware of common misidentifications like carpenter ants that leave sawdust, not mud tubes.
Wood rot sounds dull but lacks active tubes and does not threaten structural integrity like termites.
Seasonal activity patterns help too; termites swarm in spring after rain, so wings appear then.
Inspect thoroughly, but avoid breaking tubes or spraying blindly to prevent scattering the colony.
Spot these signs of termite damage? Call a pro for confirmation and a termite control plan, not guesswork.
For a quick fix, ready-to-use sprays provide up to one month of protection after a single application.
Don’t Touch That Mud Tube: Why Disturbing Termites Backfires
That mud tube you just found is tempting to smash, but don’t do it. Disturbing those tunnels breaks the colony chemistry and sends worker termites fleeing deeper into walls.
They abandon the easy path, forcing pest control pros to hunt blind. Worse, termites seal off poisoned bait stations and reject their next meal, ruining bait palatability.
| Action | Immediate Effect | Long-Term Risk |
|---|---|---|
| Break tube | Termites scatter | Colony moves, hides |
| Spray tunnel | Kills a few workers | Queen survives, regroups |
| Leave it intact | Normal foraging continues | Bait can be placed precisely |
Remember, termites are paranoid little engineers. Frighten them once, and they won’t trust a free lunch again.
Let them feel safe so your termite treatment can work. The mud tube is a map to the queen, but touching it erases that map.
Patience here saves weeks of headaches for any homeowner dealing with an infestation. Call a licensed exterminator to handle tube removal and bait placement properly. Instead, consider using a foam spray that expands to reach hidden pests inside walls without disturbing their tunnels.
Subterranean vs. Drywood: Why the Species Changes Your Game Plan
Treating every termite like a generic pest is a costly mistake. Subterranean termites live in soil and build mud tubes up your walls.
Drywood termites live inside the wood itself and leave piles of frass as calling cards. This distinction changes your entire termite control strategy.
The colony elimination timeline for subterraneans is faster with soil-applied termiticides. Expect two to three months for complete removal.
Drywood termites require fumigation or heat treatment. This process can drag on for weeks or even months and that’s where wallets get lighter.
Re-infestation prevention barriers also differ by species. For subterraneans, you need liquid-soil barriers or bait stations.
For drywoods, seal every crack and gap to block their entry. They can’t burrow through soil like their subterranean cousins.
Identify the species before calling a pest control pro. Your game plan for termite treatment and prevention depends on it.
How Bad Is the Damage? Assessing Walls for Termites
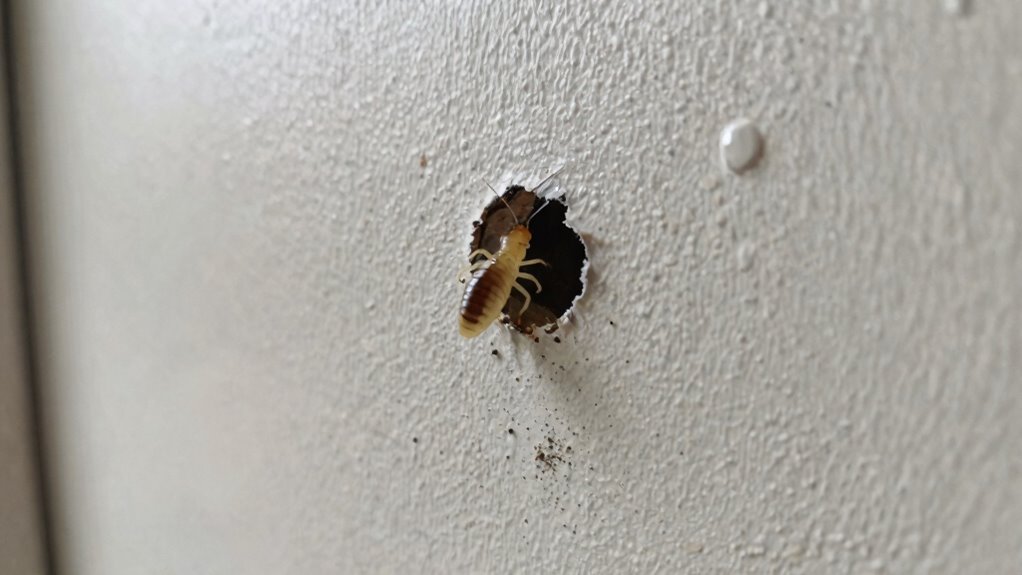
Before grabbing a hammer, pause. That hollow sound when tapping a wall is likely termites eating the wood from the inside out.
Spotting mud tubes on the foundation or piles of frass near the baseboard confirms an active termite infestation. You need professional termite inspection to assess the damage properly.
Early termite treatment can prevent costly wood replacement. Look for signs like buckling paint or sagging drywall around baseboards.
Calling a licensed pest control service for termite damage repair is the safest next step. They will evaluate structural integrity and recommend a treatment plan.
Foam products with fipronil or imidacloprid provide non-repellent contact kill and colony-wide control.
Remember to schedule an annual termite inspection to protect your home investment. Catching termites early saves thousands in repair costs.
Detecting Termite Presence
One common method for getting a quick read on wall damage is the old “tap test.” Grab a screwdriver or a hammer and give the wall a few firm knocks. If the wood sounds hollow rather than solid, termites have likely been eating away at the interior structure for some time.
For a more reliable check, scan baseboards for mud tubes. Those pencil-sized tunnels termites build to travel are a dead giveaway for termite control needs.
Additionally, look for small piles of frass, which is just a fancy word for termite droppings. It looks like sawdust or pepper near your baseboards.
Poor subfloor drainage and a lack of proper ventilation drying will attract these pests. Damp spots near walls are red flags that require immediate pest inspection.
Discarded wings near windows mean swarmers have already moved in.
Spot these signs and it’s time to call a pro for professional termite treatment. Do not poke around and make things worse by disturbing the infestation.
A pinless moisture meter can non-destructively scan walls for hidden dampness that attracts termites, without leaving holes.
Assessing Structural Damage
Termite damage can range from cosmetic to catastrophic once they settle in your walls.
Tap the wood with a screwdriver; if it sounds hollow or gives way, they have been feeding for a while.
Check for mud tubes on foundations and inspect floor joists nearby.
Termites travel relentlessly between soil and wood, so document everything with photos.
This is where colony elimination meets moisture control.
Fix leaks pronto, since damp walls are a five-star termite resort.
Applying a borate-based sealant can provide deep-penetrating defense against termites and fungi in exposed wood areas.
For localized damage, spot treatment with targeted pest control may suffice.
But if structural beams are compromised, you will need a full professional inspection.
Bottom line: catch it early with regular termite inspection.
Ignoring it turns a cheap fix into an expensive nightmare.
What Kills Termites in Walls? Liquid Soil Barriers Explained
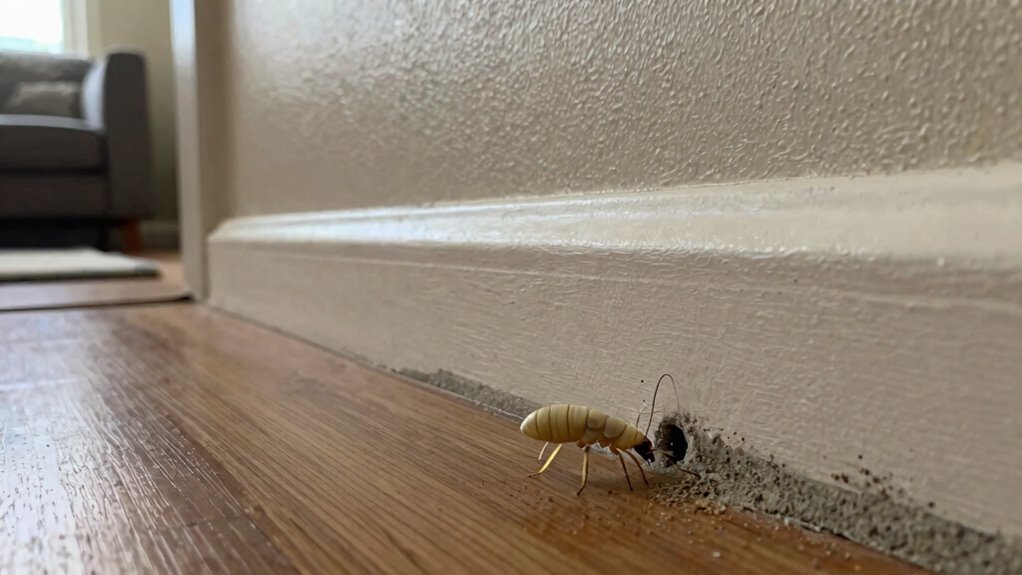
Liquid soil barriers create a chemical wall around your foundation that termites cannot cross. A technician digs a trench and injects a non-repellent termiticide like fipronil, stopping termite infestations cold.
Termites walk through the treatment zone without knowing it and carry the poison back to the colony. This termite control solution lasts five to eight years, making it a reliable long term investment.
The treatment costs around four to eight dollars per linear foot, so it can get pricey for large homes. It works best for houses with a solid foundation and no nearby wells for effective termite prevention. For ongoing defense, you can also install annual bait stations around your property to eliminate colonies before they reach the walls.
How Liquid Barriers Work
For homeowners dealing with termites in walls, a liquid soil barrier is often the go-to solution. Think of it as a moat your house never knew it needed.
When properly applied around the foundation, it creates a continuous zone of non‑repellent termiticide. Termites unknowingly crawl through it, then carry the poison back to the colony, killing it from within.
The non‑repellent formula means termites won’t avoid the treated soil. It lasts five years or more with proper trenching and injection.
This termite treatment requires a licensed pro for correct application every 12 inches. Environmental impact is low if applied away from wells or cisterns.
Safety precautions include keeping pets and kids off treated soil until dry. It’s a proven method for effective pest control that’s long‑lasting and low‑maintenance.
Just don’t water the lawn right after application to protect your home against termites. Granules applied around the foundation or crawl space also create a targeted bug barrier against crawling insects that slip through cracks and gaps.
Installation and Longevity
Installing a liquid soil barrier is not a weekend DIY project, though it sounds simple enough. It involves trenching around the foundation, then rod-injecting termiticide every 12 inches.
A professional crew does this in a day, but the real test is longevity. The chemical barrier lifespan typically runs 5 to 10 years, depending on soil type and rainfall. For homeowners seeking a faster alternative, some grub killers using lambda-cyhalothrin act quickly, killing surface insects within 24 hours.
Bait station placement, on the other hand, offers a different timeline. Colonies die over months, not hours.
| Treatment | Installation Time | Barrier Lifespan |
|---|---|---|
| Liquid Barrier | 4 to 8 hours (pro crew) | 5 to 10 years |
| Bait Stations | 1 to 2 hours (perimeter) | 1 to 2 years (bait refills) |
| Spot Injection | 30 to 60 minutes | 2 to 5 years (localized) |
Bottom line: liquid barriers give you a long, continuous wall of protection for existing infestations. Bait stations are a slow burn, great for prevention but not for panic mode.
Rod-Injection: How Pest Pros Reach Wall Voids
Since termites don’t exactly announce themselves at the front door, pest pros have to get creative. That is where rod injection comes in for precise wall void treatment.
This technique involves drilling small holes into the wall, then inserting a metal rod to spray termiticide directly into the void. It is targeted, surprisingly quick, and usually takes under an hour for a typical wall.
This technique drills small holes to spray termiticide directly into wall voids, targeting hidden colonies fast.
Drills holes every 16 inches for perfect wall void placement. This hits the colony where it hides and stops the infestation fast.
We use non repellent termiticides that termites can’t detect. So they track the poison everywhere, spreading it through the colony.
Average cost runs three hundred to six hundred dollars per wall section. It depends on access difficulty and the size of the area.
This method works best for subterranean termites in sheetrock or plaster walls. It is not recommended for drywood termites.
No need to tear out drywall. Just patch the small holes with spackle afterward.
Bottom line: this method delivers a fast, surgical strike behind your walls. If the damage is localized and the species is right, it is a solid bet for termite control.
For homeowners seeking broader protection, a whole-home pest control kit can target surface insects and complement this targeted treatment.
Termite Baiting Stations: Slow but Effective Colony Killers
Liquid treatments deliver a fast, direct knockout punch, while termite baiting stations play the long game and win.
Proper station placement is critical: install them every 10 feet around your foundation, plus inside infested wall voids through small drilled holes.
The colony elimination timeline stretches from several months up to a full year, so patience is the actual plan, not just a nice trait.
Workers consume the cellulose bait, then carry the slow-acting poison back to the nest, which wipes out the queen and the entire termite crew.
Professional pest control technicians check these stations quarterly and refill them as needed, so you barely lift a finger.
Cost runs $30 to $60 per station plus monitoring fees, which is less upfront than liquid treatments but offers no instant protective barrier.
Bottom line: if you can wait for victory, baiting stations win the war against subterranean termites without chemical overkill.
This approach suits homeowners seeking a long-term termite treatment plan with minimal maintenance and lower initial investment.
For effective termite prevention, combine baiting with regular inspections and moisture control around the foundation.
If you need termite extermination services, ask your local exterminator for a baiting quote and a timeline estimate before deciding.
Unlike baiting stations, boric acid powders offer a non-repellent alternative that clings to pests and kills them within days, though they are not typically used for subterranean termite colony elimination.
Fix Moisture Issues That Attract Termites Back to Walls
Sealing all leaks immediately is the first step, since termites thrive in damp wood. Reducing wood to soil contact with at least six inches of clearance removes a classic entry point for termite infestations.
Properly ventilating crawl spaces keeps things dry, making the walls much less inviting for a return visit. This moisture control strategy is critical for long term pest prevention.
For expert termite treatment options, consider a professional inspection to target hidden moisture sources. Keep the area well aired and fix any plumbing drips fast to stop re infestation.
Maintaining humidity levels below 50 percent with a dehumidifier provides long-term prevention against moisture-loving pests.
Seal All Leaks Promptly
Fix every leak, plumbing, roof, or faucet, as soon as you spot it. Termites love moisture more than a Labrador loves a dropped sandwich.
Plumbing seepage behind walls creates a hydration station for them. Poor gutter drainage keeps soil damp near your foundation.
You are basically leaving a welcome mat out if you ignore drips. A single dripping pipe can saturate wall voids within weeks, inviting hidden colonies.
Fixing roof leaks fast prevents rot, which termites find irresistible. Think of it as a termite spa day you want to avoid.
Clean gutters twice yearly and extend downspouts four feet from the house. This improves gutter drainage and keeps your foundation dry.
Seal gaps around vent pipes and outdoor spigots with silicone caulk. This blocks dampness entry and prevents pest control problems.
Repair slab leaks, even tiny ones. They cause plumbing seepage that stays invisible until damage is done.
Dry walls mean fewer termite returns. It is cheap insurance, and your plumber will appreciate the business.
Applying water-activated granules along the dry foundation perimeter after fixes creates a protective barrier against reinfestation.
Reduce Wood-to-Soil Contact
Termites need a direct path from soil to wood, and cutting that route stops the colony. Foundation clearance is the simple solution. Keep all structural wood at least six inches above the soil line with no exceptions. That gap alone blocks the termite highway.
Moisture management also matters, because damp soil bridges that gap faster than you expect. Wet wood against dirt is an open invitation for termite infestations. Check your siding, porch steps, and deck posts for any wood touching ground. Those spots are termite entry points you can eliminate.
The result is a drier foundation and fewer ways for pests to sneak into your walls. This approach is cheap, permanent, and requires no chemicals. Do this one pest control step correctly, and you have already won half the battle against termites.
Use a dehumidifier to maintain humidity levels between 50-60% in basements and crawlspaces, further drying out the soil and wood to keep termites from finding a moist entryway.
Ventilate Crawl Spaces Properly
A crawl space that stays damp is not just unpleasant. It is a standing invitation for termites to march right back into your walls.
Proper crawl space ventilation and moisture control barriers stop that cycle cold. Without them, you’re basically funding a termite resort.
Install foundation vents with automatic louvers. They open when humidity rises and close when dry, no brain work needed.
Cover bare soil with a 6-mil polyethylene vapor barrier. It blocks ground moisture from creeping upward.
Grade the soil outside so rainwater runs away from the crawl space. Do not let it flow in like a welcome mat.
Use a dehumidifier rated for your square footage if the space stays muggy even with vents. This costs around $200 to $500.
Seal all crawl space access doors tight. Drafts bring humid air, which brings termites.
Bottom line: pair crawl space ventilation with moisture control barriers. You starve termites before they reach your walls.
5 Questions to Ask Your Pest Pro Before Treatment
Before any drill bit hits your wall or pesticide soaks into the soil, ask five key questions. First, confirm warranty coverage and whether retreatments are included if termites return within a year.
Many pros offer five year plans, but read the fine print. Second, request the product label to check environmental safety near wells or gardens.
Third, clarify the treatment method: liquid barrier or baiting system. Liquids cost roughly one to two thousand dollars but last five years.
Baiting costs three to five hundred annually but spares the soil. Fourth, demand a detailed inspection report with photos of mud tubes or frass.
Fifth, ask for a timeline on full colony elimination, typically one to three months. Don’t let their answer be “trust me, I’m a pro.”
Get these specifics in writing before signing any contract. This protects your home and your peace of mind.
Pairing bifenthrin spray with an insect growth regulator breaks the pest life cycle.
Will They Come Back? Long-Term Prevention After Treatment
Patience is the quiet currency of prevention. After treatment, the real question isn’t if termites might return, but when. Unless you maintain your defenses, the risk of re infestation climbs back up within a year or two.
Schedule follow up monitoring every six months. Professional inspections catch new tunnels before they become costly damage.
Address moisture at the source by fixing leaky pipes. Guarantee downspouts drain six feet from the foundation.
Keep wood like firewood, lumber, or mulch at least two feet from the house. These items are termite welcome mats.
Seal every crack in concrete and gaps around plumbing with silicone caulk. Think of it as termite proofing your walls.
Use stainless steel wool to fill small gaps around pipes, vents, and wall cracks as an added barrier against pests.
Ask your pest pro for a warranty that includes annual re treatments. Some companies offer free re service if a new colony shows up within five years.
Bottom line: Termites are persistent, but so is a well maintained barrier. Stick with monitoring and you’ll stay ahead of the swarm.
Frequently Asked Questions
Can I Use DIY Sprays to Kill Termites in Walls?
DIY sprays can kill a few termites on contact, but they rarely stop a full wall infestation. Their effectiveness is low against hidden colonies deep inside the wood, and survivors often scatter underground, making professional termite control harder later.
Professional pest control treatments are no match for store bought products. Licensed exterminators use targeted liquid termiticides or bait stations that reach the nest directly.
A $10 can of foam might seem like a quick fix, but it is only a temporary band aid. For lasting home pest control results, you need a termite inspection and a professional treatment plan.
Call a licensed operator today to get the job done right. They have the commercial grade gear to actually eliminate the colony and protect your property.
How Can I Tell if Termites Are Active Inside Walls?
Tapping your walls with a screwdriver is the quickest home test for active termites. If the wood sounds hollow or like cardboard instead of solid, you likely have infestation behind the surface.
Look for pencil-sized mud tubes running up your foundation walls, since termites use these as protected highways. You might also spot discarded wings near windowsills, which signal a swarm has recently occurred inside your home.
Listen for a faint clicking or rustling sound inside the walls, especially at night when colonies are most active. Pest control experts call this the “termite tap” and it’s a strong indicator that live workers are chewing through the timber.
Check for tiny pinholes in drywall or paint that look like someone poked it with a pin, often accompanied by frass (termite droppings) that resembles sawdust or coffee grounds. If you notice bubbling or blistering paint that isn’t from moisture, that’s another red flag termites are tunneling just beneath the surface.
For a professional-grade wall inspection without demolition, technicians use dampness meters to detect moisture anomalies and infrared cameras to spot temperature differences caused by termite activity. These tools confirm active colonies with high accuracy, so you can skip guesswork and buy targeted termite treatments like foam bait or liquid barriers.
Don’t disturb any mud tubes you find, because termites will simply retreat and build new routes, making treatment harder. Instead, photograph the area and contact a licensed pest control company for a thorough inspection and a custom treatment plan.
If you’re considering DIY termite products, look for fast-acting Termidor foam or bait stations that get transferred through the colony. For walls, professional-grade borate sprays are effective at killing termites on contact and leaving a protective residue, but always compare product warranties and application ease before purchase.
The best time to act is the moment you see any sign, because termites cause structural damage worth thousands. Search for “local termite inspection near me” or “termite control products for walls” to find vetted options and get quotes today.
Will Painting Over Mud Tubes Stop Termite Damage?
Painting over mud tubes is like putting a Band-Aid on a leaky pipe. It hides the symptom, not the actual termite problem.
A paint sealant won’t stop a termite infestation. Those pests will simply tunnel elsewhere to reach your wood.
Think of mud tubes as highways for termites, not the colony itself. The real threat is hidden inside your walls or foundation.
A professional termite inspection is the only real fix for active termite damage. You need targeted termite treatment to eliminate the colony.
Bottom line, painting is a waste of time and money. For effective pest control, invest in a structural fumigation or liquid barrier treatment instead.
Do Ultrasonic Pest Repellers Work Against Wall Termites?
Short answer: No. Ultrasonic pest repellers are basically expensive gadgets that throw a party for your ears, not your walls.
They’re marketed hard, but effectiveness research says they don’t touch termites. Those bugs don’t care about noise, they care about wood.
As a technology comparison, they lose to baiting or liquid treatments, which actually kill colonies. You’re better off drilling and baiting for durable termite control, not plugging in a buzzing box that just annoys your dog.
When you buy pest control solutions for wall termites, skip the hype and call a pro for targeted colony elimination. Professional termite treatment options like soil treatments or bait stations deliver real results.
If you are researching how to get rid of termites in walls, invest in proven methods over ultrasonic noise devices. Your home’s structure deserves a real fix, not a gadget that fails and wastes your money.
How Long Does Wall Termite Treatment Take to Complete?
Treatment duration for wall termites typically spans one to three days for the initial professional process. Full colony elimination can take weeks, depending on the method chosen.
Liquid soil treatments create a barrier quickly, often in a single day, with termites dying within days. This is a fast termite control option for homeowners seeking immediate results.
Baiting systems require patience, involving several months of quarterly checks. While slower, they offer long term termite protection and are ideal for ongoing prevention.
The real timeline depends on infestation size and species. A hasty job invites repeat visitors, so trust a pest control expert to assess your property.
For fastest results, liquid treatments are the standard for active termite elimination. For long term control, baiting is thorough but slower, making it a smart purchase for prevention.
To find the best termite treatment for your home, request a professional inspection. They can recommend the right solution and give you a clear timeline.


