
Treating your yard for fleas doesn’t mean spraying the whole lawn. Most people waste time and product on sunny grass, but flea larvae actually hide in damp, shaded spots like fence lines, under decks, and dense shrubs. That targeted area is usually just 400 to 1,200 square feet, so you can skip the open grass entirely.
To actually kill them, use a liquid insect growth regulator paired with a fast-acting adulticide, applied at dusk when pests are active. You’ll need to reapply every two to four weeks and expect four to eight weeks to fully break the cycle.
We’ll walk you through the exact timing, non-toxic backup options like beneficial nematodes, and how to avoid common mistakes. Stick with us—this guide covers everything you need for a flea-free yard.
At A Glance
- Treat only shaded, damp harborages, not sunny lawns, targeting 400–1,200 square feet.
- Apply liquid pesticide to soak soil, not leaf blades, using a coarse nozzle at dusk.
- Clear leaf litter, trim shrubs, and pull back mulch before spraying for soil contact.
- Pair pyriproxyfen (long-lasting) with a pyrethroid adulticide to kill larvae and adults.
- Reapply every 2–4 weeks until nighttime temperatures stay below 50°F.
Why Most Yard Treatments Fail (and How to Fix It)
Most people grab a hose-end sprayer and douse the sunny middle of the lawn, hoping to wipe out fleas in one pass. That’s a wasted effort because the real problem hides in damp, shaded spots where flea larvae actually thrive.
These pests avoid direct sunlight, so open turf is basically sterile ground for them. Your application needs to soak the soil under porches, shrubs, and along fence lines, not just coat the grass blades.
Soil penetration is the key here: without it, the pesticide sits on top of organic matter while larvae keep feeding below. You’re essentially pumping product into a flea desert, which does nothing for your infestation.
Soil penetration is essential; otherwise, pesticides sit on top while larvae feed safely below.
Instead, target the 400 to 1,200 square feet of true harborage around your yard’s perimeter. Hit the damp dirt and shaded base areas, not the bright center.
For long-term control, pair that targeted spray with a growth regulator to stop new fleas from maturing. If you’re serious about flea extermination, focus your liquid treatment on where moisture collects and organic debris builds up.
That’s where larvae wait, and that’s where your pest control product needs to land. Stop nuking the middle and start soaking the edges for a yard that finally stays flea-free.
Check your sprayer nozzle for a coarse setting to increase droplet size, which improves soil soak rather than leaf runoff. Then reapply every two to three weeks during peak flea season to break the life cycle completely, and consider using natural granules that disrupt insect senses for a safer, non-toxic alternative around the perimeter.
Step 1: Map Every Flea Harborage Zone on Your Property
The first rule of flea control is that they hate sunlight and love damp shade. So skip the sunny, mowed lawn and instead map every shaded, damp zone and fence line hotspot on the property.
North-facing fences and dark corners under decks or porches are the real flea harborage zones. The open yard itself is not where these pests will breed.
Target these areas for your pest control treatment to stop flea infestations at the source. Focus on flea habitat elimination for long term results. For these areas, granules like Control Solutions Bifen LP provide up to 90 days of flea control when applied properly.
Shaded Damp Zones
Mapping your property for flea harborage zones is the single most important step before any product hits the soil. Shaded damp zones under decks or dense shrubs keep soil cool and humid. This environment is perfect for flea larvae and pupae to develop.
These areas additionally see frequent wildlife travel at night, bringing in new fleas. Without mapping, you will waste flea treatment on sunny, sterile lawn.
| Harborage Zone | Why It’s a Flea Magnet |
|---|---|
| Under decks | Constant shade, damp soil, cool temps |
| Dense shrub drip lines | Leaf litter traps moisture, larvae thrive |
| Mulch beds near foundations | Retains water, blocks sunlight |
| Paver gaps in shade | Wildlife passes through, drops eggs |
Prune low branches and rake debris before treating for best flea control. This exposes larvae to direct sun, killing them for free without chemicals.
Focus your spray or granular insecticide on these zones, not the whole yard. It is cheaper, faster, and more effective for flea prevention. Consider a concentrate containing Imidacloprid for up to 3 months of protection against both surface and below-ground pests.
Fence Line Hotspots
Fleas hate direct sun, so fence lines, especially north-facing ones that stay damp longest, become their favorite shaded highways. Map these hotspots first because they connect to every other harborage zone in your yard.
Moisture control here is critical for effective pest control. Rake leaf litter and trim grass right up to the fence base to expose larvae to light and air, killing them for free.
Wet the soil and fence base about six feet wide and skip the pickets. This same band additionally helps with tick prevention, since ticks love fence line edge zones.
A quart of liquid concentrate, around $60, treats multiple passes on a typical suburban yard. Apply at dusk so the product soaks in before sunrise.
Treating fence lines first is like cleaning the kitchen counters before the floor. You handle the messiest zone as everything else waits.
Do this right and you have already broken the flea highway’s main route. Your flea control treatment will be far more effective with this simple first step.
Use a 395nm UV light at dusk to spot hidden flea eggs or droppings along fence bases, enhancing early detection of pest activity.
How to Prep Your Yard Before You Spray
| What to Clear | Reason Why |
|---|---|
| Leaf litter & grass clippings | Eliminates larvae food and shade |
| Mulch pulled back from foundations | Exposes soil to spray contact |
| Overgrown shrub skirts | Lets sun dry out harborages |
After prepping, map every cool, dark spot your pets use. Spray won’t penetrate thick debris, so bare soil is better for pest control success. Skip the mess, skip the fleas. Then you can spray with confidence, your yard has earned it. Choosing a cedar oil-based spray kills existing pests and leaves a scent that repels new ones.
Choose the Right Product: Pyriproxyfen or Safe Alternatives?
When choosing a product for outdoor pest control, pyriproxyfen is the clear winner over methoprene because it resists sunlight breakdown. This allows pyriproxyfen to provide up to 7 months of residual pest control indoors, especially when combined with adulticides. For households with cats, swap standard pyrethroid adulticides for plant oil sprays like cedarwood or sesame oil. These natural flea treatments kill adult fleas without risking feline toxicity. Beneficial nematodes offer a non chemical option safe for pets and people. These microscopic worms prey on flea larvae and work best when applied to damp soil at dusk.
Pyriproxyfen vs. Methoprene
Choosing the right insect growth regulator (IGR) for your yard is where most people accidentally buy the wrong bottle. For outdoor use, the pyriproxyfen comparison ends with a clear winner.
Pyriproxyfen is photostable, meaning it survives sunlight for weeks. Methoprene breakdown happens fast in UV rays, so it is nearly useless on sunny lawns.
Pyriproxyfen sticks around, works in shade and sun, and kills larvae for 30 plus days. Methoprene is fine indoors or under decks, but fades in a day outdoors.
You will want a concentrate that pairs pyriproxyfen with a pyrethroid adulticide. That combo hits adults and larvae in one pass.
Bottom line: skip methoprene for open ground. Pick pyriproxyfen, apply at dusk, and you are set. For sustained control, consider a pyriproxyfen 10% concentrate that provides up to seven months of residual protection indoors.
Plant-Oil Spray Options
Pair them with pyriproxyfen if you want both safety and sunlight stability. Better yet, time applications for nematode synergy by spraying oils first, then waiting 48 hours before watering in nematodes.
The oils stun adults while nematodes hunt larvae, creating an effective tag team. Cost runs about $15 to $25 per quart, covering 1,000 square feet.
Use this in shade zones where kids or felines nap for extra safety. Plant oils work but need diligence for best pest control results.
Pair with pyriproxyfen for optimal protection, or go solo if you are okay with weekly spraying.
For a budget-friendly option, a 16 oz bottle of peppermint oil spray covers roughly 1,500 targeted applications.
Beneficial Nematode Use
| Aspect | Nematodes | Pyriproxyfen |
|---|---|---|
| Safety | Non-toxic to pets | Requires drying period |
| Persistence | Short-lived, needs moisture | Photostable, lasts weeks |
| Schedule | Strict reapplication timing | Flexible every 2–4 weeks |
Nematodes cost about $20 to $40 per treatment. They are a solid pick for pet households but fail fast in dry soil. Use them only in shaded harborage zones. The bottom line is this. Skip nematodes if you cannot keep soil damp. Otherwise, they work without the chemical guilt.
For safe pest control around dogs and cats, nematodes are a great choice. They target fleas and grubs without toxic residues. But they need damp soil to stay alive. That means you must water your yard before and after applying them. If you have a sunny lawn, consider using pyriproxyfen instead. It lasts for weeks and works well in dry conditions. You can reapply every 2 to 4 weeks without strict timing. For pet owners who want a natural solution, nematodes are a smart buy. Just stick to shaded spots near bushes or fence lines. That is where flea larvae hide and moisture lasts longer. If you can water regularly, nematodes give you guilt free flea control. They break the pest lifecycle without harming beneficial insects. For persistent mosquito sources, mosquito dunks with methoprene can be tossed into standing water to stop larvae without harming your pets.
When to Spray: Dusk or Dawn for Maximum Kill
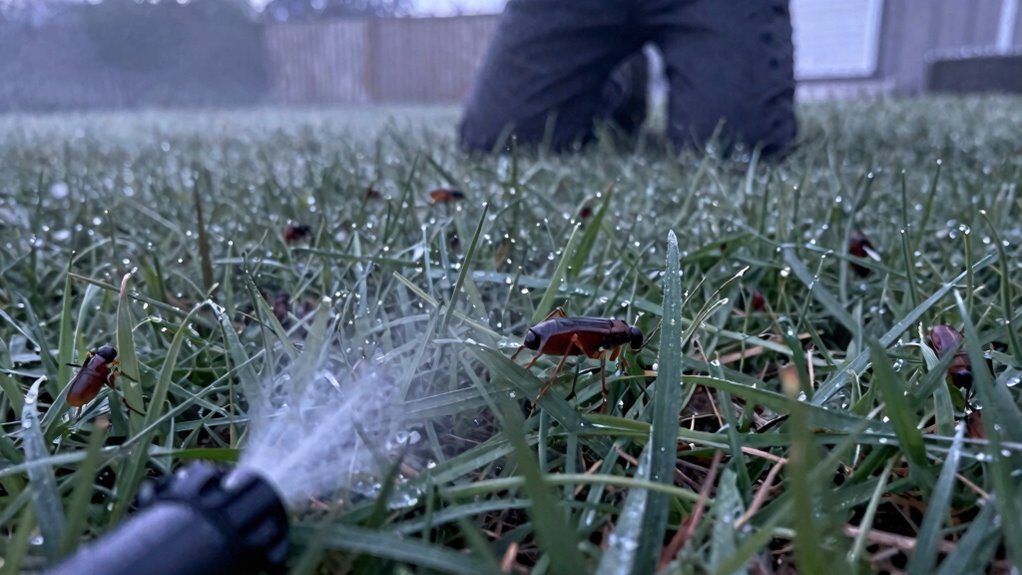
Timing is the secret to turning a can of flea spray into a real yard victory. Spray at dusk or dawn to catch fleas when they are most active and crawling near the soil surface.
The dew point at these hours keeps the product from evaporating before it sinks into the harborage. Midday sun burns off the carrier in minutes, leaving a dry crust that kills nothing.
Dusk edges out dawn because night gives the chemical a full eight hours to work undisturbed. Do not spray at noon, you will waste concentrate and probably roast yourself.
Target those damp, shaded zones where flea activity is highest. The sun is not your friend here, damp soil is the key to effective pest control. Residual barriers from rainfall can last 40 days or more, maintaining protection long after the initial treatment.
Measure Your Real Harborage, Not the Whole Yard
A classic rookie move is treating the entire lawn. That sun baked area is mostly a desert for fleas.
The real battlefield is the shaded spot square footage. Focus under decks, porches, and especially along board fence drip zones where humidity lingers.
That north facing fence line stays damp longest, creating a perfect nursery. Most suburban lots have only 400 to 1,200 square feet of true harborage.
For these high-moisture areas, a diatomaceous earth treatment works best for up to 48 hours, as dampness reduces its effectiveness.
Shaded Spot Square Footage
Most people assume they need to spray the entire fenced yard for flea control. The truth is simpler: cat flea larvae hate sunlight and hide in shaded harborage.
Under decks, porch skirts, and shrub drip lines are the only areas needing treatment. The sunny lawn is nearly sterile for them.
Grab a tape measure and calculate the square footage of every damp, shaded spot your pets use. Ignore the open grass completely.
On a typical suburban lot, you will find only 400 to 1,200 square feet of true harborage. That is about the size of a two-car garage.
Why does this matter for your pest control routine? Since one quart of liquid concentrate often covers several passes on that small zone.
You save product, money, and effort by treating only the shadows. Stop treating the whole yard and target the spots where fleas actually live. For these shaded areas, consider a Yard Powerhouse spray that connects directly to a garden hose to cover up to 5,000 square feet efficiently.
Board Fence Drip Zones
That shaded spot calculation is where you save serious money on pest control. Now, measure those board fence drip zones.
A fence line, especially on the north side, stays damp longest and is a prime harborage for flea infestation. These fence line hotspots are where flea larvae thrive, not your sunny lawn.
Measure only the shaded soil strip along the fence base, roughly two to three feet wide, and the length of the fence. Don’t measure the whole yard for your flea treatment plan.
For a typical suburban lot, this zone might be just 80 to 200 square feet. Multiply length by width; that’s your real treatment area for targeted flea control.
Treating the whole yard wastes product and cash. Focus your spray here, wetting the soil and fence base, not the pickets. For effective elimination, select a fogger with an insect growth regulator like Nylar to prevent future generations from maturing into biting adults.
That’s where the fleas live and where you get the best results. Your wallet will thank you later for this targeted approach.
Treatment Sequence: Fence Lines First, Dog Houses Last
Fence lines get treated first, because they act as the main highway for flea activity. Pets constantly brush against them, shaking off eggs and dried blood that feed larvae.
Shaded north sides stay damp the longest, creating ideal conditions for pupae in neutral pH soil. Treat a six foot wide band along every fence, wetting both the ground and base boards. Focus on the soil and wood where pets walk, and avoid spraying pickets.
Next, tackle decks, porches, and shed skirts to target hidden larvae in these structural edges. Spray three feet out from each base, covering soil and gravel thoroughly.
Save dog houses and favorite napping spots for last, since pets need those surfaces dry before resting. Wait until the spray fully dries, usually two to four hours in sun, before letting them return. One quart of concentrate covers a typical half acre yard for about 40 dollars, making this an affordable professional treatment. Many products use a pyrethroid concentrate for effective, long-lasting residual control against fleas.
Reapply every two to four weeks until nightly temperatures stay below 50°F for complete flea control. Skip mulched flower beds, because beneficial nematodes handle those later. Focus on the hard edges where fleas actually travel, and stick to the sequence for real results.
Add Beneficial Nematodes as a Non-Toxic Backup
A week after that first adulticide pass, when the adult flea population has taken its initial hit, beneficial nematodes step in as the non-toxic cleanup crew. These microscopic roundworms hunt flea larvae in the soil, and no reentry delay is needed.
Beneficial nematodes hunt flea larvae in the soil with no reentry delay needed.
Soil temperature must stay above 55°F for them to work. A cheap soil thermometer avoids wasted money.
The application method is simple: mix a packet with water and spray onto damp, shaded harborage areas at dusk. One treatment runs about 15 to 25 dollars for a typical suburban yard.
It is a quiet, poison-free backup that spares earthworms and pets alike. Skip it if the ground is dry or cold, as nematodes die fast there.
Best play: pair with pyriproxyfen sprays for a two-punch cycle. Then let the worms finish the job for effective flea control. For an extra mechanical barrier, dust food-grade diatomaceous earth into soil crevices and pet bedding to dehydrate any remaining larvae on contact.
How Long Until the Fleas Are Gone? Expect 4 to 8 Weeks
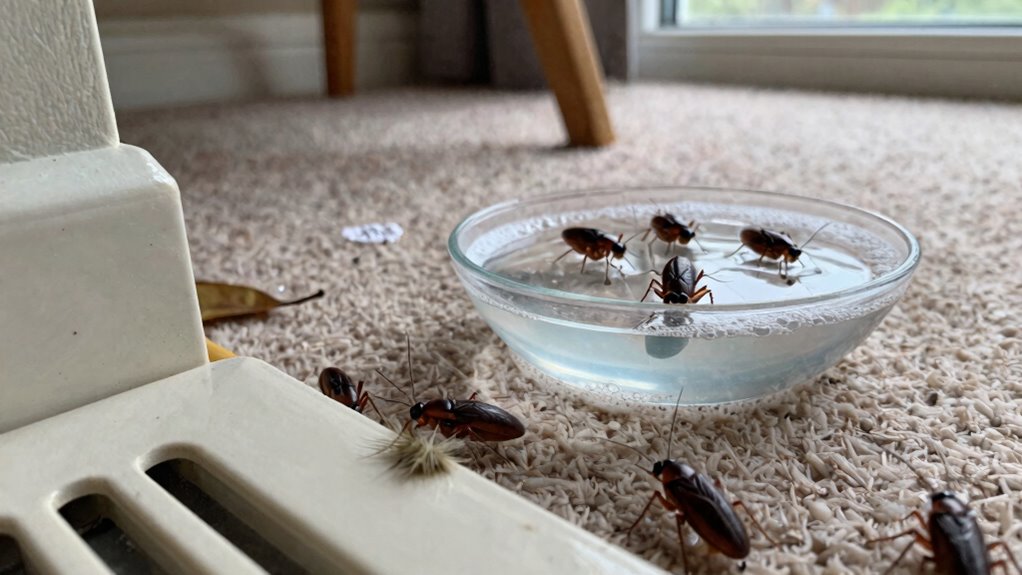
You will not wake up to a flea-free yard tomorrow. Timeline expectations matter: breaking the full flea life cycle takes four to eight weeks, so patience is mandatory.
Pupae emergence is the culprit. Those dormant, cocooned fleas in soil resist spray and keep hatching weeks after your first treatment.
Each treatment pass kills adults and stops larvae from maturing. But new pupae keep emerging for days, which is why reapplying every two to four weeks is essential.
You are not failing; you are fighting biology. Treat on schedule, keep harborage zones dry, and do not get discouraged.
Around week six, flea numbers drop sharply. By week eight, your yard is usually clear of the infestation.
Bottom line: stick with a consistent pest control routine. The cycle breaks, just not overnight.
For indoor infestations, a hydroprene fogger can disrupt flea eggs and larvae, preventing reinfestation for up to seven months.
When to Stop Outdoor Treatments (and When to Go Year-Round)
Stop spraying for fleas only after nighttime temperatures stay below 50°F for a full week straight. That cold kills the entire lifecycle, including the tough pupae that keep emerging weeks later.
If you stop too early, you are like a baseball fan celebrating in the seventh inning. Flea pupae are resilient sleepers that wait for warmth to hatch.
In warm climates like the Gulf South, coastal California, or the desert Southwest, fleas never truly freeze. These areas require a year round treatment schedule with no exceptions.
Climate exceptions make seasonal rules useless for effective pest control. Skipping winter treatment just lets the next generation of fleas breed under your deck.
Check your local low temperatures, not the calendar. If frost never visits your yard, neither does a flea vacation.
Keep spraying with a reliable outdoor pest control product, or they keep breeding. Year round prevention is the only way to stop infestations in these regions.
Calendar Alerts: Reapply Every 2 to 4 Weeks in Peak Season
Liquid concentrates require reapplication every two to four weeks during peak flea season. Granules should be applied every three to six weeks and watered in immediately.
The label, not guesswork, dictates the intervals for effective pest control. Most suburban yards need only a quart of concentrate per season, often under $60 total.
The label, not guesswork, dictates the intervals for effective pest control.
If you skip a week, pupae can emerge and restart the cycle. Set phone reminders now and check local rain radar before spraying.
Stick to the schedule without changes to keep fleas under control. Miss two weeks, and you are back to square one with your flea treatment.
Frequently Asked Questions
Can I Treat if My Yard Has a Lot of Trees?
Yes, you can treat a yard with many trees. You just have to focus on the right spots.
Tree canopy coverage creates shaded, damp zones where flea larvae thrive. Skip treating sunlit lawn and target leaf litter treatment under branches.
Rake up leaves first to let product reach the soil. Pine straw or mulch beds hold larvae, so they require extra attention.
That shaded drip line is your real battle zone. It is not the whole yard, so save your pest control products for high risk areas.
Focus your flea treatment around tree bases and root zones. This targeted approach helps you choose the best insecticide for shaded habitats.
For smart purchase decisions, look for a product labeled for moist, organic debris. That ensures you kill larvae where they hide most effectively.
What Should I Do if My Pet Eats Treated Grass?
If your pet eats treated grass, watch for vomiting symptoms within a few hours. But don’t wait for trouble to start. Immediate vet care is the smart move, especially if the product contains pyrethroids.
Keep the product label handy for your vet. That label is their best cheat sheet for quick treatment.
Most pets only get a mild tummy ache. But better safe than sorry, so call your vet, not the internet.
For pet safe pest control, always read the label before application. If you need lawn treatments that worry you less, look for pet friendly weed killers.
Ask your pest control supplier about products labeled safe for pets after drying. Many homeowners choose granular baits or natural sprays to reduce risk.
Always store pest control products out of paw’s reach. And when treating your yard, keep your pet inside until the product is fully dry.
Are These Pesticides Safe Around Vegetable Gardens?
Most synthetic pesticides are not safe near vegetable gardens, period. Pyrethroids linger in soil and can ruin the edible safety of your homegrown produce.
Stick with organic pest control alternatives like cedarwood oil sprays or beneficial nematodes. These options target fleas and other garden pests without tainting your tomatoes or leafy greens.
Apply your chosen treatment at dusk to protect pollinators and maximize effectiveness. Avoid direct spray on plants you plan to eat, and always check the product label for vegetable garden clearance.
A 32 ounce concentrate of organic flea killer costs about $25 and covers 1,000 feet of harborage. That is a budget friendly way to protect your entire garden without harsh chemistry.
The bottom line is simple: keep chemicals off edibles. Bugs are bad, but a poisoned salad is far worse for your health.
How Do I Know if I’Ve Applied Enough Product?
You know you’ve applied enough product when the soil in harborage areas is damp, not puddling. Focus on spots under decks and along shaded fence lines where pests hide.
Spraying too fast or skipping leaf litter are common pest control application mistakes. That wet area must cover every flagged location on your treatment map.
If the soil dries patchy after an hour, you didn’t apply enough liquid treatment. Product coverage means visible wetness, not a light mist.
Miss a shaded corner and larvae will survive your mosquito or tick control effort. Your property map is your target for complete coverage.
Damp soil equals done for effective outdoor pest control. Follow this rule to ensure your barrier treatment works and your smart purchase pays off.
Will Rain After Treatment Ruin the Application?
Rain after treatment can absolutely ruin your application, but only if the product hasn’t dried yet. The real culprit is drying time, not how heavy or long the rain lasts.
For liquid concentrates, a shower before the spray dries, usually two to four hours, will wash the insecticide off leaves and soil, leaving zero pest protection behind. You’ll likely need to reapply immediately, which wastes money and time.
Granular products work differently; they require watering in first, then a full dry period before rain is safe. Always read the label because some formulas have rainfast claims that protect you after just 30 minutes.
A quick drizzle after the surface is dry? No problem at all, your pest control barrier stays intact. But a downpour right after spraying? Expect to buy more product and start over.
So, check the weather forecast before you buy or apply any insecticide, and time your treatment for a dry window. Smart shoppers ask for rainproof pest control options that dry faster or include sticking agents.
Use this guide to avoid wasted treatments and get the best value from your lawn and garden pest solutions. When in doubt, wait, because a dry application is the only way to keep ants, roaches, and grubs from surviving your next spray.


