
Getting rid of mice in the kitchen doesn’t require a professional or harsh chemicals—just a smart, step-by-step plan. If you’ve seen droppings, heard scratching, or found chewed packaging, you’re not alone, and this guide covers exactly what works.
The key is to focus on exclusion, sanitation, and trapping, in that order, which stops the problem fast without creating new ones. You’ll learn how to seal every gap they could squeeze through, remove what’s attracting them, and choose traps that actually catch them.
Avoid common mistakes like poison or ultrasonic devices that fail and can cause bigger issues. By the end, you’ll have a clear, practical system to clear your kitchen and keep it mouse-free.
Let’s walk through the three steps that make the difference.
At A Glance
- Eliminate food sources by storing dry goods in airtight metal or plastic containers.
- Seal all gaps larger than a quarter-inch with steel wool and caulk.
- Set snap traps perpendicular to walls with peanut butter or bacon grease bait.
- Remove nesting sites like cardboard boxes and maintain clean, clutter-free pantries.
- Fix leaky faucets and dry sink areas daily to remove water attractants.
Spot the First Signs of Mice in Your Kitchen
Vigilance is your first line of defense against a kitchen mouse invasion. Spotting rodent activity early is key for effective pest detection.
Look for droppings, which are ¼ to ½ inch long, brown to black, and have tapered ends. These are often scattered near food sources.
Look for droppings near food sources: ¼–½ inch, brown to black, with tapered ends.
Mice produce 50 to 75 droppings per day, so seeing a few is not a good sign. Check for gnaw marks on packaging, wires, or wood, since mice chew constantly to keep their teeth short.
Hidden nests in wall voids or cluttered areas also confirm activity. Nibbling behavior, where mice take small tastes from multiple items, is another clue.
Ignoring these signs lets a small problem grow into a full-blown infestation. Act quickly, because early detection simplifies removal and saves you time.
Once you spot entry points, seal them with rust-resistant stainless steel wool to block re-entry.
What Makes Your Kitchen a Mouse Magnet
A kitchen becomes a mouse magnet mainly through easy access to food and water. Leftover crumbs, unsealed pantry items, and a pet’s forgotten bowl supply a mouse’s daily meal.
A dripping faucet or a sweaty pipe offers the hydration it needs. Fundamentally, a kitchen that offers a free buffet and an open bar will always attract these uninvited guests.
To prevent an infestation, seal all food in pest proof containers. Fix any leaky pipes to eliminate drinking sources for rodents.
Professional pest control can help identify hidden entry points. Use snap traps or bait stations near baseboards for effective pest removal.
Keep counters clean of crumbs and store dry goods in airtight bins. This practical approach turns your kitchen from a magnet into a safe zone.
Food Sources
The kitchen is basically an all you can eat buffet for mice, and they don’t bother with a reservation. These little opportunists will gnaw through cardboard and thin plastic like it’s paper, drawn by the scent of accessible food.
They don’t need a feast; a single spilled crumb or an open bag of chips is enough to set up a permanent residence. Ultrasonic repellers and natural repellents might deter them briefly, but no gadget replaces basic sanitation. They are sidekicks, not heroes.
Store dry goods like flour, cereal, and pasta in metal or heavy duty plastic containers with tight fitting lids. Mice can chew through a bag of rice in one night, so use rodent proof storage to prevent infestation. Choose containers with silicone gaskets and locking hinges to create a true airtight barrier against pests.
Clean up crumbs, spills, and pet food immediately to remove pest attractants. A forgotten granola bar under the couch is an open invitation for a mouse intrusion.
Dispose of garbage regularly using a can with a secure lid, and avoid leaving dirty dishes overnight. Proper waste management is a key step in rodent control and home pest prevention.
Inspect pantry shelving for gnaw marks or droppings weekly, and rotate food stock to prevent hidden stashes. Look for signs of rodents early to target your extermination efforts before the problem grows.
Water Access
Water is the silent wingman of every kitchen mouse. A dripping faucet or a sweaty pipe gives them daily hydration right under your nose.
Mice need water to survive, just like they need food. Ignoring water condensation on your fridge’s floor or behind the dishwasher is like leaving the bar open all night.
The fix for pipe leak prevention isn’t glamorous, but it’s cheap. A five dollar wrench or some plumber’s tape can stop a bar’s worth of problems.
Wipe down sinks after use and check under cabinets monthly for signs of moisture. You can also seal entry points and set up peppermint oil sprays to naturally repel rodents without chemicals.
Bottom line: dry floors, dry pipes, no mouse parties. If you suspect an infestation, a professional pest control inspection is your best next step.
Remove Every Food and Water Source Right Now
Remove every food and water source right now. Food is the number one reason mice decide to become roommates. Any kitchen that leaves a trail of crumbs is fundamentally rolling out the welcome mat.
Before addressing hiding spots, you must first eliminate the very reasons mice endure the arctic entry of a kitchen. Those reasons are food and water.
After a long outdoor migration, a thirsty mouse will happily slurp condensation from a leaky pipe. Store all dry goods like cereal, pasta, and pet food in metal or thick plastic containers with tight lids, not flimsy cardboard. Using airtight side-locking lids with silicone gaskets provides a secure, pest-proof seal that blocks out moisture and pests.
Wipe countertops and sweep floors nightly since mice survive on crumbs as small as a grain of rice. Fix leaky faucets and dry sink areas daily because a dripping pipe is a water fountain for rodents.
Remove pet food bowls after feeding and empty the drip tray under the refrigerator regularly. Without these two necessities, mice lack the fuel to justify staying.
Clean Your Kitchen to Eliminate Hiding Spots
Once mice lose access to food and water, they will search for hiding spots. The best defense is ruthless decluttering throughout your kitchen.
Clear out kitchen storage areas, especially cardboard boxes where mice love to nest. Swap those for plastic bins with tight lids, which cost about 12 dollars each at big box stores.
Clear out cardboard nesting spots and swap them for sealed plastic bins.
Keep pantry lighting on at all times. You can also install a cheap motion sensor LED, since mice hate bright and open spaces.
Wipe down shelves and sweep under appliances regularly. Toss any old or torn bags of rice or pasta without hesitation.
No hiding spot should survive in your pest control efforts. Short stacks of cans are fine, but piles of junk are not.
A clean and well lit kitchen with organized storage leaves mice nowhere to lurk. For ongoing protection, place slow-release peppermint pellets in mesh bags around problem areas to naturally repel rodents for up to 90 days. This forces them to move on or into traps for effective rodent removal.
Seal Every Gap Over ¼ Inch to Mouse-Proof Your Kitchen
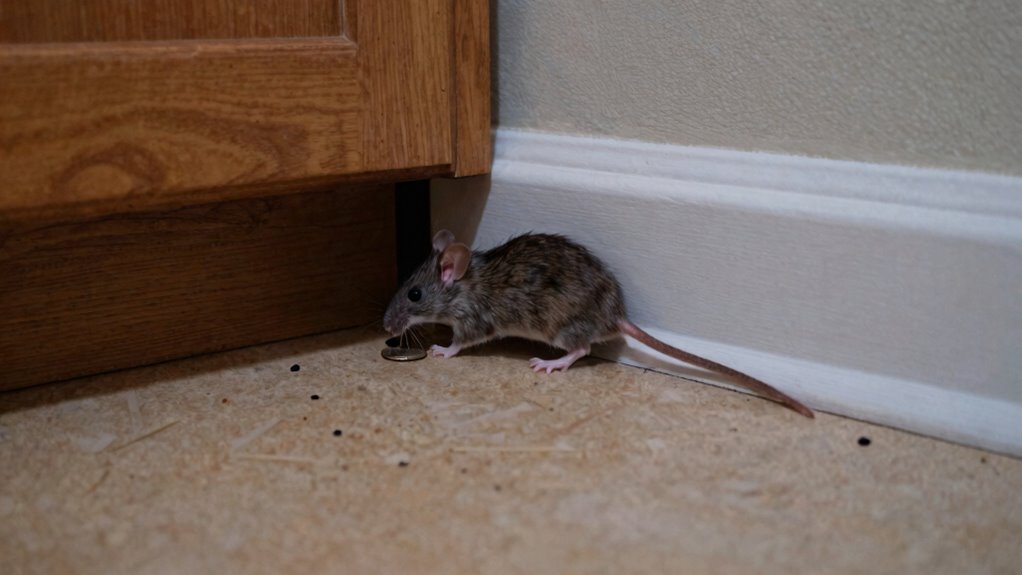
Since mice can squeeze through a hole the size of a dime, about ¼ inch, your kitchen is basically a welcome mat if you do not seal every gap that size or larger. Understanding mouse behavior means knowing they will test any crack, looking for warmth and nesting materials.
Grab caulk, steel wool, or expandable foam.
These cost under $10 at any hardware store and are essential for effective pest control.
Inspect around pipes under sinks, behind the stove, and along baseboards.
Seal gaps where electrical lines or vents enter walls, as these are common entry points for rodents.
Stuff steel wool into larger holes before caulking, since mice gnaw through foam alone.
Check door sweeps, because a ¼ inch gap under a door is an open invitation for rodent prevention.
This cheap and simple method stops problems before they start.
No trap needed if they never get in, making it a smart buyer intent solution for mouse proofing your home. For additional non-chemical backup, consider glue boards with safe adhesives to trap any mice that do sneak through.
The Best Mouse Traps for Kitchens and How to Bait Them
For kitchen pest control, the snap trap remains the gold standard. It is simple, cheap, and brutally effective.
The kill is instant, and cleanup is just tossing the trap. Wooden snap traps cost about two dollars for a four pack and work fine.
Plastic versions like the Victor Easy Set offer easier trigger adjustment. That extra dollar is worth it for tight corners.
Bait choices matter more than the trap itself. Peanut butter is the old reliable, but it dries out.
Bait choices matter more than the trap itself. Peanut butter is reliable, but it dries out.
For a stickier, longer lasting lure, try dental floss dipped in bacon grease. It refuses to fall off, so it stays put.
Avoid cheese because it hardens and slips off the trigger. Stick with snap traps and bait with something gooey.
Check them daily to ensure they stay effective. Set them, and let spring work for you.
For best results, position traps with their triggers facing the wall, since rats run with their whiskers touching surfaces.
Where to Place Mouse Traps for Maximum Success
Placement is the real secret to effective rodent control, and a trap sitting in the open is nothing more than a useless decoration. Mice naturally hug walls and baseboards for safety, so set your traps perpendicular to the wall with the trigger facing the baseboard.
Focus on dark, quiet corners where you spot droppings, gnaw marks, or rub marks along the edges. Run continuous trap lines along cabinetry, appliances, and counters to intercept their nightly foraging routes.
Pay special attention to gaps under sinks, behind stoves, and near pantries, since these are prime mouse highways for food and shelter. Vary your bait selection across traps, like peanut butter on one and chocolate on another, to quickly learn what they prefer.
Space your traps no more than 6 to 10 feet apart in active zones, because closer coverage beats scattered guesswork in a serious infestation. Check traps daily and reposition any that sit empty for 48 hours, since a lazy trap catches nothing but dust.
Think like a mouse: skittish, hungry, and glued to the wall, and you will see far better results from your pest control efforts. For a complete home defense, combine these trapping tactics with sealing entry points and removing food sources to stop new visitors. Secure placement inside tamper-resistant stations keeps bait intact in high-traffic spots.
How to Use Poison Bait Safely in Your Kitchen
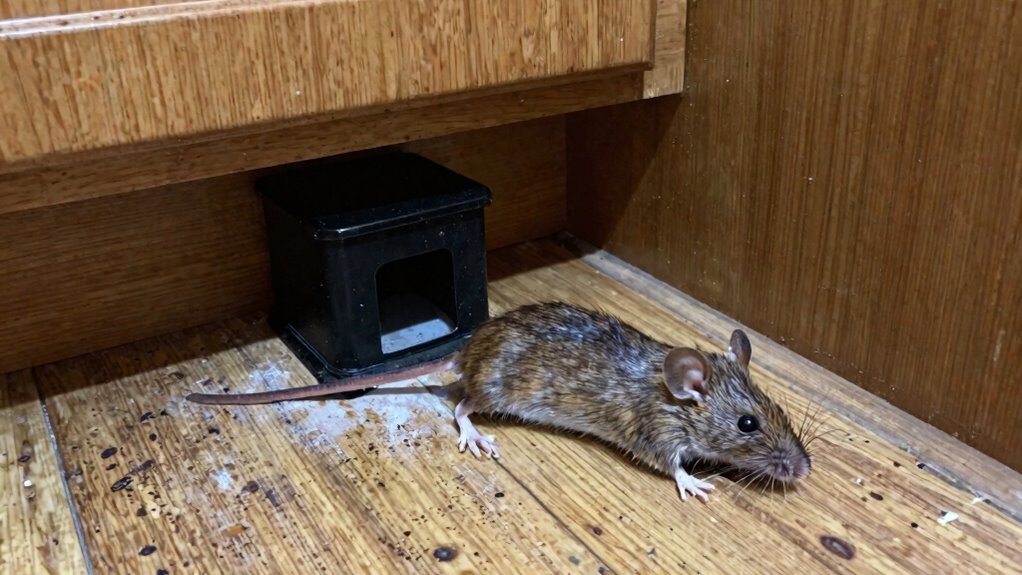
After dialing in trap placement to catch active mice, the next step is poison bait, though a kitchen demands extra caution. Rodenticide resistance is real, so some mice shrug off standard baits like Warfarin, making single dose formulas a smarter bet for pest control success. Using tamper-resistant bait stations outdoors prevents access by children, pets, and birds.
Always use tamper resistant bait stations, plastic boxes with small entry holes costing about $8 each, to keep kids and pets out. Place them near walls spaced 10 feet apart in cupboards or behind appliances, not near food prep areas.
Expect poisoned mice to die in walls, causing a smell for days. The best bait is a single dose block, replacing it every 48 hours if gnawed.
Bottom line: poison works but it is a last resort, traps are cleaner for kitchen rodent control. Use baits only when traps fail for safer mouse elimination.
What to Do With a Dead Mouse (Safe Cleanup Guide)
Safe removal begins with a dead rodent, so use an inverted plastic bag or disposable gloves.
Clean the affected spot with a bleach solution, mixing one part bleach with ten parts water. This kills germs from droppings or urine.
Double bag the carcass and seal it tightly. Place the bag in an outdoor trash can with a secure lid, not your kitchen bin.
For ongoing pest control, consider sealing entry points and setting traps to prevent future issues. For continued protection, use tamper-resistant bait stations to keep rodenticide secure from kids and pets.
Safe Removal Steps
So what happens when the snap trap snaps and you find a mouse carcass? Resist the urge to throw it outside, as that could be considered unlawful wildlife relocation.
Instead, grab disposable gloves and a plastic bag to handle the pest control job properly. Double bag the mouse and trap for odor containment, then toss it in an outdoor trash can with a tight lid.
Use a plastic bag as a glove to pick up the trap and mouse together without direct contact. Place the whole assembly into a second bag and seal it immediately to lock in smells.
Wash your hands thoroughly with soap and warm water for at least 20 seconds after removal. For extra odor protection, sprinkle baking soda inside the outer bag before sealing.
That is it, clean and simple with no mess involved. Your next step is disinfecting the entire area to prevent any lingering germs. If you choose a poison instead, remember that vitamin K1 serves as the antidote for first-generation anticoagulant baits like warfarin or diphacinone.
Disinfecting Affected Area
The dead mouse is safely bagged and in the trash, but the work isn’t over. Now disinfect the affected area thoroughly to prevent rodent diseases.
Mice leave behind bacteria, urine, and dried droppings that can spread illness. Use cleaning chemicals like a bleach solution, one part bleach to ten parts water, or a commercial disinfectant spray.
Apply it generously to the spot where the mouse was found. Then wipe clean with paper towels to remove all traces of pest contamination.
For odor removal, sprinkle baking soda over the area. Let it sit for a few hours, then vacuum it up.
This absorbs lingering smells and dries up dampness. Don’t skip this step, as even a faint odor can attract other mice.
The goal is a sanitized, scent-free surface that says “no vacancy” to future visitors. Peppermint oil pest repellent sprays offer an eco-friendly alternative to harsh chemicals for ongoing deterrence. This complete pest control cleanup protects your home from reinfestation.
Proper Disposal Methods
Finding a dead mouse in the kitchen is never pleasant, but proper cleanup prevents ongoing pest control problems.
Double-bag the carcass in thick, leak-proof plastic and seal it tight for disposal.
Compost disposal works only if your pile stays above 140°F for weeks.
Otherwise, burying carcasses at least two feet deep away from wells and gardens is safer.
Municipal trash also handles the job well for most homeowners.
Always wear disposable gloves and a mask to avoid direct contact.
Disinfect the area with a bleach solution at a 1:10 ratio after removal.
If you choose to bury carcasses, dig deep enough to stop scavengers from digging them up.
Finally, wash your hands thoroughly with soap and warm water.
These steps help ensure you solve the issue without attracting more pests.
Be aware that dead rodents pose secondary poisoning risks if scavengers access the carcasses.
How to Prevent Kitchen Mice From Ever Coming Back
A mouse that never arrives is a mouse you never have to evict, so prevention is where your effort pays off best. The real trick is making your kitchen a no-fly zone for rodents.
Start by sealing every gap larger than a quarter-inch, like those sneaky cracks around pipes or vents. That’s mouse-proof construction, and it’s cheap, with caulk running under five dollars a tube.
Next, eliminate outdoor nesting spots by clearing brush, woodpiles, and debris near your foundation. Mice love those cozy hideouts, so deny them the chance to set up camp.
For extra protection, some homeowners try electronic repellents that plug into outlets and emit high‑frequency sounds. Do they work? Sort of, they might deter a few curious mice, but don’t bet the house on them. These devices use variable frequency ultrasonic technology to prevent pests from adapting to the sound over time.
Think of those gadgets as a polite “no thank you,” not a bouncer, for rodent control. The best pest prevention strategy is a layered approach, not a single magic fix.
To stop mice permanently, pair sealing with proper food storage, like using airtight containers for grains and pet food. Sanitize crumbs and grease daily, because even a tiny spill can attract a hungry visitor.
Hire a professional pest inspector if you suspect hidden entry points, especially around utility lines or crawl spaces. They offer long-term rodent exclusion services that go beyond DIY caulking.
The bottom line is seal first, then sanitize, then maybe plug in a gadget for peace of mind. You’ll save money, time, and your snack stash, while keeping kitchen mice from ever coming back.
3 Mouse Myths That Keep Your Kitchen Infested
Within the world of kitchen pests, myths spread faster than mice themselves. Believing false fixes keeps infestations thriving and wastes your time and money on pest control solutions that do not work.
Kitchen smells alone do not repel mice. Fresh scents like peppermint or bleach seem logical, but rodents adapt quickly to any odor.
Odors cannot replace sealing entry points or removing food sources. They simply mask an active problem, leaving your kitchen vulnerable to a rodent infestation.
Ultrasonic devices promise silent deterrence for twenty to fifty dollars. In reality, mice often grow accustomed to the noise and walk right past them for a crumb. However, for maximum effectiveness, these devices must be mounted 10-47 inches off the ground to allow sound waves to travel unobstructed.
These gadgets are more gimmick than guarantee for long term pest prevention. A clean kitchen helps but does not guarantee safety from mice.
Mice squeeze through quarter inch gaps, ignoring spotless counters while nesting in walls. One mouse sighting signals a hidden family, not a lone wanderer.
Mice reproduce fast, so acting quickly with professional pest control traps is key. Trust exclusion methods and snap traps, not myths, for effective rodent control.
Frequently Asked Questions
Can Mice Chew Through Plastic Containers?
Yes, mice can absolutely chew through plastic containers. Their constant gnawing easily punctures standard plastic, especially thin storage bags or bins.
For true rodent proof storage, you need thick walled containers made of metal or heavy duty glass. Even tough plastic might fail over time under persistent chewing.
Imagine a mouse as a tiny, relentless demolition expert. Flimsy barriers are just a challenge they will overcome.
A $10 metal bin is a smarter investment than replacing chewed food bags repeatedly. Prioritize material over convenience for long term pest control success.
If you want to keep mice out of your pantry, choose steel or thick glass. These materials are the best mouse proof storage solutions on the market.
For high chew frequency areas, always seal your food in airtight, rodent resistant containers. This simple step stops infestations before they start.
How Long Does It Take to Get Rid of Mice?
It takes one to three weeks to eliminate a mouse infestation, depending on the severity. Exclusion methods speed things up by sealing entry points, whereas professional removal handles stubborn cases in days.
Mice breed fast, so patience is key. Those droppings and gnaw marks won’t vanish overnight.
A combo of trapping with snap traps baited with peanut butter and sealing cracks works best. Expect daily trap checks, then a slow decline.
For heavy infestations, call pros; they cost $200 to $500 but finish faster. The bottom line is consistent effort, not luck, wins.
Consider using rodent bait stations or ultrasonic repellents for added prevention. Professional pest control services offer the fastest rodent removal solutions for severe cases.
What Scent Repels Mice Effectively?
Peppermint oil is the top natural scent that effectively repels mice. Its powerful, concentrated aroma overwhelms their sensitive noses and makes spaces unappealing.
However, it is not a standalone solution for pest control. Mice may simply avoid the area temporarily, so it should be part of a larger plan.
Ammonia fumes mimic predator urine and create a false threat for rodents. Placing a few drops on cotton balls near entry points can help deter them.
These scents work best alongside sealing holes and setting traps. Think of them as a polite suggestion, not a fortress, for complete rodent removal.
For the best mice repellent results, combine scent deterrents with professional grade traps. This smart purchase strategy ensures you get long term pest prevention.
Do Ultrasonic Pest Repellers Work on Mice?
Do ultrasonic pest repellers work on mice? The short answer is barely, and that is the truth you need before spending a dime.
These devices emit high-pitched sound above human hearing, but mouse ears adapt fast and often ignore the noise after just one week.
Deterrent efficacy is low, so don’t expect a plug-in gadget to solve a rodent problem on its own.
For $20 to $50, you get a weak supplement, not a real solution for mouse control or rodent exclusion.
Your better bet is snap traps, steel wool, and sealing entry points, which are proven pest prevention methods.
If you are searching for an effective mouse repellent, this device should sit at the bottom of your pest control buying guide.
Saving $30 on a repeller might cost you a gnawed wire or chewed insulation later, so weigh the risk carefully.
Use these units only as a last-layer addition alongside professional rodent removal techniques, never as your primary pest management tool.
For buyers with a rodent infestation or house mice problem, invest in integrated pest management around the home first.
Bottom line, skip the ultrasonic repeller and spend your money on durable traps, exclusion materials, and a thorough home inspection.
Can I Get Sick From Mouse Droppings?
Yes, mouse droppings pose real transmission risks. Hantavirus and salmonella are health hazards lurking in those tiny pellets.
Dried droppings turn to dust, so inhaling that invites serious trouble. It’s not dramatic, just basic biology: mice leave germs behind.
A professional pest control cleanup starts with gloves, a mask, and a bleach solution. No shortcuts matter when protecting your home from rodent infestations.
The bottom line is don’t ignore the mess. It’s gross and genuinely risky for your family’s health.
If you spot droppings, call a pest control service or buy rodent bait stations now. Effective pest removal is the only way to seal entry points and stop recurring infestations.
You can also trust EPA approved rodenticides for spot treatments. Just ensure you follow safety labels for responsible pest control products.


