
Checking a house for termite damage doesn’t require a pro—just a screwdriver and a keen eye.
Start outside where mud tubes on the foundation are a dead giveaway of active termites. Probe wood with a flathead tool; a hollow sound means internal damage is already underway.
Inside, look for frass that looks like coffee grounds near baseboards, plus blistered paint or tiny pinholes capped with dirt. A flashlight held at an angle reveals these signs that homeowners often miss.
We’ll walk you through every step, from crawl spaces to attic rafters, and show how fixing dampness stops 70% of invasions cold.
A $150–$300 inspection now beats a $3,000 repair bill later, so stick around for the deeper tricks that save you money and stress.
At A Glance
- Tap wood with a screwdriver; hollow sounds indicate termite damage inside.
- Look for mud tubes on foundation walls, a sign of active subterranean termites.
- Check for frass: small wood pellets or sawdust near baseboards and windowsills.
- Probe suspect wood with a screwdriver; soft spots confirm internal termite galleries.
- Inspect foundation cracks as small as 1/32 inch, which allow termite entry.
Key Signs of Termite Infestation to Watch For

Termites work in secret but leave clear signs of infestation you can spot with a careful eye. Look for indoor frass, which looks like tiny wood pellets or coarse coffee grounds near baseboards and window sills.
Termites work in secret, but frass near baseboards is a clear sign of infestation.
This means drywood termites are eating overhead. Warped floorboards that buckle or feel spongy underfoot indicate hollowed subflooring.
Tap wood with a screwdriver. A hollow sound means termite damage has already weakened the structure.
Check for blistered paint or tiny pinholes capped with dirt in drywall. These are direct indicators of an active termite colony.
If you see any of these signs of termite activity, do not panic with DIY treatments. Schedule a professional pest inspection for around 75 dollars instead of facing a 3000 dollar repair bill later.
To protect undamaged wood in your home, consider applying a borate-based wood preservative that penetrates deep to kill termites on contact and prevents future infestations.
Start Your Termite Inspection Outside: Foundation and Mud Tunnels
Start your termite inspection outside where the foundation meets the soil, since this is their main highway. Look for foundation cracks as small as 1/32-inch wide, about the thickness of a dime, because termites can squeeze through these gaps.
Scan for pencil-sized mud tunnels running up the foundation walls. These covered walkways let termites travel from the colony to the wood above.
Mud tunnels are a clear sign of subterranean termites, which are often best detected using chemical-free monitoring stations placed in damp soil near the foundation.
Foundation Crack Entry Points
A foundation crack is the termite’s welcome mat. Any gap as thin as 1/32‑inch is a freeway for pest entry.
An inspector looks for vertical, horizontal, or stair‑step crack patterns. These are classic entry routes for termite control concerns.
Sealant types matter here for long‑term protection. A polyurethane caulk or hydraulic cement works best for sealing.
Avoid cheap acrylic caulk. It shrinks and fails within a year.
One tube costs about $8 to $12. It seals three to four average cracks.
Apply after cleaning debris and fill completely. A crack isn’t just a crack, it’s an open invitation for termite infestation.
Seal them and you shut the door on a major entry point. This is cheap, easy, and beats a costly termite bill later.
For active infestations, applying an expanding foam with expansion ratios up to 30:1 can deep-infiltrate these cracks to target hidden nests.
Mud Tunnels on Walls
Foundation mud tunnels are the next thing you’ll spot, after cracks, when you start your termite inspection outside.
These pencil-sized, dirt-packed tubes running up your foundation walls serve a clear, creepy purpose. They are highways for subterranean termites, connecting their colony in soil to a wooden feast inside your home.
A mud tunnel’s purpose is to protect these soft-bodied pests from drying out and predators, so they can travel unseen.
Look for damp wood signs near these tunnels, like water-stained or rotting siding. Termites love humid conditions and 70% of invasions start with wet wood. Pinless moisture meters using high-frequency electromagnetic waves can detect hidden dampness up to 40mm deep without damaging finished surfaces.
If you see broken, abandoned-looking tubes, don’t relax. Active ones stay smooth and dark inside. Gently scrape one open with a screwdriver. Live termites inside mean it’s time to call a pest control pro.
Bottom line: no tunnel is good news. But catching them early, before they cost thousands in structural repairs, is a win.
How to Spot Termite Frass and Discarded Wings
Check for frass, which are drywood termite droppings that look like small mounds of sawdust or coffee grounds near wood. Those little piles mean termites have been eating, and they are not subtle about it.
Frass often appears near baseboards or windowsills. Mud tubes on foundation walls alert you to subterranean termites instead.
Frass near baseboards or windowsills signals drywood termites; mud tubes on foundation walls point to subterranean ones.
Tapping suspect wood might reveal hollow wood, a sign they have been snacking inside like tiny, destructive tenants. Discarded wings from swarmers look like small, translucent scales and show up on floors or window sills after mating season. For a targeted approach, foam sprays can expand into hidden gaps to reach termites behind walls.
If you see piles of wings, termites are likely living nearby. Check gently, do not panic just confirm, then call a pest control pro.
It is cheaper than rebuilding a wall. Schedule a termite inspection to protect your home.
Where to Probe During a Termite Inspection for Hollow Wood
Since termites rarely announce themselves with a marching band, finding hollow wood requires deliberately tapping and probing the most vulnerable areas of a house. Probe wood systematically with a flathead screwdriver. It is cheap, effective, and doubles as a back scratcher in a pinch.
Start low where moisture meets wood and work upward. Tap floorboards near walls and corners for a dull papery thud versus a solid knock.
Check window frames by pressing along the sill and sides, especially if paint bubbles are visible. Probe door jambs at the bottom six inches. That is prime entry turf for subterranean termites.
Inspect baseboards along their entire length, focusing on joints and spots near plumbing. If the screwdriver sinks in easily, you have found your hollow spot. Once you identify an active area, a Bifenthrin-Plus C Insecticide applied as a liquid barrier spray can help eliminate remaining termites on contact.
Call a pest control pro before the wood turns to confetti. Prompt termite inspection is the best way to protect your home’s value.
Termite Damage Signs in Floors, Walls, and Ceilings
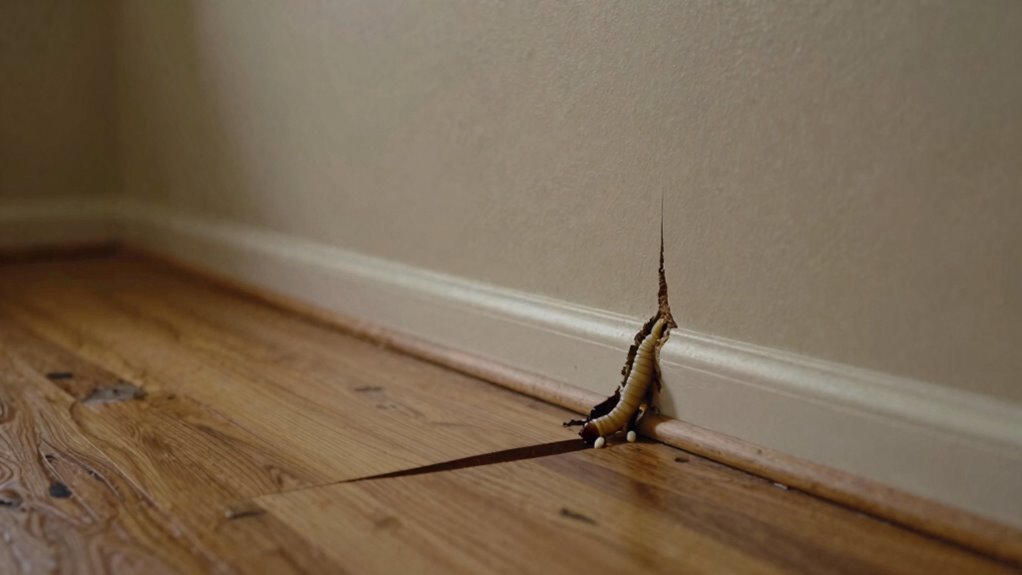
Where do floors, walls, and ceilings betray a termite invasion. Look for blistering or buckling wood flooring, which is a clear sign termites have been tunneling underneath. You might additionally find pin-sized holes in drywall, often capped with dirt specks. Stuck windows or doors, and squeaky floors, point to weakened subflooring and frames. Don’t ignore bubbling paint or wallpaper. Termites chew through drywall just beneath the surface. Mold patterns can appear from trapped dampness, which often coincides with termite activity. Though dry rot is a separate issue, its presence can signal wood damage termites love. Ceilings dipping or support beams buckling are serious structural red flags. Probe suspicious areas with a screwdriver. Hollow sounds mean internal galleries where termites have been feeding. If floors feel spongy below your feet, it is time to call a pro for pest control inspection. Act quickly to prevent costly structural repair. A professional exterminator can confirm the infestation and apply termite treatment to protect your home. After confirmation, an OMRI-listed powder can be applied to cracks and crevices to target other crawling insects.
Moisture Red Flags to Spot During a Termite Inspection
Since roughly seven out of ten subterranean termite invasions are purely dampness driven, a water problem is practically a welcome mat for these pests.
Moisture attractants like leaky faucets and poor drainage create a termite paradise.
Spotting a damp wood warning early can save thousands in home repair costs.
Look for standing water near the foundation.
Even a small puddle after rain keeps soil saturated, inviting termites to build mud tubes.
Rotting window sills or door frames are a clear damp wood warning.
Soft, dark wood from condensation or leaks is not just cosmetic damage.
Stained or warped baseboards signal persistent moisture attractants behind walls.
Discoloration from hidden pipe leaks often points to active water damage.
A moldy smell in basements means high humidity.
Termites love damp air more than a forgotten cupcake.
Fix any water issue immediately.
Drier conditions are safer for your home, and your wallet will thank you.
Schedule a professional pest control inspection to catch termite problems early.
Using a dehumidifier to keep humidity below 50 percent is also effective for preventing booklice and other moisture-loving pests.
Crawl Spaces and Attics to Check in Every Termite Inspection
In a thorough termite inspection, the crawl space and attic are the two most critical areas to examine.
Starting below, an inspector checks for mud tubes climbing up foundation walls or along the concrete piers that support your home.
These tubes are a clear sign of active subterranean termite entry, often hidden in damp, dark corners.
In the attic, the focus shifts to exposed wood, where a screwdriver is used to probe beams and rafters for soft spots.
A hollow sound when tapped or pressed reveals internal tunneling, which means termites have been feeding unseen for a while.
Checking these zones helps you catch a termite treatment need early, saving you from costly structural repairs down the line.
Many homeowners ignore these spaces until damage appears, but a proactive inspection can confirm whether you need a local pest control service.
If you notice sagging floors, peeling paint that looks like water damage, or tiny piles of wings near vents, those are buyer-intent signals to schedule a professional assessment.
For peace of mind during a home purchase, asking for a written termite report on both the crawl space and attic is a smart move.
After every inspection, sealing cracks and reducing moisture in these areas will make your property far less inviting to termites. For comprehensive protection, you might explore whole-home pest control kits that offer long-lasting residual barriers and coverage for multiple zones.
Crawl Space Entry Points
Crawl space entry points are where dampness and soil meet wood, making them prime termite highways.
Many termite inspections miss these dark, cramped areas, but that is where trouble starts with pest control.
Check soil grading around the foundation to ensure it slopes away from the house.
If water pools near the crawl space, it invites termite damage and moisture issues.
A sump pump needs a working cover to prevent it from becoming a humid, termite-friendly cave.
Test the pump during your inspection to confirm it functions properly for buyer peace of mind.
Look for mud tubes on foundation walls, piers, or pipes as clear signs of active termite activity.
These brown, dirt-caked tunnels are the termite’s version of a subway entrance.
Seal any gaps where utilities enter using caulk or grout to block hungry colonies.
A 1/32 inch crack is enough for a termite to access wood from the soil.
Do not skip the crawl space when scheduling a professional pest inspection.
A few minutes with a flashlight can save thousands in costly wood repair bills later.
Placement along walls or behind appliances ensures traps target the same pest pathways.
Attic Wood Probing
Every inspection of a crawl space or attic comes down to one key test: probing the wood. In attics, the focus is on rafters and roof sheathing for signs of wood rot or termite damage.
If a screwdriver meets soft, hollow timber, termites have eaten the inside out. Damp insulation often hides the problem since moisture attracts these pests.
Worse, electrical wiring damage can follow as termites chew through insulation and even cables. That creates a fire risk, plain and simple.
The repair cost ranges from $500 to $3,000 depending on the affected area. But a professional probe costs around $100 and catches the problem early.
Grab a flashlight, poke the suspect spots, and listen for a crunch sound. A hollow sound means trouble, not a low cost fix.
While probing, look for signs that targeted pest control has been used previously, as this can indicate the type of barrier protecting the structure.
Termite Inspection Entry Points You’re Probably Missing
Most homeowners check the obvious termite hotspots, like baseboards and porch steps, but the sneaky entry points are what keep pest control companies busy.
You would never guess where these wood destroyers actually slip inside.
Painted utility lines act like termite highways because the paint hides tiny cracks where they squeeze through.
Always inspect where gas or electric lines enter your house for hidden termite damage.
Stacked lumber against the foundation creates a termite buffet by staying damp against the soil.
Even dry firewood forms a perfect bridge for a termite infestation.
Gaps around outdoor faucets or hose bibs often have crusty caulk that gives termites a damp hidden path.
Checking these spots helps with early termite detection and prevention.
Tree stumps or roots touching the siding can rot and invite a colony underground, even if they look dead.
Removing them reduces the risk of structural pest control issues.
Do not just stare at the baseboards during your termite inspection.
Grab a flashlight and poke around those ignored entry points to avoid a costly repair bill.
Proper sealing with EPDM rubber seal kits can block crawling insects from entering through tiny foundation gaps.
4 Essential Tools for a DIY Termite Check
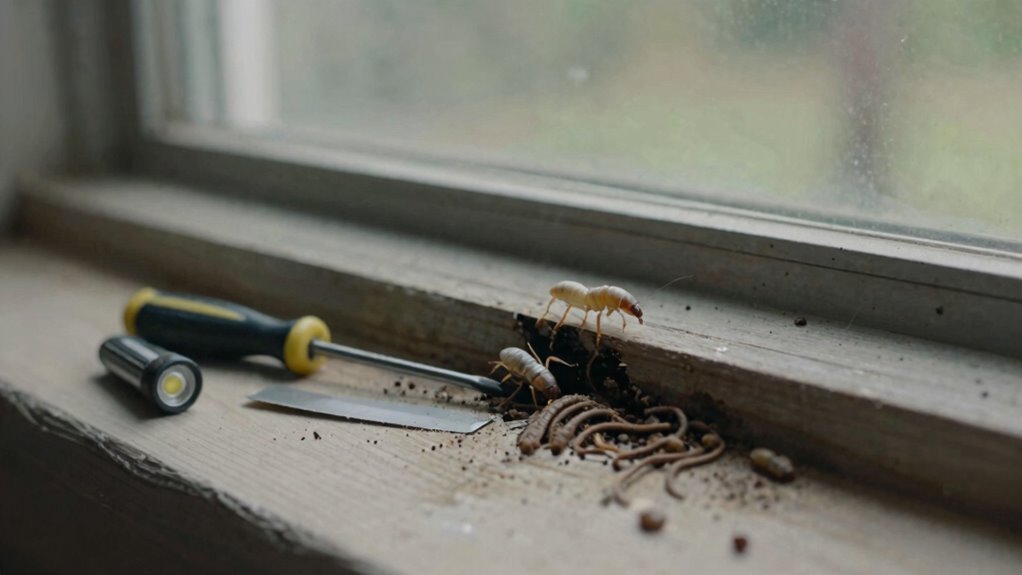
A termite check begins with a bright flashlight and a flathead screwdriver. The flashlight helps spot mud tubes in dark corners, while the screwdriver probes wood for soft spots or hidden tunnels.
Tapping on beams and floors with a knuckle or tool exposes hollow sounds. These often mean termites have been eating from the inside out, which is a clear sign you need professional pest control.
Visual Inspection Tools
The right tool for a termite check is less about fancy gadgets and more about knowing what to poke, prod, and peer at. A solid flashlight is non-negotiable for pest control inspections. You need one that throws a bright, steady beam into dark crawl spaces and attics. Cheap keychain lights won’t cut it when searching for termite damage. A flathead screwdriver is your best friend for probing wood edges without causing a mess. Your own eyes do the heavy lifting, so bring reading glasses if needed for detailed termite identification.
Flashlight techniques involve aiming the beam at an angle to spot mud tubes or frass against dark surfaces. Probing methods require gently pressing the screwdriver tip into suspect wood. Feel for soft spots or hollowed galleries beneath the paint during your termite treatment prep.
A moisture meter, about 25 dollars, checks wood dampness content. Termites love damp lumber, so this tool helps find potential infestation sites. Knee pads, under 15 dollars, save your knees during long ground-level inspections. Future you will thank present you for investing in these professional termite inspection tools. A UV flashlight at 395nm can also reveal hidden pest trails and droppings in dark corners.
Probing & Sound Checks
Screwdriver and knuckles form the DIY termite inspector’s percussion section. A sharp rap on baseboards or beams, listening for hollow sounds, reveals internal galleries where wood has been eaten away.
Then, use a screwdriver probe to press gently into suspicious spots. If the tip sinks in easily, like poking stale cake, termites have been busy.
A flathead screwdriver, under $10, is ideal for this termite inspection task. Probe along floor joists, window frames, and sill plates to check for hidden damage.
A hollow sound followed by a soft probe penetration is a clear verdict: damage exists. This method catches problems before walls buckle, saving you from costly structural repairs.
Bottom line: combine knock and probe every six months as part of your pest control routine. Keep your ears open and your screwdriver handy, because early termite detection is your best defense.
Finding trouble early saves thousands and spares your home’s bones, so schedule this sound check into your seasonal home maintenance checklist. For peace of mind, pair this DIY method with a professional termite inspection if you notice any soft spots or hollow echoes.
For additional protection against other pests, boric acid powders last for weeks if kept dry and can be applied in cracks and crevices.
When to Call a Professional Termite Inspector
Knowing when to call a professional termite inspector is smart budgeting, not a failure on your part. DIY checks have clear limits, and certain situations demand trained eyes, specialized gear, and a license for chemical treatments.
Scheduling matters too, since an annual pro inspection is cheap insurance against a $5,000 repair bill. Make that call the moment you spot active mud tubes or live swarmers inside your home, because that is not a guessing game.
Structural wood that sounds hollow or sagging floors point to hidden damage that only a certified inspector can fully map out. If you are buying or selling a property, mortgage requirements often mandate a documented termite report before closing.
Your DIY probe revealing extensive, deep rot that baffles your screwdriver means the infestation has progressed past surface treatment. Trust your gut: if the situation feels off, spend that $150 to $300 for peace of mind and a thorough termite inspection.
Bottom line, do not gamble on guesswork when professionals guarantee precision and long term pest control. A licensed termite treatment expert will also provide a clear action plan for termite prevention and moisture control.
That annual checkup can catch subterranean termites, drywood colonies, and dampwood issues before they compromise your foundation. Always request a written report with photos, because that document becomes your proof for lenders and your roadmap for repairs.
If you notice discarded wings near windowsills or hollow sounding baseboards, schedule a home inspection service immediately. Early detection from a pro costs less than one weekend of patching drywall or replacing a load bearing beam.
Your peace of mind after a professional termite inspection is worth more than any DIY shortcut, so book that appointment without hesitation. When in doubt, call a local exterminator who offers free estimates and a full termite warranty. For ongoing protection, consider natural repellents like peppermint oil as an eco-friendly barrier against other pests around your foundation.
Easy Ways to Keep Termites Out for Good
A professional inspection is smart, but the real victory comes from making your home so unappealing to termites that they never think about moving in.
First, moisture control is your best friend. Fix leaky pipes and gutters fast, since 70 percent of invasions start with damp wood and wet soil.
Keep soil six inches below siding and use a dehumidifier in crawl spaces.
Then install a termite bait station system for long term monitoring. It costs about three hundred dollars annually, but it will spot colony activity before damage starts. For additional outdoor pest defense, chemical-free traps offer a safe alternative that uses UV light rather than poisons.
Store firewood twenty feet from the house and seal foundation cracks with silicone caulk.
Think of it as making your home taste terrible to termites. They will just go next door.
Bottom line: dry wood plus vigilant baiting equals termite free living.
Taking these pest control steps keeps your home safe from costly repairs.
Frequently Asked Questions
Can Termites Infest Concrete or Brick Walls?
No. Termites cannot eat concrete or brick; they lack the biology for it. Nevertheless, they will exploit cracks and gaps in these materials to reach wood behind them.
Look for subterranean mud tubes on the surface, or honeycomb tunnel patterns inside damaged wood frames. Those are the real red flags for a termite infestation.
Think of masonry as a highway, not a meal. If you spot any mud tubes or signs of termite damage, call a professional pest control service immediately.
Investing in a termite inspection now is cheaper than a new foundation later. For effective termite treatment, consider bait stations or soil applied liquid barriers from top brands like Termidor or Taurus.
You need a pest control solution that targets the colony, not just the surface. Choose a proven product to stop termites from using your concrete walls as a tunnel to your home’s structure.
Do Termites Only Damage Wood, or Can They Harm Other Materials?
Not entirely, and that’s a key point for any homeowner searching for termite control solutions. Though termites chiefly damage wood, they also harm other materials while hunting for cellulose, which is their main food source.
They tunnel through drywall, leaving behind blistered paint or tiny holes capped with dirt specks, and they can erode plaster surfaces by undermining the support behind walls. Even non-wood items like paper, cardboard, and some fabrics are vulnerable, so your stored boxes and books are at risk, too.
That means your house could show drywall damage and plaster erosion without a single visible wooden beam being affected, which often confuses DIY inspectors. Ignoring these non-wood signs is a common and costly mistake, especially if you’re relying only on visual checks for termite damage.
For effective pest control, you need to inspect baseboards, ceiling corners, and even wallpaper seams before buying any treatment. If you spot mud tubes or hollow-sounding drywall, act fast with a professional-grade termiticide or bait system designed for whole-home protection.
No material is truly safe once they’ve moved in, so early intervention is the smartest purchase you can make for your property. Whether you choose liquid soil barriers or bait stations, prioritize products with proven residual action and clear application guides to stop their spread.
How Long Does It Take for Termites to Cause Visible Structural Damage?
Visible structural damage from termites typically takes three to eight years, depending on colony size and feeding rate. A small colony nibbles slowly, like a distracted toddler at dinner, while a large one devours wood at shocking speed.
Hollow sounding floors or stuck windows usually show up after several years of steady tunneling. If you suspect termite damage, schedule a professional termite inspection right away.
Subterranean termites with a million strong colony can cause sagging beams within two years. That is why early termite detection is critical for protecting your home’s foundation.
The trick is catching them early with annual inspections, not panicking over a single mud tube. For reliable termite control, consider a liquid soil treatment or bait system from a trusted pest control company.
Ask your local exterminator about termite treatment costs and warranty options. Smart buyers invest in a termite bond before damage becomes visible and costly.
Will Termite Damage Always Be Covered by Homeowners Insurance?
No, termite damage is rarely covered by homeowners insurance. Policies typically treat it as a preventable maintenance issue, not a sudden event.
Insurance exclusions are standard here, since termites work slowly and damage accumulates over time. Think of it like a leaky pipe you ignored. Fixing it is on you.
Prevention costs, like regular inspections or treating mud tubes, are your responsibility, not the insurer’s. For a concrete example, repairing hollow sounding floor joists can cost thousands out of pocket.
Bottom line is that you need to budget for prevention, not claims. Schedule professional termite control inspections at least once a year to catch activity early.
Investing in termite bait stations or soil treatments now helps you avoid expensive structural repairs later. If you see mud tubes or frass, act fast and call a licensed pest control pro.
Want to protect your home? Get a termite prevention quote today and keep your policy intact.
Can Termites Return After a Professional Treatment Has Been Applied?
Yes, termites can return after a professional treatment. Most treatments eliminate the active colony, but new swarmers can easily reinfest your home.
This often happens if the soil stays damp or if foundation cracks remain open. The time before a return varies: some properties stay safe for years, while others see termites back in months.
Always check your treatment warranty gaps carefully. Some plans cover retreatments, but others do not, so read the fine print.
To prevent re infestation, fix all leaks and seal any cracks in your foundation. Think of it like a garden: pull one weed, and another might sprout.
Stay vigilant, schedule regular termite inspections, and you will catch them before they settle in. Using a quality termite barrier or bait system can give you long term protection and peace of mind.


