
Repairing termite-damaged wood starts with knowing when you can fix it yourself and when you need a pro. Many homeowners spot minor damage on window sills or trim and wonder if a quick DIY patch is enough.
The truth is, treating active termites first is non-negotiable, or any repair is wasted. For small, surface-level spots, you can scrape out the soft wood, apply a hardener, and fill with epoxy for a solid fix.
But if a screwdriver sinks over an inch into the wood, that’s a sign of structural damage requiring a licensed contractor. This article breaks down the simple repairs you can handle and the warning signs that mean you should call for help.
We’ll cover the tools, costs, and techniques to save your wood without guesswork. Keep reading to learn exactly how to assess and fix termite damage the right way.
At A Glance
- Treat active termite infestations before any repair work begins.
- Test damage depth with a screwdriver to distinguish superficial from structural.
- Use epoxy fillers only for non-load-bearing wood like window sills.
- Sister damaged joists with new lumber for moderate structural termite damage.
- Call a professional for full beam replacement if floors sag or doors jam.
Why You Must Treat Active Termites Before Making Repairs

There are two reasons you never paint over a water stain without fixing the leak first. Termites are that leak, and filling the hole while they feast is just expensive decorating.
Active colonies keep chewing, silently hollowing out your beams while you admire fresh paint. Infestation elimination must come first, meaning a pro confirms zero live termites.
Skip this and you are sealing bugs inside your walls, a real mistake. Then comes preventative pest control, usually a soil treatment or bait stations around the perimeter.
Treating first costs a few hundred bucks but stops thousands in re damage. Skipping it means you are literally feeding the problem.
Bottom line is to kill them, block them, then repair. Anything else is wishful thinking with a hammer.
For example, a bait station system placed 10 to 20 feet apart can effectively monitor and eliminate colonies before you begin any wood repairs.
Superficial vs. Structural Termite Damage: How to Tell
Termite damage falls into two clear categories: superficial cosmetic issues and structural load bearing problems.
Superficial damage stays on the surface and often appears in window sills, door frames, or baseboards with soft hollow spots.
You can test it by poking the area with a screwdriver. If it sinks in an inch or two but the wood behind it feels solid, the problem is likely cosmetic.
Structural termite damage is far more serious and affects beams, joists, or studs that support your roof or floor.
A professional termite inspection using tools like moisture meters or borescopes is necessary to assess hidden damage.
Watch for red flags like sagging floors or doors that suddenly jam.
If you can push a knife in over an inch and the wood crumbles, you are likely dealing with structural damage.
Do not try to guess the severity on your own.
Calling a licensed pest control inspector is the safest move, because a wrong guess could mean your home’s framework is compromised.
These tools can detect excess dampness that attracts termites, but moisture monitors alone cannot confirm an active infestation.
When DIY Epoxy Repairs Are Safe (and When They’re Not)
After poking suspect wood with a screwdriver, you need to decide if the damage is cosmetic or structural. DIY epoxy repairs are safe for non-load-bearing spots like window sills, baseboards, or decorative trim where no weight sits above.
Epoxy creates a tough, durable patch for these surface scars, much like mending a favorite jacket. For minor rot in these areas, a homeowner-grade epoxy kit works well and saves you a service call.
But stop right there if the rot involves floor joists, beams, or any lumber that carries your roof or upper floors. Epoxy cannot restore the compressive strength of hollowed-out support wood, so patching it is a false economy.
Structural fixes need sistering or full joist replacement, which runs $500 to $1,200 per joist from a licensed contractor. DIY epoxy on load-bearing parts can hide ongoing termite or carpenter ant damage, letting pests keep chewing inside your walls. If you have an active infestation, applying a foam with non-repellent active ingredients like fipronil or dinotefuran can stop the colony before you seal the damage.
That hidden decay invites more costly infestations, moisture intrusion, and eventual sagging. For a quick check, poke a screwdriver into the suspect area; if it sinks more than half an inch, assume deeper rot and call a pro for a pest and structural inspection.
If you only see surface flaking or shallow cracks, grab a two-part epoxy filler and follow the label for a clean patch. For anything that holds up your house, skip the DIY and get a licensed estimator to quote the repair.
Safety isn’t a suggestion here, and a cheap fix can compromise your family’s shelter. When in doubt, hire a pest control specialist to assess insect damage before you patch anything.
A small investment in a professional look-over beats a failing floor beam later. So patch the pretty stuff, but never gamble on structure.
What Tools and Materials Do You Need for Minor Repairs?
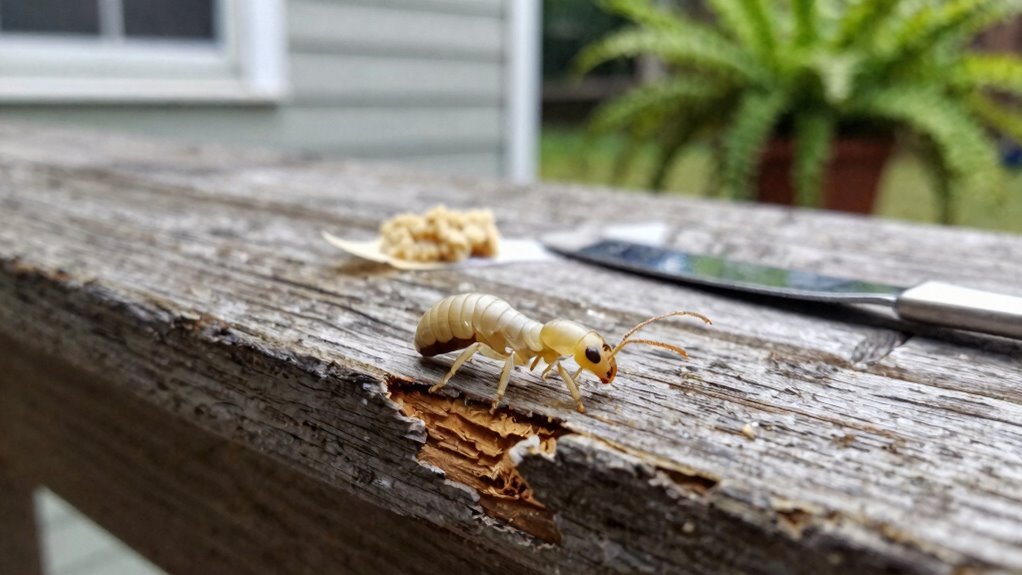
For minor termite repairs, having the right tools and materials ensures your fix holds up well over time. A putty knife, utility knife, and sandpaper are essential for shaping and smoothing damaged wood areas.
Wood filler options vary based on the damage depth. An epoxy based hardener works best for deep termite tunnels, while lightweight spackling is ideal for shallow surface pitting.
Always wear safety equipment like gloves and a dust mask during sanding. This prevents skin irritation and stops you from breathing in fine wood particles mixed with pest debris.
Using a quality wood filler from a trusted pest control supply store can make your repair last longer. Check for products specifically labeled for termite damaged wood for the best results. To prevent reinfestation, you could also apply boric acid powder along nearby baseboards and cracks as a natural pest deterrent.
After sanding and filling, apply a primer and paint to seal the repair completely. This also helps deter future termite activity by covering exposed wood surfaces.
Essential Tools
You will always need a few basics before tackling minor termite damage. A utility knife, stiff putty knife, and 80 to 120 grit sandpaper are non-negotiable for scraping and smoothing.
A vacuum with a crevice tool helps you see the true termite infestation timeline by exposing hidden galleries. For dampness control, a four foot level and a trowel assist with soil grading to keep earth away from wood post repair.
A cordless drill with a number two Phillips bit drives screws for temporary bracing. Wear safety glasses and a dust mask because sawdust flies everywhere.
Your glove choice matters: nitrile for epoxy, leather for demolition. The bottom line is skip pricey termite repair kits.
Spend forty dollars on these single items, not one hundred dollars on a mystery box of junk. This practical approach gets you pest control ready without overpaying for tools you do not need.
Wood Filler Options
If damage has turned wood into structural confetti, you can fix minor termite issues with two DIY filler options.
First, apply wood hardener to soak into soft, crumbly wood and stabilize it like superglue.
Then use epoxy based fillers from brands like Abatron or Minwax for a strong bond that sands smooth. A standard epoxy kit costs $20 to $40 and covers a few square feet.
For deeper holes from active termite damage, choose a thicker paste filler. Just mix, apply, and shape it.
This won’t fix a rotten beam that needs professional structural repair. But for a window sill or smaller pest control fixes, it works perfectly.
The bottom line is to grab wood hardener for prep, then a quality epoxy filler for lasting results. Skip cheap fillers that termites already took enough from.
To prevent future damage, consider applying a borate-based sealant that penetrates deep to kill termites on contact and provides long-lasting protection.
Safety Equipment Needed
Respirator cartridges cost between 20 and 30 dollars. Each pair lasts roughly eight hours of use.
Protective nitrile gloves should be thick enough to resist chemicals. Scratch resistant, wrap around safety glasses complete your pest control kit.
Bottom line? Spend the fifty bucks upfront. Your lungs and hands will thank you later.
No amount of wood filler fixes a burned fingertip. Invest in your safety equipment before your next job.
Always follow application guidelines to avoid irritation from chemical exposure.
How to Repair Minor Termite Damage With Epoxy (Step by Step)
Precision matters here. Start by scraping out all soft, crumbly wood until only firm material remains, using a stiff wire brush or screwdriver. Then brush on a liquid wood hardener. This soaks deep into porous areas and initiates wood hardening within 30 minutes.
Mix the two-part epoxy filler according to package directions. Its paste like consistency allows easy spreading into voids and cracks from termite damage. Overfill slightly to account for shrinkage, then shape with a putty knife.
After curing overnight, sand flush with surrounding wood, prime, and paint. This pest control repair works best for non load bearing spots like window sills or baseboards. The cost runs $200 to $500 per area. For ongoing protection, consider a foam spray that expands behind surfaces to reach hidden pests.
No jacking or engineers are required. Just solid, user friendly patchwork that buys years of trouble free service. For surface level termite damage, epoxy is the simple, durable solution.
When to Sister a Termite-Damaged Joist Instead of Replacing It
Sistering a joist by bolting new lumber alongside the damaged one is ideal when termite damage is moderate but not severe. This method works if the joist still has solid wood along at least half its length, making it a practical pest control repair.
It costs $500 to $1,200 per joist, which is far cheaper than full replacement. A structural engineer must approve this fix for any load-bearing floor, so always get certified guidance.
Sistering a joist costs $500 to $1,200, far less than replacement, but always get an engineer’s approval first.
Don’t expect insurance to cover it, since most policies exclude termite damage outright. Sistering is perfect for a compromised joist that isn’t hollowed out, so call a pest control specialist to assess the damage.
If the wood still has some bite after localized termite damage, this approach saves money without sacrificing safety. For buyer intent, searching “affordable termite joist repair near me” often leads to this cost-effective solution. A dry, finely-textured food-grade diatomaceous earth product is a non-toxic tool for killing any surviving pests by dehydration, but ensure it remains dry and reapply after cleaning to maintain its residual effect.
Full Beam Replacement: What’s Involved and When to Call a Pro

Full beam replacement means the old beam is cut out entirely and a new one is bolted in after temporary jacks support the house. This process typically runs between $3,000 and $10,000.
Call a pro when a licensed inspector finds the beam is hollowed out, sagging, or failing the “screwdriver test” where it sinks in like butter. This signals catastrophic structural failure, not a DIY weekend project.
If the beam is more termite than wood, don’t touch it. You need a structural engineer and a contractor who handles permits and jacking.
Pest control inspections often reveal hidden termite damage that softens beams to the point of collapse. Buyers searching for “termite damage repair cost” or “rotted beam replacement” should hire a pro immediately.
Delaying this work can allow pests to spread and worsen the damage. A full beam replacement restores safety and stops infestations from taking over your house.
Beam Replacement Steps
When termites have turned a structural beam into something that looks more like a honeycomb than a load-bearing support, full replacement is the only safe option. First, hydraulic jacks temporarily shoulder the building’s weight, preserving beam strength elsewhere.
Next, a saw cuts out the compromised timber, making clean lines for the new lumber. This stage demands precision because mistakes mean sagging floors.
Then, the new beam is pressure-treated, often engineered wood, and it is fitted, bolted, and secured. The permit process here is non-negotiable, adding $300 to $800 but ensuring codes are met.
Finally, jacks slowly lower the house onto its fresh bones. Expect two to four days of labor, with costs between $3,000 and $10,000.
Skimping on steps invites future pest control headaches. For reliable termite damage repair, professional help ensures your property stays safe.
When to Call a Pro
Three clear signs indicate it is time to call a pro for full beam replacement: visible sagging in floors or ceilings, cracks spreading in drywall above a beam, and doors or windows that stick or refuse to close.
This isn’t a DIY moment.
It is a “call someone who owns a hydraulic jack” moment.
Full replacement involves temporarily jacking up the structure, cutting out the destroyed timber, and installing a new beam.
Cost assessment typically runs $3,000 to $10,000 depending on access and permits.
Timeline planning means a few days to several weeks since the house literally rests on this fix.
Minor epoxy patches won’t save a hollowed-out support beam.
That is like putting a Band-Aid on a broken leg.
Let the pros handle the heavy lifting, literally.
Your back and your home’s integrity will thank you.
For termite treatment or wood rot repair, call a professional before the damage spreads.
Searching for “beam replacement near me” is the first smart step to protect your property value.
How Much Will Termite Repair Cost? A Breakdown by Repair Type
Termite repair costs can vary widely, so it helps to understand what you might pay for different types of damage. Minor cosmetic fixes like patching a window sill or baseboard usually range from $200 to $500 per area.
For moderate damage, sistering a floor joist to share the load costs between $500 and $1,200 per joist. Major structural repairs, such as full beam replacement, can run from $3,000 to $10,000 and often require jacks, permits, and a structural engineer.
Active termite infestations must be treated before any repair work begins, which adds days or weeks to your timeline. Ignoring this step means your repair money could be wasted.
Homeowners insurance rarely covers termite damage because the destruction is gradual, not sudden. Always get a professional pest inspection first to know the full extent of the problem.
Choosing annual bait stations designed for year-round structural protection can help prevent future infestations and costly repairs.
The bottom line is simple. A pro inspection helps you understand costs before you commit, and your wallet will thank you.
How to Restore Walls, Insulation, and Finishes After Repairs
Once the framing repairs are buttoned up, the real fun begins: putting your house back together. First, inspect the wall cavity vapor barrier. If it is torn, replace it to keep humidity and potential pest attractants out.
Then pack in new insulation, making sure it is snug around electrical boxes. Post repair dampness control is critical for avoiding termite-friendly moisture. Check for leaks before sealing drywall. For drywall patching, a pre mixed compound and mesh tape work fine. Just sand, prime, and paint. Maintaining humidity below 50 percent further deters future infestations by making the space inhospitable to pests.
| Restoration Step | Key Consideration |
|---|---|
| Vapor barrier | Prevents future termite-friendly moisture and pest entry |
| Insulation | R value matters; use faced batts for walls |
| Drywall repair | Use a 6 inch knife for smooth finishes |
| Painting | Two coats of primer seal stains and hide previous damage |
| Trim replacement | Pre paint pine to avoid brush marks and insect hiding spots |
Finish by reinstalling baseboards and trim. A new layer of paint hides the headache and deters small bugs. Finally, schedule that walk through. You earned it after keeping pests out.
Frequently Asked Questions
Can I Claim Termite Damage on Homeowners Insurance?
Termite damage is almost never covered by standard home insurance. Policies treat it as preventable neglect, not a sudden accident.
That means claim denial happens fast, since termites are considered a maintenance issue. The key word is “policy coverage,” and it excludes pests outright.
For example, a $5,000 beam repair lands on you. But get this, a burst pipe that termites then feast on? That water damage might get paid.
Bottom line: check for a rider, or just budget for repairs. To avoid out of pocket costs, schedule a professional termite inspection every year.
Many homeowners add a termite bond or wood destroying organism rider to their policy. If you spot mud tubes or frass, call a pest control company immediately for a free estimate.
Investing in quarterly termite bait stations or a liquid soil treatment now can save you thousands later. Look for a local exterminator who offers a renewable warranty on treatment plans.
How Long Does Termite Treatment Last Before It Needs Reapplying?
Termite treatment longevity typically lasts between five and ten years, depending on whether you choose a liquid barrier or a bait system. Soil conditions around your home also play a major role in how long the protection holds up.
Your reapplication schedule should be guided by annual pest control inspections. A professional will flag when termiticide levels drop or bait stations need refreshing.
Liquid soil treatments can often last a full decade without needing a touch up. Bait systems require checking every few months to ensure termites are still feeding on the stations.
Don’t guess when it comes to termite protection. A $300 annual inspection is a smart investment compared to a $10,000 beam replacement down the road.
Bottom line, budget for proactive termite monitoring instead of expensive reactive repairs. Regular pest control service gives you peace of mind and keeps your property safe from structural damage.
Will Termite Damage Weaken My Home Enough to Be Unsafe?
Yes, termite damage can absolutely make your home unsafe, especially when it compromises structural integrity. Think of it like termites quietly eating the bones of your house, and the real danger is hidden until it’s too late.
The biggest concern is foundational risk: when load-bearing beams or joists get hollowed out, floors can start to sag or even collapse under normal weight. If you notice creaky floors, sticking doors, or visible mud tubes, those are buyer-intent signs you need a professional termite inspection right away.
A sistered joist repair typically costs $500 to $1,200, while a full beam replacement can run $3,000 to $10,000, depending on your home’s layout and access. Compare that to the price of a proactive termite treatment plan, which is far cheaper than emergency structural repairs.
Ignoring termite activity is like ignoring a leaky roof: eventually, something breaks, and the repair bill skyrockets. For pest control products, look for termite baits, liquid soil barriers, or wood treatments that target subterranean and drywood species.
The smart purchase here is an annual inspection paired with a preventative moisture control routine, since termites thrive where wood meets damp soil. Don’t wait for visible damage; act on early warning signs like discarded wings or hollow-sounding wood.
Bottom line: get a licensed inspector to assess load-bearing areas, treat the infestation first, then repair the damaged framing. Your home’s safety depends on addressing this now, not later.
If you’re comparing pest control services, ask about warranties that cover re-treatment if termites return within the guarantee period. That way, you buy peace of mind, not just a one-time fix.
How Can I Tell if Termites Are Still Active in My Home?
Two reliable signs point to active termites. Look for termite wings, tiny identical pairs, often near windows or doors, shed after a swarm.
Then check for frass piles, those little pellet-like droppings that look like sawdust or coffee grounds, usually beneath damaged wood. Spot either one, and you’ve got a current infestation that needs immediate attention.
Call a licensed pest control professional for confirmation, since they’ll inspect and treat before any repair work begins. This is where your termite treatment options come into play, from liquid barriers to bait stations, so ask about warranties and follow-up visits.
Bottom line, wings or frass mean they’re still home, so act fast. If you’re searching for termite control services or eco-friendly termite extermination, a professional will match the right product to your situation and help you prevent future colonies.
Does a Home Inspection Report Reveal All Pre-Existing Termite Damage?
A standard home inspection report does not always reveal all pre existing termite damage. Think of it as a pre purchase inspection with limitations, since inspectors cannot see inside walls or under floors without destructive measures.
The rule of caveat emptor, or buyer beware, applies here. Many issues like hollowed beams behind drywall stay hidden until a licensed pest control specialist checks with a borescope.
For minor termite repair jobs, costs typically run between $200 and $500. Major beam replacement can hit $3,000 to $10,000, so you want a thorough inspection before closing.
Bottom line: always hire a licensed pest inspector separately for termite risks. A dedicated termite inspection will target hidden wood destroying organisms and past infestations that a general home check may miss.
This proactive step helps you avoid surprise structural damage and expensive remedial treatments later. Add a wood destroying insect report to your due diligence checklist for peace of mind.


