
Finding a mouse nest doesn’t require tearing apart your whole house—it just takes knowing where to look. Start in the kitchen or pantry, because mice rarely wander far from food. A thirty-foot radius around pet bowls, stoves, or stored goods is your prime hunting ground. Check behind appliances, inside cabinets, and along baseboards for shredded paper or insulation tucked into hidden corners. Listen for scratching at night or follow grease smudges and droppings to pinpoint the spot.
In this guide, we’ll cover exactly how to locate nests in attics, garages, and crawl spaces. You’ll also learn what to do once you find them so the problem doesn’t come back.
At A Glance
- Check within 30 feet of kitchens, pantries, or pet bowls for nests.
- Inspect behind refrigerators, stoves, dishwashers, and inside cabinets.
- Search attics and garages for shredded insulation, paper, or fabric piles.
- Use a flashlight to spot droppings, gnaw marks, and grease smudges.
- Listen for steady scratching or squeaking during quiet night hours.
Where to Start Looking for Mouse Nests
Start your search for mouse nests where the food is. Rodent populations stay within 30 feet of kitchens, pantries, or pet bowls because foraging drives their survival.
Ignoring that rule is like fishing without bait. For effective pest control, inspect under appliances, inside cabinets, and along baseboards near food storage.
Seasonal behavior shifts matter too. Cold weather pushes mice indoors from woodpiles and sheds, so winter inspections should target foundations and garage gaps first.
Look for shredded paper or insulation tucked behind stoves or refrigerators. Check attics and crawl spaces if no nest is obvious downstairs.
Mice prefer hidden, quiet spots near heat sources. A single nest can hold a dozen mice, so early detection prevents bigger problems. Reusable snap traps costing around $2 to $5 can catch mice multiple times with care, making them a cost-effective option once you locate the nest.
Focus on food zones first, then expand outward with seasonal awareness. This practical approach helps you remove nests quickly and avoid a larger rodent infestation.
Where Mice Build Nests Inside Your Home
Most indoor mouse nests appear in three common areas: the kitchen, the attic, and the garage.
In the kitchen, they hide behind refrigerators, dishwashers, or stoves where warmth and food scraps are easy to reach.
Attics offer soft insulation for shredding, while garages have clutter and cardboard boxes that create hiding spots.
Mouse behavior explains these choices. They prefer dark, quiet, rarely disturbed spaces within thirty feet of a food source.
Mouse behavior explains these choices: dark, quiet, rarely disturbed spaces within thirty feet of food.
They also use ultrasonic squeaks to coordinate nesting and warn of danger, sounds humans cannot hear.
If you hear faint scratching instead of squeaks, you are likely hearing gnawing, not communication.
Check behind kitchen appliances first, then attic corners and garage storage bins.
For effective rodent control, focus on warm, messy, and quiet areas to locate the nest.
If you need pest removal services, inspect those zones regularly and seal entry points with rust-resistant stainless steel wool or copper mesh for damp areas.
Deal with mice early to prevent infestation.
How to Find Nests in Attics, Garages, and Crawl Spaces
Attics, garages, and crawl spaces give mice the perfect blend of shelter, warmth, and entry points around vents or pipes.
You can spot hidden mouse nests by looking for droppings, gnaw marks, and shredded insulation near corners or storage boxes.
Always check those areas for fresh debris or greasy smudges along baseboards.
These signs of rodent activity reveal exactly where a mouse has settled in for the long haul.
Inspecting these hidden nest locations early helps you take effective pest control action.
If you see these clues, consider professional removal to stop an infestation before it grows.
For long-term control, use diphacinone bait in tamper-resistant stations to ensure rodents receive a lethal dose.
Indoor Entry Points
The garage door gap is a classic invitation for pests. A sagging seal or uneven floor gives a mouse a direct path inside.
Indoor weatherproofing like door sweeps and expanded foam is a cheap fix. You can find everything under $20 at any hardware store.
Seasonal migration patterns push mice indoors when autumn temperatures drop. These pests aren’t picky about where they enter.
Gaps around pipes, vents, and foundation cracks serve as highways for rodents. Attics and crawl spaces become prime real estate since they are warm, dark, and undisturbed.
A quarter-inch gap is all they need to squeeze through. Check everything thoroughly with pest control in mind.
Seal it now to prevent an infestation. Expecting uninvited guests costs far more than a quick fix. Steel wool barriers are an effective, low-cost option for blocking these gaps since rodents cannot gnaw through the sharp fibers.
Hidden Nest Locations
Although the garage door gap has been sealed and foundation cracks are foamed shut, the real challenge is finding where mice are already living.
Attics, garages, and crawl spaces are prime real estate for hidden nests.
Look for shredded insulation, paper, or fabric tucked into corners, inside old boxes, or behind stored items.
Warm spots near pipes or vents are favorites for rodent nesting.
Rodent proofing techniques like sealing larger gaps with steel wool help block new travelers.
But don’t rely solely on ultrasonic repellent devices because they have mixed results in actual homes.
Instead, inspect clutter zones and check dark, quiet shelves for signs of mice.
If you see a pile of soft nesting material, you have found the hideout.
Bottom line is that persistence beats gadgetry for effective rodent control and pest removal.
For lasting rodent proofing success, focus on sealing entry points and removing cozy nesting areas.
Peppermint oil sprays can be used as a natural deterrent to repel mice from these nesting areas without harsh chemicals.
Signs of Activity
A sharp flashlight with at least 300 lumens helps you spot mouse activity before you ever touch a nest. Active rodents leave obvious clues in attics, garages, and crawl spaces.
Chewing damage on wires, wood, or drywall edges signals a nearby nest with fresh wood shavings underneath. Night activity becomes audible as scratching or scampering sounds within walls or above ceilings after dusk.
Droppings appear as small, dark pellets with pointed ends near food sources and along travel routes. Grease smudges from fur mark frequently used paths on pipes and beams near entry points. Peppermint oil sprays offer a chemical-free deterrent that can be applied along these travel routes to disrupt rodent activity.
Finding these signs first saves time digging through insulation during a pest control inspection. The real trick is following the crumbs literally to locate the nest.
Recognizing Nesting Materials and Their Hiding Spots
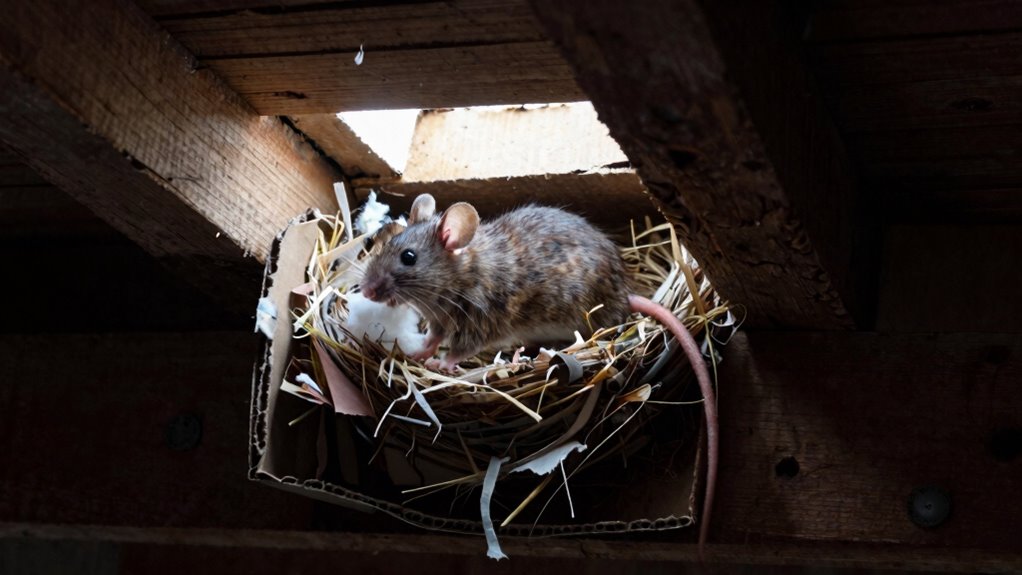
When mice start nesting, they get surprisingly crafty about materials. They shred anything soft like paper, fabric, or insulation into a cozy ball. Look for chewed wires near walls or appliances as a sign of material gathering. Dust tunnels and clear paths through debris with no cobwebs mark their highways. You can also use ultrasonic pest repellers to disrupt nesting activity in these areas without using chemicals.
| Material | Typical Hiding Spot |
|---|---|
| Shredded paper | Inside storage boxes |
| Fabric scraps | Under upholstered furniture |
| Insulation fluff | Wall voids or attics |
| Cardboard pieces | Behind major appliances |
| Dry leaves or grass | Woodpiles or crawl spaces |
Check dark, undisturbed areas within 30 feet of food sources. Nests often have multiple openings for quick exits. If you spot these materials clumped together, you have found their hideout. Bottom line, mice favor comfort and concealment so inspect clutter and quiet corners first. For effective rodent control, focus on blocking entry points near these nesting spots. Professional pest removal can target hidden infestations in attics or crawl spaces.
The Sounds That Give Away a Hidden Nest
Listening for a hidden mouse nest often means tuning in to what your walls are trying to tell you. Acoustic detection works best during quiet hours, when mice scurry, scratch, and gnaw without the daytime hum to mask them.
Those faint, rhythmic rustles near baseboards or ceiling corners are your cue. Scratching sounds are steady, like sandpaper dragged over wood, often from nest construction.
Gnawing noises are quick, repetitive clicks that signal reshaping of entry points. Squeaking chatter comes as high-pitched bursts, usually from young or agitated adults nearby.
Foot patter is light, rapid tapping that betrays travel routes to and from the nest. Ultrasonic sensing devices that pick up frequencies above human hearing can confirm activity, but your ears suffice. Ultrasonic repellers target specific pests based on frequency sensitivity ranges from 10kHz to 65kHz.
For a quicker verdict, grab a stethoscope like listening tool for roughly $25 and pinpoint the source. That is the direct line to your hidden culprit and your next pest control step.
How to Track Mice to Their Nest Using Footprints and Grease Marks
Tracking mice to their nest using footprints and grease marks is a practical way to solve a rodent problem without guessing. These clues are reliable for nest detection, and you can confirm mouse activity with a quick look at the tracks.
Front footprints show four toes, while back ones have five, which helps you verify you are dealing with mice rather than other pests. Grease marks appear as dark smudges from their oily fur, often along walls and baseboards where they travel.
Front footprints show four toes, back ones five, confirming mice over other pests.
Follow these streaks and tracks in hidden corners, under counter edges, or near pantries to map their movement patterns. The heaviest concentration of prints and smudges leads directly to the nest, so focus your search there.
Check dark, undisturbed areas like behind fridges or under sinks, where trails grow denser and more consistent. Each distinctive footprint and fresh grease mark narrows the search, making nest location straightforward for pest control planning.
For effective rodent removal, combine this tracking method with traps or bait stations set along those high-traffic routes. This approach saves time and reduces the guesswork, helping you address the infestation at its source.
Professional exterminators use this same evidence to locate nesting sites quickly, and you can too with minimal effort. Once you find the nest, you can seal entry points and clean grease trails to prevent future mice from returning.
Using snap traps with sensitive triggers along these high-traffic routes ensures quick and humane captures without mess.
How to Safely Remove and Dispose of the Nest
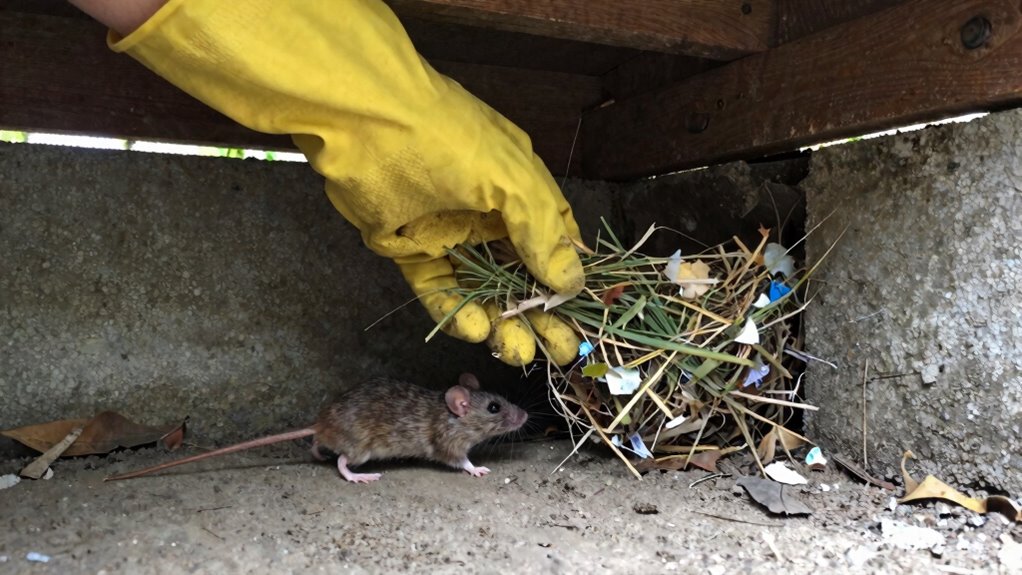
Remove gloves and a respirator before disturbing the nest, because safety comes first. This step prevents inhaling dust or pathogens, which is non-negotiable for nest disposal. You can use tamper-resistant bait stations to securely contain poisons if placing bait nearby.
Carefully bag the nest and any nesting materials, then seal the bag tightly. Place it in an outdoor trash bin with a secure lid, avoiding indoor storage to prevent re-infestation.
Wear disposable gloves and a mask. They protect against hantavirus and bacteria, cheap insurance under $10.
Use a heavy-duty trash bag. Double-bagging prevents tearing, especially if the nest is damp or messy.
Spray the nest with a disinfectant. Let it sit for five minutes before handling to reduce pathogen spread.
Place the bag in an outdoor bin. This keeps mice from returning to the scent, aiding odor removal.
For odor removal, air out the area with fans for a few hours. The bottom line is bag it, bin it, and breathe easy.
Why You Must Sanitize and Seal After Nest Removal
Since you have bagged the nest, your work is not finished. Sanitizing and sealing the area stops a sequel to this rodent drama.
Mouse droppings and urine carry dangerous pathogens, so proper waste decontamination is non negotiable. Use a bleach solution of one part bleach to nine parts water on any soiled surfaces. Let it sit five minutes before wiping. Leftover germs can trigger allergies or Hantavirus, a real health concern.
Skipping this step leaves behind a scent map for new mice. This invites a nest re infestation.
Seal all holes with steel wool and caulk, as mice slip through dime sized gaps. The bottom line is to scrub hard, then seal tight. That is how you lock the door on this rodent drama for good.
Stainless steel wool fused with poly fibers creates a rust-proof barrier rodents cannot chew through.
How to Seal Entry Points and Keep Mice From Rebuilding Nests
A mouse’s talent for squeezing through impossibly small gaps is frankly insulting. To keep them from rebuilding, use rodent proofing materials like copper mesh or stainless steel wool, not plastic which they chew through.
Pack these firmly into holes larger than a quarter inch. Then, apply a high-quality silicone caulk around pipes, vents, and utility lines, as sealants alone often fail.
Install a heavy-duty door sweep with a brush seal for under 20 dollars to block the gap beneath exterior doors. Cover attic vents and crawl space openings with corrosion-resistant hardware cloth using a minimum of 1/4 inch mesh.
Install a heavy-duty door sweep and cover vents with 1/4-inch hardware cloth for lasting rodent proofing.
Secure it with screws and washers for a lasting pest proofing fix. Seal holes around foil-faced foam board insulation with spray foam labeled for rodent resistance, since standard foam is a buffet for mice.
Conduct seasonal rechecks every three months, using a flashlight at night to spot new gnaw marks or droppings. The bottom line is that sealing is a battle, not a one time fix, so stay consistent with your rodent exclusion efforts. For small gaps around vents or windows, apply narrow copper tape with double-sided conductive adhesive to create a durable pest barrier that also blocks electromagnetic interference.
Frequently Asked Questions
Can Mice Climb up Into Beds or Couches?
Yes, mice climbing up into beds or couches is common. Their vertical abilities are surprisingly strong, letting them scale bed frames, box springs, and upholstered furniture with ease.
A mouse can jump 12 inches high and climb rough surfaces like wood or fabric. Nests are often built inside couches or beneath mattresses, using shredded material from cushions.
Signs include droppings on sheets, gnaw marks on frames, or scratching sounds at night. Check seams and crevices for entry points to stop an infestation before it spreads.
If you find droppings on your pillow or mattress, you need rodent control products like snap traps or live catch traps. Seal cracks with steel wool and caulk to block mouse access permanently.
For heavy infestations, consider professional pest control services or bait stations placed near the bed base. Protect your sleep area by removing clutter and storing linens in sealed containers.
How Quickly Will a New Nest Appear After Removal?
A new nest can appear within 24 to 48 hours after removal, especially when active mice are nearby. Nesting frequency stays high if food and shelter remain accessible in your home.
In a typical infestation timeline, mice rebuild quickly, often using leftover materials like insulation or paper. Check for fresh droppings or gnaw marks daily, as that is the real test for reinfestation.
Seal entry points fast, or you will be playing whack a mouse forever with no end in sight. For effective pest control, act within two days to prevent a sequel and save on expensive rodent removal.
Choose professional grade sealants or traps to break the nesting cycle for good. Smart buyers prioritize exclusion products and monitoring stations to keep their property mouse free long term.
Will Ultrasonic Repellents Actually Keep Mice Away?
Ultrasonic repellents do not reliably keep mice away. Scientific studies prove ultrasonic effectiveness drops fast through walls and furniture.
Device placement matters but won’t fix the core issue. Mice eventually ignore the noise, especially near food or warmth.
A $40 gadget might make a human feel clever, but mice call bluff. For real rodent control results, seal gaps and remove nests.
That is the noise pests actually respect. Focus on exclusion and sanitation if you want lasting pest prevention.
Buying a smart ultrasonic device can help as a secondary tool. Pair it with steel wool and caulk for a complete home pest defense.
How Many Mice Typically Live in One Nest?
A single mouse nest typically holds one adult female and her litter, which is around five to eight babies. Colony structure keeps nests separate because each female claims her own space, so mouse population control starts with understanding this layout.
You might find multiple nests close together, since they love neighbors who don’t borrow sugar. Think of it as a tiny rodent subdivision where everyone has their own place but shares the same wall void.
One nest rarely means just one mouse, so if you spot signs of nesting, you likely have a bigger infestation. For effective pest control, focus on bait stations and exclusion techniques to break the colony cycle.
Targeting nests directly with professional grade traps or rodenticides can stop reproduction fast. If you need a smart purchase for long term elimination, look for products labeled for multi nest environments.
Do Mouse Nests Smell Like Ammonia or Musty Odor?
Yes, full blown mouse nests definitely carry a noticeable smell. Don’t expect a subtle perfume; it’s a sharp, stale mix of ammonia from that concentrated urine.
The heavy, musty scent comes from accumulated droppings and decaying nesting materials like shredded cardboard and insulation. Think of a neglected gym bag crossed with a dirty barn.
This odor isn’t just gross; it’s your GPS to the infestation. You can sniff out the epicenter in attics, crawl spaces, or under appliances.
If that musty, tangy smell is thick, you are likely inches from the nest. To tackle it, grab a quality rodenticide bait station or a strong odor neutralizer from our pest control stock.
Act fast because that stench attracts other mice and can spread disease. Smart homeowners pair detection with exclusion tools like steel wool and foam sealant.
Use a UV flashlight to spot dried urine trails, then place snap traps or glue boards right along those paths. For a permanent fix, call a professional exterminator to inspect and seal entry points.
Your nose is a powerful early warning system. Use it to protect your home and avoid costly damage from nesting rodents.


