
Getting rid of pantry moths feels like a battle you didn’t sign up for, but you *can* win it with the right plan. If you’ve spotted those tiny brown moths fluttering near your flour or cereal, you’re already on alert.
The key is stopping them before they ruin more of your dry goods. This guide walks you through the exact steps to wipe them out completely.
You’ll learn how to clean, trap, and prevent these pests without wasting time on weak fixes. No generic tips or cringe-worthy advice—just straightforward action.
Stick with the process, and your pantry will be safe again. Ready to clear those shelves for good?
At A Glance
- Discard infested food immediately in sealed bags, placed in a lidded bin 20 feet from home.
- Vacuum all pantry shelves, crevices, and corners using a HEPA filter attachment.
- Wash all surfaces with warm soapy water or white vinegar to remove eggs and grease.
- Freeze borderline items at 0°F for one full week to kill hidden eggs or larvae.
- Store all dry goods in airtight glass, metal, or thick plastic containers with snug lids.
How to Spot Pantry Moths and Their Signs

Before you can win the war on pantry moths, you need to know who you are fighting. Indian meal moths are the usual culprit, with two tone wings that have dark bronze tips and lighter brown near the head.
Their larvae spin telltale silken webbing in your food. Check corners of containers, cabinets, and grains for clumps of webbing. Look for holes chewed through plastic bags and packaging.
Adult moths are weak fliers, so infestations almost always come from contaminated food brought home from the store. For long term pest control, correct identification matters because other beetles can mimic their signs. Once you identify the pest, you can choose an effective trap that uses a pheromone attractant radius of up to 25 feet to break the breeding cycle.
Adult moths are weak fliers, so infestations almost always come from contaminated food brought home from the store.
If you are unsure, professional identification via a local Cooperative Extension Service costs around 10 to 15 dollars. This small buyer investment saves months of misguided effort and ineffective treatments.
Spotting them early with monthly inspections transforms a year long battle into a manageable nuisance. Use these practical tips to protect your pantry and buy only sealed, inspected goods.
Why Even Sealed Food Packages Must Be Inspected
Those unopened boxes and shiny bags are where pantry moth infestations often hide best. A sealed package looks safe, but larvae can chew through plastic bags or thin cardboard.
Female moths lay up to 400 eggs, and those eggs slip easily into box folds. Seasonal moth patterns mean infestations peak in warm months, so even new store purchases can carry hidden larvae.
A pantry redesign using only glass or metal containers with tight lids forces you to inspect every item individually. Check corners, roll bags, and look for webbing or clumps of grain.
Don’t trust the seal. Larvae survive long journeys inside sealed packaging. Using pheromone-based traps captures male moths to break their reproductive cycle before more eggs are laid.
Dump all suspect items into sealed bags for outdoor trash. This non-negotiable step prevents weeks of repeat cleanup.
How to Dispose of Infested Food Safely
Dispose of infested food right away in a sealed bag without any delay. This stops pantry pests from spreading to other items.
After removing the bagged food, vacuum every shelf and crevice in the pantry thoroughly. Then wash all surfaces with warm soapy water to eliminate eggs or larvae.
Take the sealed bag directly to the outdoor trash bin to prevent a moth infestation from returning. For ongoing pest control, consider using non-toxic glue traps that are safe for placement near food storage areas.
Immediate Bag & Remove
Once you’ve spotted the pantry moths or their webbing, it’s time to act fast and remove the infested flour without hesitation. Grab a heavy-duty trash bag and double-bag those contaminated goods, then tie the top tightly to seal in any pests.
Take that bag straight to your outdoor bin, and never leave it sitting in the kitchen where moths can escape. For items that look borderline, follow proper freezing protocols: seal them in a freezer bag and freeze for one full week at 0°F to kill hidden eggs or larvae. This freezing step buys you critical time, but it does not replace a thorough wipe-down of your pantry shelves later.
Keep in mind that moth larvae can chew through thin plastic, so any food you decide to save must go into glass jars or thick metal containers with snug, airtight lids. No mercy for stragglers, and no second chances for items that show even slight webbing or clumping.
Use a pantry moth killer spray or pheromone traps after cleanup to catch any lingering adults. For thorough pest control, also vacuum all cracks and corners before wiping with vinegar.
For long-term monitoring, Maxguard Pantry Moth Traps use extra-strength female pheromones to attract and trap male moths, effectively halting reproduction in stored food areas.
Deep Cleanup Aftermath
The sealed bag of infested flour you tossed into the outdoor bin is only half the battle. What remains is the psychological tolerance test of seeing those telltale webbed clumps and moth migration patterns across your shelves.
Every speck of grain, every cracker crumb, must go. Larvae can crawl into bag folds, box corners, even under jar lids.
Do not salvage anything questionable because moths don’t respect sentimental value. Seal all suspect food in double plastic bags, tie them tight, and march them straight to the outdoor trash.
No lingering, no second-guessing. Your pantry is now a crime scene, and you are the cleanup crew.
Dispose with conviction because hoarding infested items only invites a sequel. For thorough pest control, consider a vacuum and pantry moth traps to prevent reinfestation, and apply a plant-based insecticide spray to shelves for extended residual protection.
Outdoor Disposal Protocol
Seal infested food in double plastic bags and tie them tight. March those bags straight to the outdoor trash without any hesitation. This is no time for farewells or composting experiments. Outdoor disposal means placing the bags in a lidded bin at least 20 feet from your house. Bin maintenance is critical here because a cracked lid invites moths to march right back in. Use heavy duty two mil thick trash bags that cost about ten dollars a roll. Secure the bin lid with a bungee cord or a heavy rock. Take trash out on pickup day, not the night before. Do not toss bags in an open bin or on the curb a day early. Never leave infested bags near a garden or compost pile. Skip lining the bin itself because food residue attracts critters. One forgotten bag is all it takes to restart the whole pest control circus. To prevent future infestations, store new dry goods in airtight side-locking lids with silicone gaskets.
The Complete Pantry Cleaning Process for Moths
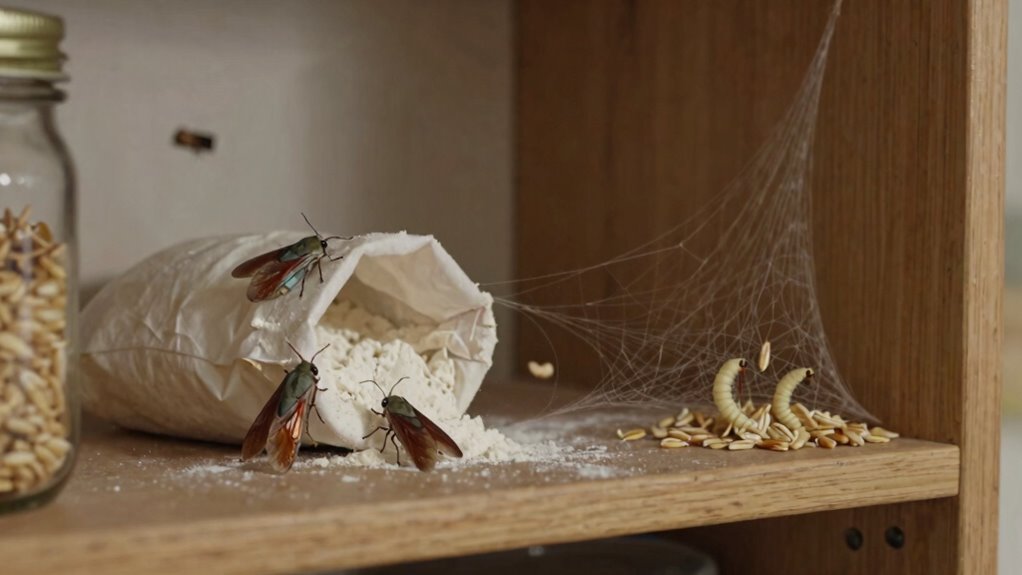
The complete pantry cleaning process starts with emptying every single shelf, drawer, and bin. No exceptions, since a single overlooked crack can harbor eggs.
Wash all surfaces with warm, soapy water or vinegar. The real work happens when you vacuum every crevice, corner, and hinge with a crevice attachment, because larvae love tight spaces.
After that, let everything dry completely before restocking. Keep in mind that this isn’t a one and done deal; it’s the foundation for keeping those winged freeloaders from making a comeback.
A thorough pest control routine like this targets hidden food moth infestations effectively. You will want to inspect every pantry moth hiding spot for long term prevention.
Using an airtight storage solution after cleaning is your best defense. This simple pest prevention step stops new eggs and larvae from settling in.
To monitor for lingering adults after cleaning, place pheromone-based traps near dried foods or pet food and check them weekly.
Empty Everything
Emptying the entire pantry is the one non-negotiable step in breaking a moth infestation, and it’s similarly the part that feels like a small, tedious betrayal of your own kitchen. Every box, bag, and jar must come out, no exceptions.
Once it’s all on the counter, the real work begins: sorting each item with ruthless suspicion. Here’s the hard truth: there’s nothing to discuss with a suspect package.
If it shows the faintest webbing, a single hole, or a clumpy grain, it’s gone. A futile inspection, like poking at a sealed cereal box hoping it’s fine, wastes time and risks re-infestation.
Check staples like flour, oats, and pasta first, but don’t skip pet food or birdseed. Everything questionable goes straight into a sealed trash bag, taken outside immediately.
For effective pantry pest control, treat this as your first line of defense against Indian meal moths and flour beetles. That’s it, no sentimentality, just survival.
Empty shelves make the next step, washing with soap and vinegar, actually work. For thorough moth removal, inspect every crevice and corner after you clear the space.
If you want to buy new storage containers afterward, look for airtight glass jars with rubber gaskets to block future infestations. Emptying now saves you from repeated fumigation costs later.
Wash All Surfaces
Wash every surface: shelves, walls, corners, even jar lids, using soapy water or white vinegar to break down grease and remove egg deposits. Avoid saturating unfinished wood, since moisture can warp it and create new hiding spots for pantry pests.
Don’t forget those sneaky crumb deposits under shelf paper, where pantry moth larvae often thrive. Rinse and dry thoroughly to eliminate any lingering soap film that could attract dust or new invaders.
This step kills eggs and removes the food supply for survivors, which is critical for effective pest control in your kitchen. Patience now saves you from repeating this whole circus later, and it’s a smart pantry cleaning solution worth every minute.
For lasting protection, consider sealing cracks with caulk and storing future dry goods in airtight containers after this deep clean. If you’re shopping for pest-proof storage bins or natural repellents, this wash-down is the ideal foundation before you invest, and using septic-safe enzyme cleaners in your drains during or after the cleaning can help prevent any nearby maggots or drain flies from thriving on residual organic waste.
Vacuum Every Crevice
Vacuuming every crevice is the second act in this pantry moth drama, and it demands a more thorough approach than a quick pass with the broom. The right vacuum technique means using a crevice tool, which slides into those hard to reach areas where larvae hide, like baseboard edges, cabinet hinges, and shelf brackets.
Don’t skip the gap between the stove and counter, or the corner behind a loose floorboard. A shop vac, costing around $50, works wonders for deep corners, whereas a dustbuster at $30 handles tight spots.
A HEPA filter is key for effective pest control, as it traps eggs and frass, or moth poop, without blowing them back into your home. Pull out all stored items first, then go corner by corner for a complete moth infestation treatment. For an added layer of defense, you can also dust a powder formula with a duster into those same crevices, as it dehydrates and kills any hidden larvae.
It’s tedious, but skipping this step is like sweeping crumbs under the rug, and moths love that rug. For best results, pair this with a pantry moth spray and sticky traps to eliminate any survivors.
How to Remove Moth Cocoon Spots From Walls and Ceilings
Moth cocoon spots on walls and ceilings look like small, brownish-gray lumps that stick stubbornly to painted surfaces. For effective pest control removal, start by scraping them off gently with a putty knife or an old credit card.
Go slow to avoid paint damage, then wipe the area with a damp sponge. For stubborn residue, a mild soap solution works well for wall cleaning, but test an inconspicuous spot first.
| Action | Tool | Tip |
|---|---|---|
| Scrape | Putty knife or credit card | Go slow to avoid paint damage |
| Wipe | Damp sponge with mild soap | Rinse sponge frequently |
| Spot treat | White vinegar solution | Kills any lingering eggs |
| Touch up | Small paintbrush and matching paint | Fixes any lifted paint flakes |
After scraping and wiping, check for leftover webbing or larvae because those little guys are sneaky. A final wipe with vinegar guarantees no eggs remain, which is a key step in your home pest control routine. For ongoing protection, consider applying a cedar oil spray that masks scent cues moths rely on to find fabrics.
Bottom line is gentle scraping plus thorough cleaning handles these spots without ruining your walls. For complete peace of mind, you can also use a pest control spray around baseboards and ceiling corners to prevent future infestations.
Best Food Storage Containers to Block Pantry Moths
First things first. You cannot rely on flimsy plastic bags or the packaging your dry goods came in to stop a determined pantry moth.
Container material is your first line of defense for moth prevention. Thick-walled glass or metal is the winner here for pest control.
Plastic works only if it is heavy duty, like 0.1 inch thick polypropylene, and seals with a gasket. For any grain type, such as rice, flour, oats, or cereal, choose a container with a screw top or clamp lid.
Larvae can wriggle through a loose snap on, so a tight seal is essential. A 2 quart glass jar costs around $8, while a 5 quart metal can runs $15.
Both block moths for years if you invest in quality storage. Avoid thin acrylic or Ziploc bags entirely.
They are just a chew toy for pests. For similar protection in your closet, opt for PEVA garment bags which are odorless, transparent, and provide dust and moth protection. The bottom line for effective moth proofing is to spend a few bucks upfront.
Save your sanity and your food with the right containers. Buy durable food storage containers to keep your pantry safe.
Why Freezing Kills Pantry Moth Eggs and Larvae
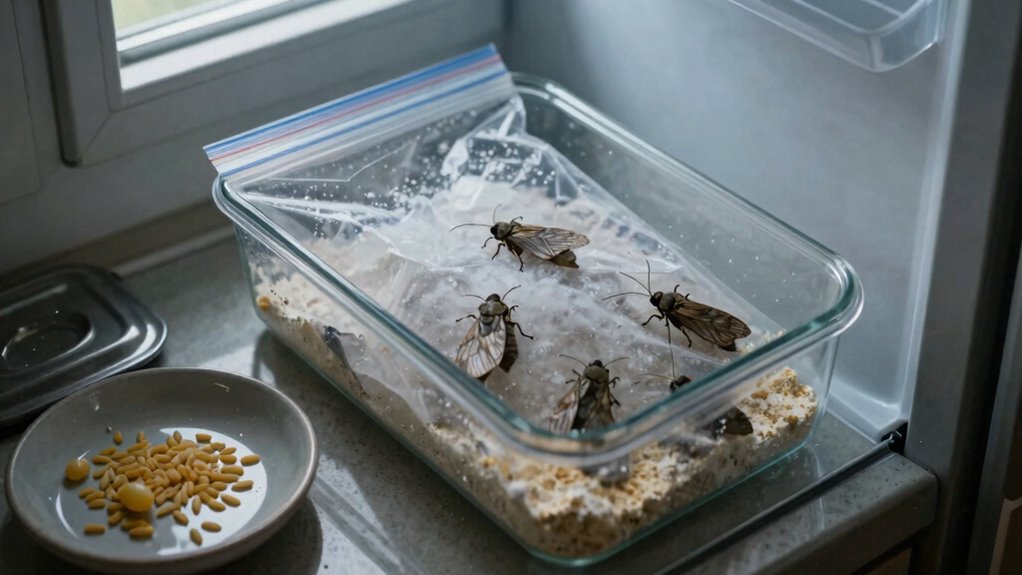
Freezing is a proven chemical free method to eliminate pantry moth eggs and larvae.
You need a steady temperature of zero degrees Fahrenheit for at least seven days.
This ensures every stage of the pest lifecycle is completely destroyed.
Always store your dry goods in sealed, airtight containers or heavy duty freezer bags before freezing.
This prevents moisture damage and stops cross contamination in your kitchen.
For reliable pest control, freezing offers a simple and effective solution to protect your stored food.
You can also use food-grade diatomaceous earth as a complementary non-toxic treatment for weevils and pantry pests.
Freezing Duration Needed
The freezer is your best tool for pantry moth elimination. A full week at zero degrees Fahrenheit kills eggs and larvae completely, even in dense grain bags.
Freezer space is limited, so focus on flour, nuts, and birdseed first. Freeze new purchases right after holiday baking sales when infestation risk peaks. Don’t try to cut the time short. Four days is not enough for deep packed food.
Use a freezer thermometer to check your actual temperature. Older units may not hold zero degrees reliably. Seal items in airtight bags before freezing. Store them in sealed containers after the seven day freeze.
One full week, no shortcuts. This method is simple, cheap, and keeps larvae out of your pancake mix. For an additional chemical-free safeguard, consider using non-toxic glue boards in your pantry to trap any stray adult moths.
Container Preparation Tips
A freezer is a brutal and effective weapon against pantry moth eggs and larvae, but it only works if you prepare the containers correctly. Those tiny eggs can survive if packaging leaks cold air.
Transfer suspect dry goods into thick-walled glass containers with airtight lids. Metal or sturdy plastic also works, but glass lets you spot webbing fast.
Larvae cannot chew through glass or squeeze past a properly sealed lid. For example, a 64-ounce mason jar costs about $12 for a set of six. Snap on the lids until you hear a pop.
Skip flimsy plastic bags, as moths can easily get through those. Freeze sealed containers for one week minimum for complete pest control.
Dead moths mean no drama in your kitchen. The bottom line is to invest in glass, seal tight, and trust the freeze. Durable, pest-resistant materials like rust-proof iron mesh or BPA-free plastic ensure similar long-term protection for produce storage.
How Pheromone Traps Monitor for Return Infestations?
Once you’ve cleaned and sealed everything, pheromone traps act like a silent early warning system for any returning moths, saving you from another full scale pantry panic. These sticky lures specifically target male moths, disrupting mating before eggs appear.
Since the adult moth lifespan is only a few weeks, and larval travel distance can stretch several feet to pupate, a single male caught means one less breeding cycle. Place one trap per cupboard, costing about $8 for a six pack, and this is a low cost pest prevention investment. Most traps use species-specific synthetic pheromones to attract only the correct target moth, ensuring effective monitoring.
Because adult moths live only weeks and larvae travel far, each male caught stops an entire breeding cycle.
Check them weekly; a sudden spike in captures means a new food source has been missed. Traps won’t kill larvae or eggs, but they give you an honest head count of the problem.
Think of them as a smoke alarm, not a fire extinguisher. Use them, trust them, but still inspect your sealed containers monthly.
For ongoing pantry pest control, pair these traps with regular sanitation checks and airtight storage upgrades. If you want to buy a reliable monitoring solution, these sticky lures are an essential part of your integrated pest management routine.
How Long Does It Really Take to Eliminate Pantry Moths?
Monitoring traps catch the males, but that doesn’t mean the pantry moths vanish overnight. Real elimination takes four to six weeks of consistent action after you remove infested food.
The life cycle demands patience: eggs hatch in days, larvae feed for weeks. You control the timeline through thoroughness with pest control strategies.
Ethical cleaning means discarding contaminated items properly, not just tossing them in the bin. Vacuum every crevice, wash shelves with vinegar, and seal all dry goods in glass or metal containers.
Those pheromone traps are a progress check, not a miracle cure for moth infestations. If you skip steps, moths will reappear, humbling your best efforts.
Stick with monthly inspections, and within two months you will see no flutter of wings. That is the honest timeline for complete elimination, no faster, no slower.
Year-Round Habits to Keep Pantry Moths Away
Why do so many people treat pantry moth prevention like a one-time event, only to find themselves hosting a sequel a few months later?
Since moths don’t take vacations, consistent inspection every single month is the only way to catch eggs before they become a platoon of larvae.
Grab a flashlight, check every box corner, and roll bag creases.
This five-minute habit saves a weekend of scrubbing.
Sealed storage is non-negotiable.
Transfer flour, cereal, and birdseed into thick glass or metal containers with tight lids.
Plastic bags are a buffet pass for those tiny chewers.
Freeze any suspicious new food for a week before it hits the shelf.
Bottom line: treat prevention like brushing your teeth.
It is boring, repetitive, and absolutely necessary if you want to avoid a moth reunion.
Frequently Asked Questions
Can Pantry Moths Infest Non-Food Items Like Spices or Tea?
Yes, pantry moths can absolutely infest spices and tea, not just grains. Their larvae have evolved to survive on dried herbs, seasonings, and even loose-leaf tea, making these items prime targets in your kitchen.
Tea contamination routes are sneaky, with eggs or larvae hiding in the folds of paper packaging or tucked between loose leaves, even in unopened boxes. Always check for webbing inside containers or tiny exit holes in bags before you brew or bake.
For a quick laugh to keep you sharp: “They’ll spice up your life, unfortunately, not in a good way.” But humor won’t stop an infestation, so you need a solid pest prevention strategy.
The smart move is to transfer all spices and teas into airtight glass jars with metal lids, which blocks moth entry and keeps your dry goods fresh. A quick inspection of every dry good you buy is your first line of defense against a pantry moth invasion.
If you spot signs of activity, act fast with targeted pantry pest control products, like pheromone traps or residual sprays designed for food storage areas. These tools help you catch adult moths and break the breeding cycle before it spreads.
For heavy infestations, consider fumigation services or professional pest management, but most homeowners succeed with proactive monitoring and sealing. Buy a few extra jars and traps now, because the cost of replacing contaminated spices and tea will far outweigh a simple prevention kit.
Do I Need to Throw Away Opened but Uninfested Packages as a Precaution?
No. Throwing away opened but uninfested packages is completely unnecessary and wastes money. Focus on smart inspection methods instead.
Check each item carefully for telltale webbing, small holes, or clumpy grains. Use proper storage tips like transferring all dry goods into glass or thick plastic containers with tight lids.
This simple step prevents any hidden eggs from spreading to your other food. Larvae can chew through flimsy bags but sealed containers stop them cold.
Save your money and toss only the clearly compromised stuff. Containerize the rest and you will stop a pantry pest problem before it starts.
For long term pest control, consider investing in airtight canisters designed for kitchen storage. These products are a smart purchase for anyone serious about pest prevention.
Are Pantry Moths Harmful to Pets if They Eat Infested Food?
Pantry moths are not directly harmful to pets if they eat infested food, but the real concern is egg ingestion.
While moth eggs are not toxic and will pass through digestion, the infested food often loses nutritional value.
This can lead to mild stomach upset in your dog or cat, which is never fun to clean up.
To keep your furry friend safe, always store dry pet food in airtight containers like glass or heavy plastic bins.
Using a pest control product like pantry moth traps can help you monitor for infestations early.
If you find heavily infested pet food, discard it immediately and clean your storage area thoroughly.
You can also buy sealed storage bins designed for pet food to prevent future issues.
It is not a crisis, but why risk a picky pup refusing their meal over stale kibble?
For complete peace of mind, combine airtight storage with regular pantry moth prevention sprays.
This keeps your home pest free and your pet’s food fresh and safe to eat.
Can Pantry Moths Survive in a Fridge or Freezer Long-Term?
Pantry moths can’t survive long term in a fridge or freezer. Their cold tolerance is very low, so freezing stops their development and kills eggs and larvae.
The life cycle normally lasts 25 to 275 days, but freezing halts it completely. A week at 0°F or below is enough to finish them off.
Adults die fast in cold temperatures, so don’t hesitate to use freezing as pest control. For reliable moth infestation treatment, freeze any questionable dry goods for a full week.
This is the cheapest, most effective method to get rid of pantry moths without chemicals. If you need ongoing prevention, consider investing in pantry moth traps or a dedicated pest control product for long term protection.
Should I Worry About Pantry Moths Laying Eggs in Clothing or Fabrics?
No, you don’t need to worry about pantry moths laying eggs in your favorite sweater. Pantry moths focus on food, not fabrics, because their larvae need grain based meals to survive.
Wool and cotton simply don’t cut it for these pests. However, minor fabric damage is possible through larval migration as they wander into clothes to pupate.
They may spin annoying webs on your garments, but they are not eating the material. Vacuuming your pantry shelves and sealing all dry goods solves this problem instantly.
The real threat is forgotten birdseed or old pet food, not your wardrobe. For total pest control, focus your home inspection on stored food areas rather than closets.
Bottom line: relax about your fabrics but double check the pantry. If you need pantry moth traps or monitoring solutions, look for products with pheromone lures that target Indian meal moths specifically.


