
Getting rid of ants in walls isn’t about spraying what you see—that only wipes out a fraction of the colony and can make things worse. In 2025, the smarter move is a targeted dust treatment that lets the workers carry the poison back to the nest.
This guide covers the best supplies for the job, key tips for applying them safely, and which products are actually worth your money. Whether you’re dealing with a minor trail or a full invasion, we’ve got the straightforward fix you need.
Keep reading for our top picks and what to skip.
At A Glance
- Use non-repellent dust like boric acid directly into wall voids for deep colony elimination.
- Liquid sprays fail because they only penetrate an inch and split colonies into satellites.
- Follow distinct ant trails back to hairline cracks to locate all entry points.
- Treat each separate trail independently, as multiple non-merging colonies may coexist.
- Apply thin, even dust puffs deep into the stud cavity for lasting control.
Where Are Ants in Walls Coming From?
Trace the trail backward and you will find the real story. Ants in walls almost always come from an exterior colony, not a spontaneous indoor birth.
Trace the trail to the source—the wall is just a highway from an outdoor colony, not their true home.
Their foraging behavior, those neat little lines on your counter, is a search for food and water. Wall voids are just a handy highway for them.
Many species like odorous house ants are nomadic. Colony relocation happens roughly every 21 days, so that nest you think you have might just be a temporary pit stop.
You are dealing with a moving target. Most of the workforce, about 90 percent, stays outside.
Spotting the entry crack, even a hairline one, is the first step in pest control. Do not just admire the trail.
Trace it back to the source to find where ants are coming from. That is the real battle for effective ant removal. Deploy slow-acting baits along the exterior trail so foragers carry the poison back to the nest, eliminating the colony at its source.
Why Spraying Won’t Get Rid of Wall Ants
Spraying ants in your walls is like trying to put out a kitchen fire with a squirt gun, it simply doesn’t reach the heart of the problem. Liquid sprays barely get past the first crack, so they kill a few foragers but leave the queen and her hidden colony completely untouched.
Worse, if that spray is a repellent type, it can actually split the colony into scattered splinter groups. These groups then set up satellite nests in other parts of your home, turning a minor annoyance into a full-blown infestation.
For real wall ant control, you need a baiting system that the foragers carry back to the nest. This targets the entire colony, including the queen, without scattering the ants. Boric acid powders offer a residual effect lasting for weeks when kept dry, making them ideal for targeting wall colonies.
If you want to stop ants returning, focus on sealing entry points and eliminating moisture sources near your walls. A professional pest inspection can identify hidden trails and recommend a long-term treatment plan.
Limited Wall Penetration
The wall void is an ant’s secret bunker, and a spray can only knocks on the front door. The spray hits drywall, coats the surface, and stops dead with physical penetration barely reaching an inch.
Surface tension makes liquid bead up and cling to whatever it touches instead of flowing deep into the colony. Here is what this means for your pest control treatment.
| Spray Limitation | Why It Fails |
|---|---|
| Dripping down voids | Liquid follows gravity, not the nest. |
| Soaking into insulation | Most product is wasted without reaching ants. |
| Evaporating quickly | Thin films dry in hours, losing residual effect. |
| Blocking access | Residue repels ants and scatters them away. |
Even though bifenthrin sprays provide a residual barrier for four to six weeks, they do nothing for ants hidden inside wall voids.
To achieve full colony elimination, you need a targeted insecticide that penetrates voids and reaches hidden nesting sites. A professional grade aerosol with a flexible straw or dust injection tool solves this penetration problem.
Colony Remains Untouched
A forgotten army, thousands strong, is thriving in your wall. Your spray bottle is a nuisance to the foragers, not a death sentence to the whole colony.
Here is the hard truth. The workers you see outside are just the visible tip, maybe ten percent of the total force.
Spraying kills those scouts, certainly. But the real problem sits deeper.
The queen, buried in the wall void, never meets your spray. Without queen disruption, the colony keeps producing workers, week after week.
It is like trimming a weed’s leaves whilst the root stays fat and happy. Some species might attempt a colony relocation if disturbed.
But that just means new ants, new walls, new headaches. A targeted ant dust, applied directly into the void, reaches the colony’s core. Instead of spraying, delayed-action baits are carried back by foraging ants, delivering poison to the queen and brood.
Spraying is a token gesture. The bottom line for effective pest control is to beat the queen, you must go where she lives.
Repellents Split Colonies
You know that sinking feeling when you think you’ve won, only to find ants in a brand new spot. That’s the classic repellent split.
Spraying visible workers kills a few foragers, but the active ingredient just scatters the rest. The colony doesn’t die; it fractures, pushing satellite nests deeper into your walls, under slabs, or into the attic.
Repellents create panic, not eradication. A proper colony detection method involves following the trail back to the void, not just blasting the visible line.
Once found, a slow-acting bait placement strategy is king. Foragers carry poison to the queen, killing the source.
Concrete specifics? A $15 gel bait works better than a $40 spray. Use dust for voids, but baits for split colonies. For structural pests like carpenter ants, professional-strength options such as TERRO Carpenter Ant spray can provide targeted, non-repellent residual effects on infested wood.
Bottom line: skip the spray, adopt the bait, or you’ll be playing whack-a-mole for months. A targeted ant control plan stops the splitting cycle for good.
Do You Have Multiple Colonies in Your Walls?
If you spot ants in two separate areas that never seem to connect, that is your first clue of multiple colonies inside your walls. Look for satellite nests, which form when a queen gets separated or a repellent spray splits a group.
Check for independent trails wandering in from different wall corners. Watch for winged reproductives showing up in spring, as these fliers are a dead giveaway.
Seeing a few winged ants means they only emerge to start new cities. You are not just hosting guests; you are running a whole subdivision in your drywall.
A professional ant control inspection can confirm these hidden colonies. For effective pest management, targeted baiting and sealing entry points are essential to stop recurring infestations. For lasting protection, bait options offer long-term control and suppression of re-infestation.
Signs of Multiple Colonies
One wall can host two, three, or even six separate ant colonies at the same time. None of them send a welcome basket, making effective ant control tricky.
Each colony has its own queen, and queen location varies per void. A colony lifespan can stretch for years if untreated.
Look for distinct trails that never merge, or reproductives emerging from separate cracks. That is a multi-colony condo requiring targeted pest extermination.
Treat one entry, and the other queen’s crew keeps partying. So count the trails, not the ants, for complete colony elimination.
Ignoring this doubles your bait bill and wastes time. Multiple queens mean multiple battle lines needing professional pest inspection.
Check each crack seriously, or you will be playing whack-a-mole with queens. For example, ants from two separate holes never share a meal, so watch their trails.
Yep, that is a sign of widespread infestation. That is a game nobody wins without thorough pest management. Using delayed-action poison can eliminate multiple colonies at once.
Satellite Nest Indicators
Trails that refuse to merge are the first clue. Separate ant lines that never join a single highway mean multiple colonies in your walls.
Each nest keeps its own path, and that is the big tell. Colony relocation happens often, especially for odorous house ants, who pack up and move every three weeks, leaving behind a satellite crew.
Rain driven invasions push them indoors, and they set up shop in drywall voids. They thrive in the insulation, so these satellites are not just strays.
They are a sign of a bigger network. You might spot trails at different hours or workers of varying sizes.
That is a giveaway for a widespread ant infestation. Check for winged reproductives near windows to confirm nesting activity.
Bottom line: do not treat just one trail. Dust each void separately with a non repellent dust like Alpine.
You will catch the whole family and stop them from relocating. For effective pest control, target every satellite nest in your walls. Consider applying boric acid-based powders for residual control that lasts months.
Tools You Need Before Dusting Wall Voids
Before dusting wall voids, you will need a few basic tools for a precise pest control job. A good hand duster, like a bulb or bellows type, costs about fifteen to twenty dollars.
Calibrating your duster is essential for accurate insecticide application. Weigh the output per five, ten, and twenty squeezes to know exactly how much product exits the tip. Product selection depends on particle size, as fine dusts drift better into wall voids. Fill a ten-ounce duster with about six ounces of powder to avoid clogging and ensure even flow.
Always check the label for flow and compatibility. You will also want a flashlight, an extension wand, and a small drill bit for creating new access holes.
A kitchen scale works fine for calibration, so skip fancy gadgets that overcomplicate things. Think of it like a cat in a bath, messy and unnecessary.
Your bottom line is to buy a reliable duster, calibrate it twice, and pick a dust that flows dry. That is your real ticket to a clean kill and effective pest elimination.
Repellent or Non-Repellent Dust for Wall Voids
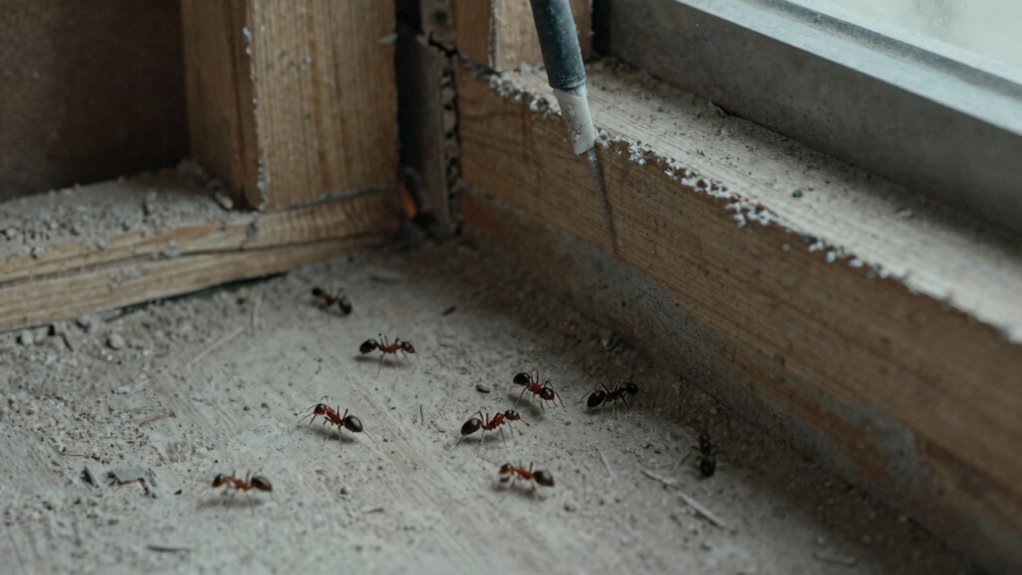
With the duster calibrated and ready, the next decision is which dust to load into it. For wall voids, skip the repellent stuff.
Repellent dust just makes ants split and find a new wall. Congrats, you have redecorated.
Non-repellent dust lets foragers carry the poison back. It kills the whole colony quietly.
That is the subtlety of active ingredients. They are undetectable, so ants walk right through.
For dust longevity comparison, non-repellents like boric acid or silica gel stay potent for months. Even in dusty voids, no joke.
For best results, use high-purity boric acid with 99% or higher active ingredient.
Repellents break down faster and just push ants around. Non-repellents are slower but thorough.
Repellents give quick scattering, not control. The bottom line is choose non-repellent for wall voids.
It is the difference between a fix and a party trick. Trust me on this pest control tip.
Dust Wall Voids the Right Way
Dusting a wall void correctly is all about placement, not just powder. A standard duster’s nozzle should slide deep into the void, aiming along the stud cavity and not at the opening.
Dust application works best when thin and even, like a light frost. Underapplying does nothing, while overapplying clumps and repels ants away from the kill zone.
For calibration, squeeze the bulb five times into a cup and weigh the output. Adjust until each squeeze delivers a consistent puff for effective pest control.
Standard dusters with a curved tip fit tight corners perfectly. Fully inserting the wand and then withdrawing slightly targets the void for complete ant treatment.
For the most effective coverage, the dusting technique should employ an extended straw to deliver powder deep into the tightest cracks and crevices where ants travel.
Bottom line: slow, measured puffs placed precisely beat a cloud of dust any day. Patience wins every time in your insecticide application.
Always use a fine layer to avoid clumping and ensure the spray reaches every crevice. This method maximizes your pest control results and keeps ants from avoiding the treated area.
When Baits Beat Dust for Wall Ants
Baits beat dust for wall ants when the true target is the hidden colony in the void. Dust tends to scatter foragers and split a colony into satellite nests.
But a slow-acting bait gets carried back to reach the queen and brood, the ones that safely decide the ant family. Kill the queen with a targeted bait treatment, and the whole colony collapses without you needing to poke holes in every wall.
This method saves time and avoids messy dust clouds in your living space. For effective ant control solutions, choose a gel or granular bait designed for wall voids. When applied correctly, bait products can eliminate the queen and the entire colony within 24 to 72 hours.
Always follow the label for safe pest management in your home. A single bait application often does the job where dust fails completely.
Targeting Hidden Colonies
When the goal is wiping out the entire wall colony, a well‑placed bait beats a puff of dust every time. Dust repels foragers, but bait gets carried deep into the void, poisoning the nest.
Rapid identification of the entry point is key. Check damp corners or utility gaps.
For seasonal prevention, bait early in spring before settling. Granular bait spreads in voids, gel bait sticks to surfaces, and liquid bait offers fast uptake.
Bait costs ten dollars a tube while a duster runs fifteen dollars. Place a pea‑sized dab near the trail. Once foragers carry the bait into the void, the Domino Effect spreads the toxin to the queen and the entire nest.
Within days, forager numbers drop. Dust just makes a barrier, scattering the colony.
Bottom line: skip the puff, grab a slow-acting gel, and let the workers do the delivery. That is just the lazy win and it works.
Reaching Queen And Brood
Every once in a while, the laziest tool in the pest-control cabinet turns out to be the smartest. That is exactly the case when the mission shifts to reaching the queen and brood inside a wall void.
Dusts scatter randomly, but baits get carried straight to the source. Foraging ants find the poison, bring it home, and hand-deliver it to the hidden brood chamber.
This bypasses the need for a traditional queen excluder, which is great since ants don’t respect those anyway. Precision targeting kills the reproductive core, not just a few scouts.
Zero drilling is needed, so there is no wall damage or messy dust clouds. Speed of transfer from food-sharing spreads the poison fast. This slow kill takes 24 to 36 hours, allowing the poison to spread through the colony for maximum elimination.
Colony collapse follows as the queen perishes, starved of new workers. Less disturbance avoids scattering ants that can cause nests to split.
The bottom line is simple. Swap the duster for a syringe of gel bait.
It is lazier, of course. But smarter, absolutely.
Avoiding Colony Splitting
Reaching the queen is only half the victory; the other half is avoiding a colony meltdown. Over-applying repellent dust sends workers scrambling, and each one can spawn a new nest.
That is colony splitting, a homeowner’s nightmare. Baits win here because they ride the ant colony lifecycle.
Poisoned syrup travels from forager to queen to brood over several days. Patience is required, but you get total eradication of even the deepest nest.
Pair that with moisture source elimination, like fixing a drippy pipe or caulking a weepy sill. You have removed the welcome mat for satellite queens.
A $12 gel bait outperforms a $20 dust canister. Dust just kills the visible ants, while bait kills the entire family tree.
So skip the scatter and adopt the slow burn. Dry out your walls and stop inviting new colonies.
Been there, done that. My basement still smells like regret.
Trust me, the dust route taught me that lesson the hard way. But no hard feelings, just a dry foundation and maybe a little more caulk.
Seal These Entry Points to Block Ants
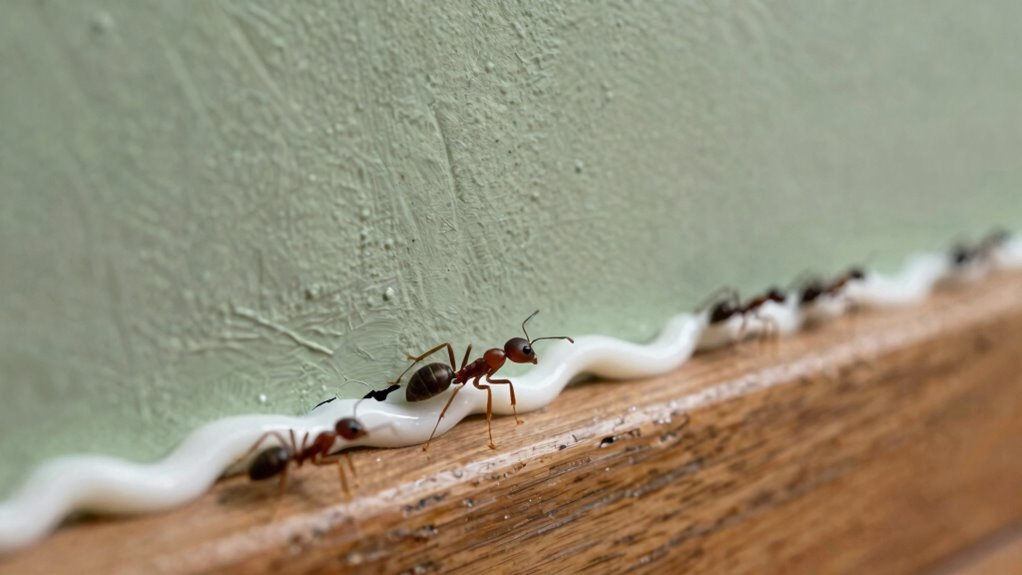
Persistence is key when sealing entry points, but only if the homeowner knows where to look. Ant trail mapping reveals the exact paths workers take through utility penetrations and garage corners.
Persistence seals entry points, but only after ant trail mapping reveals exact paths through utilities and garage corners.
Once traced, the real work begins. Wall void dusting handles the interior, and sealing stops the parade.
Here is what to seal. Foundation cracks: pack copper mesh, then caulk over it.
Utility pipe penetrations: use silicone or expanding foam. Garage door gaps: install a rubber threshold seal.
Window frames with light: apply exterior-grade caulk. Electrical conduit openings: dust first, then seal.
Silicone caulk runs five to ten bucks a tube. That is cheap insurance for ant control.
If it looks like a door for ants, it is one. The bottom line is seal everything, dust the voids, and watch the trails disappear.
Inspect Attic, Crawl Space, and Sill Plates
Sealing entry points stops the obvious parade, but ants have a nasty habit of already being inside. The places to catch them are the attic, crawl space, and sill plates.
Shine a flashlight along the sill plate, that wooden seam where your house meets the foundation. Look for damp rot or tiny dirt piles that signal pest activity.
In the attic, check for nests under insulation. In the crawl space, watch for mud trails left by carpenter ants.
To test block resistance, place a small, plain wood block like a 2×4 scrap near a suspected trail. If they gnaw at it, they are active and you have an infestation.
A moisture meter can give false positive detection when humidity is high. Do not panic at every reading.
Use a cheap $10 flashlight and a screwdriver to probe soft wood for hidden damage. Bottom line? If you spot frass, ant sawdust, you have found the hangout.
Perform this pest inspection before sealing everything up. It helps target ant control efforts effectively.
What Do Pest Pros Do About Ants in Walls?
A pro’s first move isn’t a spray can. It’s a flashlight and a calibrated duster.
Good pros know nuisance ant biology, so they scout first. The goal is never to kill the few you see; it’s to reach the hidden thousands.
They map tunnels, check dampness, and then dust wall voids with a careful hand. Fiber optic scopes spy colonies inside drywall gaps.
Calibrated dusters release exact, Instagram worthy puffs. Monitoring cards confirm which bait stations got hit.
Non repellent dust gets carried deeper to the queen. Inspection notes build a map for future callbacks.
That’s professional ant management: patient, measured, and a little nerdy. It skips the flashy spray can trick.
But the colony dies, all of it, at the root. That’s a quiet kind of satisfying.
Keep Ants Out of Walls Next Season
Once the last ant has been escorted out, the real work begins. Keeping next season’s colony from treating the walls like a timeshare requires stopping them before they check in.
Inter season monitoring done monthly with a flashlight and a screwdriver catches new cracks early. Remember that a hairline gap is a six lane highway to an ant.
Dampness control is non negotiable. Leaky pipes, damp sill plates, and clogged gutters are basically welcome mats for pest invasion.
Fix them and the colony moves elsewhere. The table below covers essential exclusion techniques and ant proofing steps for your home.
| Check | Fix |
|---|---|
| Foundation cracks | Seal with silicone caulk |
| Utility penetrations | Stuff copper mesh, then foam |
| Roof eaves | Trim branches touching siding |
| Crawl space vents | Confirm screens fit tight |
| Plumbing lines | Wipe condensation, repair drips |
That routine takes an hour. Do it in spring and fall and you will likely skip the whole drama.
Bottom line: a little effort now beats a fogger later. Trust a guy who has learned the hard way that proactive pest control saves money and stress.
Frequently Asked Questions
What Ant Species Normally Nests Inside Wall Cavities?
Carpenter ant identification is essential because they are the usual suspects for nesting inside wall cavities. Unlike soil nesting species that stay outdoors, carpenter ants travel through wood, joists, and structural timbers.
They don’t eat sawdust, they just excavate to create smooth tunnels for their colony. So if you spot dampness or fine wood shavings near windows, you likely have an active infestation.
A homeowner might notice them in dusty trails along baseboards or around electrical outlets. Soil nesting species won’t colonize inner studs, so carpenter ants are clearly the prime suspects.
Find the source of moisture, locate the nest, and treat the area with a professional grade insecticide. For effective pest control, use a foam spray or dust formulation that reaches deep into wall cavities.
Case closed. But verify: always recheck for new activity after treatment to ensure full elimination.
Does the Wall Colony Attract Other Pests Like Roaches?
Typically, not directly, but it’s a package deal. A thriving ant colony signals wall moisture, and that dampness is a roach magnet.
The same entry points serve both pests. Ants don’t call roaches, but they share the real estate.
Roaches love drips. That’s not a dinner invite.
Sealing gaps wider than ¼ inch and fixing leaks handles both. Bottom line: dry wall, seal cracks, and whole bug party moves out.
Can Wall Ants Allergic Residents Get Asthma Symptoms?
Yes, wall ants can trigger asthma symptoms in allergic residents. Their saliva and shed body parts act as asthma triggers, not just bites.
The humidity sources inside your walls attract dust mites and mold, doubling the respiratory problem. This creates a two for one allergy special, but not the fun kind.
The fix starts with professional ant control and moisture inspection. Seal entry points, dry out damp voids, and call a pro to eliminate the colony.
Bottom line is treat the ants to save your lungs. Contact a pest control expert for targeted treatments and prevention plans.
How Long Wall Nests Dying After Blocking All Wall Voids?
Blocking all wall voids doesn’t kill the nest instantly. The colony dehydration timeline typically spans one to three weeks.
Without access to humidity and food, workers die off first. But the queen may linger for a while longer.
The dead ant smell duration usually lasts two to four weeks after that. Consider it a fun little parting gift from the infestation.
Expect a slow, quiet famine, not a dramatic implosion. For faster results, dusting voids with a non repellent dust like Drione speeds up the process.
This professional grade treatment costs around $20 and targets the colony effectively. The bottom line is simple: practice patience, or call a pro with a scope.
Do Ants Need Water if They Already Living in the Wall?
Yes, ants absolutely need water even when they live inside walls. Wall humidity is their secret lifeline that keeps them thriving.
Vapor barriers, which are plastic sheets that stop dampness, are your best defense against an indoor ant invasion. If a wall stays completely dry, the colony will eventually pack up and leave.
But leaky pipes or condensation? That’s a free drink for ants, and they’ll multiply fast once they find it. So, always check for drips under sinks and around your AC lines.
Just seal those moisture spots with a high-quality silicone caulk, which costs about $5 per tube. Fix every leak to cut off their water supply, and you’ll see dry walls mean gone ants. Simple.


