
Getting rid of an ant colony starts with targeting the queen, not just the workers you see. In 2025, the most effective method is still a slow-acting bait that workers carry back to the nest. A simple peanut butter smear test helps you find their hidden trails before applying bait on a cool, dry evening. This guide covers the best supplies, helpful notes on different ant species, and what is actually worth buying for a quick fix. You’ll learn exactly how to break the colony cycle and keep your home ant-free.
Below is our roundup of the top ant control products for parents and shoppers who want simple, effective results.
At A Glance
- Identify the ant species to choose correct bait: sugar or protein.
- Locate the nest using a peanut butter smear test.
- Use slow-acting baits so workers carry poison to the queen.
- Rotate baits every few weeks to prevent bait shyness.
- Apply baits in cool, dry evenings for peak foraging activity.
Identify Whether You Have Fire or Argentine Ants
Your first step in ant control is a proper identification. The ant’s size and color are your two biggest clues.
Argentine ants measure 2 to 3 millimeters and are honey brown. They favor warm, dry spots and have a single, uniform node between body segments.
Little fire ants are tiny at 1.5 millimeters, roughly half a sesame seed. They are yellow red to light brown and move slowly.
Their subtle visual markings include a reddish tint, which is a giveaway. Get the ID wrong, and your baiting strategy fails completely.
Argentine ants crave sweets, so use sugar based baits. Fire ants go for protein and fats, requiring a different bait type.
Size up the worker ant carefully. If it is under 2 millimeters and reddish, you have little fire ants.
If it is a bit bigger and uniformly brown, it is Argentine. The bottom line is measure twice, bait once for effective pest control. For successful baiting, always apply during peak foraging times—early morning or late afternoon—when ants are most active.
Detect the Nest With a Peanut Butter Smear Test
Smear a dollop of peanut butter on a chopstick or stake every 10 to 12 paces around the suspected zone, which acts as a free, non-toxic ant bait for quick pest identification.
After 45 minutes, check which smears have the heaviest traffic, and that will reveal the ants’ pheromone trail leading straight to the nest entrance.
Mark those busy smears, then follow the line to common hideouts like potted plant bases, tree crotches, or cracks in concrete, and you’ve found the fortress without any guesswork.
This method is perfect for effective ant control services, especially when you want a do-it-yourself pest inspection before calling in professional exterminators.
The peanut butter scent attracts worker ants fast, so you can spot the colony’s main entry point for targeted nest removal.
Once you locate the entrance, apply a granular insecticide or bait station nearby to shut down the entire colony, not just the visible foragers. A borax bait is slow-acting, allowing workers to return to the colony before dying.
For long-term ant proofing, seal those cracks and keep organic matter away from plant bases, since moisture and food scraps are their favorite attractants.
This smear test also works great for termite detection pre-treatment, but remember to recheck the smears after rain or heavy watering, as moisture can wash away the signal.
If traffic is heavy on multiple sticks, trace the densest line back toward the soil line, where subterranean ants often build shallow tunnel systems.
Your peanut butter map gives you a clear, low-cost route to the nest, saving you from buying unnecessary ant traps or spraying blindly across your property.
Placement Every 10–12 Paces
One grabs a disposable chopstick, a dollop of peanut butter, and a sense of patience. Locating an ant colony starts with a surprisingly low-tech grid.
Space sticks ten to twelve paces apart, a stake spacing that sounds loose but works. This detection grid turns your yard into a buffet.
Lure intervals of three meters catch scouts before they regroup. Peanut butter bait coverage costs pennies, not pest-control bills.
Missed gaps mean hidden nests, so keep points consistent. Mark each stick with a pebble; wind erases memories.
The trick is patience. Ants walk, you wait.
Every smear is a tiny invitation, and the colony RSVPs fast. Place them, walk away, and resist fiddling.
Once the nest is found, large colonies require combined steps like sealing entry points or removing food sources.
Good spacing now saves you hours later. That is the final payoff.
Check After 45 Minutes
Patience is a quiet science, and the forty-five-minute mark is where it pays off. A thin smear of peanut butter you laid down earlier has done its job as a simple ant bait test.
Now for lure inspection. Kneel, squint, and count the busy workers to confirm pest activity and nest location.
A thick stream of ants means the nest is near—maybe under that paver or deep in a tree crotch. Mark the spot, but don’t disturb the colony for later ant control treatment.
An untouched smear is likewise pure gold. It tells you they are feeding elsewhere, saving you steps in your pest inspection.
You are reading their map without digging anywhere. This is cheap, low-tech, and quietly brilliant for targeted extermination. For longer-term prevention, follow up with residual barrier spray around entry points.
That costs you a spoonful of peanut butter and a few minutes of shade. Then you will know exactly where to focus your pest management efforts.
Patience here saves sweat later. Watch, wait, and strike smart with your removal plan.
Identify Nest Habitats
Usually, the quickest way to find an ant colony is the peanut butter smear test. A small dab of peanut butter on a wooden stick, set down every 10 to 12 paces around paving, plant bases, and foundation cracks, then checked at the 45 minute mark reveals the trail.
Nest habitats are predictable. The home foundation’s warm, dry soil is a favorite spot for ant colonies.
Electrical outlets often hide nests behind the plates. Ants love the heat from these areas, making them prime pest control targets.
Potted plants and tree crotches offer shelter and humidity. Cracks in concrete and paving stones make low effort homes for ant populations.
Once the trail points somewhere, inspect that spot gently. Poking blindly annoys ants, so check before wrecking anything.
If the smear test shows traffic near an outlet or foundation crack, bait it first. Applying a perimeter treatment can create a chemical barrier lasting up to six months. This targeted pest management approach stops colonies before they spread deeper into your home.
Kill the Queen With Slow-Acting Ant Baits
A slow-acting bait is the only weapon that actually reaches the queen ant. Worker ants carry the slow acting poison back to the nest, sharing it through trophallaxis, which is ant mouth-to-mouth feeding. Basically a tiny, deadly potluck. This process, fueled by active ingredients like abamectin, stops egg production and ensures total colony collapse.
This delayed kill is the secret to successful queen elimination. If the poison worked instantly, workers would die before sharing and the queen would simply replace them.
Why it works: The queen never leaves the nest, so she relies on this communal feeding. The catch: Patience is required.
You won’t see results for a few days, which feels like an eternity when ants are marching through your kitchen. The bottom line? Skip the spray, adopt the slow burn.
It is the only way to truly decapitate the colony and achieve lasting pest control results. Always choose an ant bait product formulated with a delayed toxin for effective colony eradication.
Apply Ant Bait in the Cool, Dry Evening
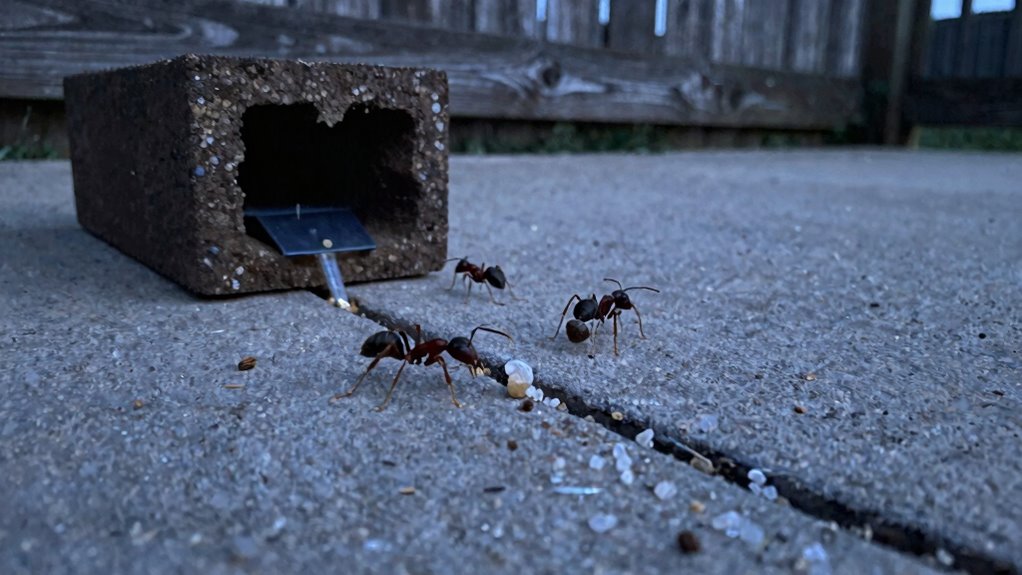
Cool, dry evenings are the perfect time to apply ant bait for the best results. The lower temperature and lack of dampness keep the poison fresh and effective longer.
Foraging ants are at their busiest during these hours. This means more workers will drag the bait back to the queen before dawn. The imidacloprid in the bait works through the Domino Effect, as ants share it with every member of the nest.
Skip the midday sun entirely. Heat and UV light break down the insecticide quickly, reducing its potency.
You want every bait station to work hard for you. That is why evening application is a key part of any ant control strategy.
Make sure the bait stays moist and attractive to the colony. A cool, dry evening gives you the best chance to eliminate the entire nest.
Cool, Dry Evenings
Timing matters more than the bait itself when the goal is ant colony elimination. A cool, dry evening is the ant’s happy hour for foraging.
Workers leave the nest in droves during twilight, but they are not desperate. They are simply efficient in their pest control routine.
The lack of humidity keeps the bait crumbly and fresh. It will not turn into a soggy mess that ants ignore.
Ants practice moisture avoidance, so they skip the dew entirely. They head straight for your tasty poison during this sweet spot. A dry evening ensures dry weather application is possible, as heavy rain or muddy ground can wash the bait away.
Ants move faster in cooler air, which improves bait pickup. Dry bait granules stay loose and do not clump together.
Moisture avoidance means ants skip puddles and wet spots. Slower acting poison gives workers time to share it with the colony.
Bottom line: pick a cool, dry night for your ant baiting strategy. You are handing the colony a death sentence with this method.
Reapply later to ensure complete colony elimination. Stay consistent with your pest control schedule for best results.
Optimal Bait Timing
When should ant bait go down, and why does the clock matter more than the poison?
The evening, hands down, is the best choice.
Cool, dry hours let bait stay fresh longer, while heat cooks it and dampness ruins it.
Sunlight breaks down active ingredients fast, killing potency within days.
Apply at dusk, when ants are foraging and the air is still.
Bait rotation keeps colonies honest, since ants get shy if they taste the same poison twice.
Switch products every few weeks to maintain ant control effectiveness.
Granular options like Advance 375A cost $15 per pound and cover 200 square feet.
Liquid baits work faster but dry out quicker, so timing your pest control application matters.
For maximum colony elimination, slow-acting baits give poison time to spread through the entire nest.
Do the math.
Evening application with rotated products is the way to hit the queen before she knows.
Bottom line: timing beats chemistry for successful ant baiting.
Avoid Midday Sun
The midday sun breaks down ant bait fast. UV rays degrade the active ingredients in just hours.
High humidity turns bait into a gummy mess or a dried brick. Ants themselves vanish to seek shade during peak heat.
Professional exterminators wait for dusk to apply treatments. Cool evening temperatures keep the bait fresh and moist.
No direct sunlight means the poison stays potent longer. Lower humidity prevents the bait from clumping or hardening.
Ant colonies are most active at sunset, so workers find the bait quickly. Using liquid baits at this hour can eliminate the whole colony within 24 hours. A night shift strategy costs no more than a simple headlamp.
Skip the noon sun and catch the evening shift. Your ant problem will never know what hit it.
Choose the Best Ant Bait for Your Species
Matching the bait to the ant species is the whole game. A bait that wipes out little fire ants will barely affect Argentine ants, like offering steak to a vegan.
For Argentine ants, fipronil-based baits work best to target their massive super colonies. Little fire ants respond well to granular options like Extinguish Plus because they are smaller and slower.
Use a peanut butter smear on a stick to identify your pest. Collect a sample for local agencies before choosing your ant control product.
Rotate between gel and granular baits every few weeks to prevent bait shyness. Pair this with barrier treatments around foundations to block new foragers from re entering. For indoor infestations, borax bait stations require no mixing and are simply placed along ant trails.
Never spray bait trails, as this can ruin your pest control efforts. Apply bait when it is cool and dry, and reapply every two to four weeks.
The bottom line is to match the bait to the bug for effective ant control. Rotating products keeps you ahead of persistent infestations.
Treat Stubborn Infestations With Advanced Baits
Even a perfect bait match can hit a stubborn wall. When ants ignore your first offering, it’s time to pull out advanced pest control tactics.
A slow acting poison, like fipronil, gives workers time to carry the dose back to the queen. But they only eat it if you rotate baits to break “shyness” every two weeks. Fipronil gels typically begin working within a day and achieve full eradication in two to three weeks.
Use gel baits for tight cracks and granular stations near trails for a bigger reach. Mix protein and sugar baits, as colonies switch cravings seasonally.
Check humidity levels, because wet bait spoils fast and leaves you with ants that just laugh at you. Switching brands monthly keeps the colony guessing and dying.
The verdict is that advanced baits work, but only with stubborn patience. Rotate, observe, and don’t give up on your ant control.
Repeat Ant Treatment Every 4–6 Weeks for a Year
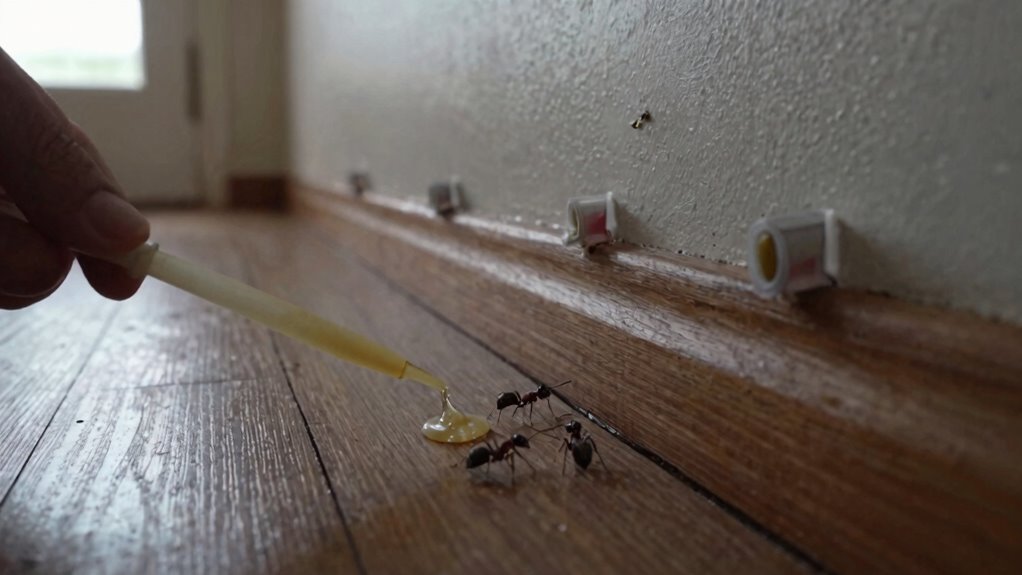
A single ant treatment often fails because the queen stays hidden deep in the nest. She keeps laying eggs, so one pass simply cannot solve the problem. That is why professionals recommend retreating every four to six weeks for a full year.
Bait rotation is essential because ants grow shy of the same product and stop eating it. Community cooperation also helps, especially with Argentine super-colonies that span several yards. If you neglect one pocket, the colony will quickly rebound.
Think of it like flossing: once is nice, but a routine works best. Each visit costs about one hundred and fifty dollars, so plan a budget near six hundred dollars. For a DIY approach, boric acid powder has a residual effect that lasts for weeks when kept dry, making it a cost-effective alternative to monthly professional visits. The bottom line is to stick to the schedule, switch your baits, and get neighbors on board.
Otherwise, the ant drama simply repeats every summer without end.
Inspect Plants and Materials for Hidden Ant Nests
How often do you actually flip a potted plant’s saucer, or run a finger along a kayak hull seam, hunting for a hidden city? That’s nest inspection, the quiet detective work of effective ant control.
A thorough scout checks every crack, crevice, and hollow before any treatment begins. Slide a flashlight under nursery pots, looking for soil piled at drainage holes.
Gently shake potted plants. A rain of debris or frantic ants signals activity.
Examine stacked firewood, lumber, and pavers for fine dust or trails. Probe kayak hulls, chair tubing, and garden tool handles with a wire.
Material quarantine isn’t just a buzzword, it’s the rule that keeps new colonies from riding in on your latest haul. Survey everything coming home to prevent an ant infestation.
Catching one nest early beats chasing a thousand later. The bottom line is inspect first, treat second. After locating the nests, residual dusts applied to cracks and crevices provide long-lasting control.
Quarantine Infested Items to Stop Ant Spreading
Uncovering a colony inside a new shipment of pavers or a favorite planter shifts the problem from detection to containment. Here is where a little discipline pays off against these invasive pests.
Isolate that item immediately at least ten feet from the house for two full days. That short wait interrupts the colony lifecycle, since workers lose the queen’s pheromone trail.
Ant behavior goes haywire, but no new scouts arrive. Confused workers mill around, they die off without a queen to feed.
Use a plastic bin or tarp to avoid ground contact. Here is the recommended quarantine schedule for common items.
| Item | Quarantine time |
|---|---|
| Potted plant | 48 hours |
| Paver stack | 72 hours |
| Garden soil bag | 24 hours |
| Outdoor furniture | 48 hours |
Check daily for stragglers. If none appear, the item is clear.
This trick stops ant spread without costly fumigation. For stubborn infestations, call a local exterminator for a targeted treatment plan.
Coordinate With Neighbors to Break up Super-Colonies
Pitting a single yard against a super-colony is like fighting a wildfire with a garden hose. Technically possible, but you will lose sleep over it.
Super-colonies of Argentine ants ignore property lines completely. No single homeowner can win this battle alone.
Neighbor communication is the only real ant control weapon you have. You need a block wide assault for effective Argentine ant extermination.
Start a group chat and get addresses, not just names. Coordinate bait schedules to maximize your pest management impact.
Create a community mapping system for nest sightings. Use a shared digital map to track ant crime across the neighborhood.
Synchronize your bait drops using fipronil based baits. Apply them within the same 48 hour window for reliable ant elimination.
Split costs fairly among participants. At $1,400 per hectare, dividing it six ways turns expensive ant treatment into a bargain.
The bottom line is you cannot outrun a super-colony. But you can out coordinate it by talking, mapping, and baiting together.
Know When to Call a Professional Exterminator
Even when a neighborhood coordination effort runs like clockwork, a homeowner occasionally hits a wall. That’s when a cost benefit analysis favors professional pest control.
DIY baiting costs $20 per station, but re-baiting every two weeks for six months gets ugly. Pros charge $150 to $300 per visit, identify the ant species, and use restricted chemicals with guaranteed results.
They check electrical outlets and foundation cracks, places you would miss. They also bring fipronil-based baits for Argentine ants and Extinguish Plus for little fire ants.
That $1,400 per hectare is cheaper than a blown fuse from a compromised outlet. A full year of professional treatment wipes out entire nests.
One dad joke: ants are great at hide and seek, but you are not. After three bait rotations and still seeing trails, call a pro.
It is a cost benefit analysis you win, exactly.
Frequently Asked Questions
Can I Use Natural Remedies Like Borax and Sugar?
Yes, borax and sugar works, but it’s a slow, careful game for ant control. Borax toxicity is the key because it’s a stomach poison, not a contact killer.
The sugar ratio matters: too little borax and ants ignore the bait. Too much borax and they die before sharing the mixture with the colony.
Use 1 part borax to 3 parts sugar with water for an effective homemade ant killer. Place small drops near ant trails and let the foraging ants take the bait back.
This natural ant remedy kills the queen eventually, so just give it time. Bottom line: it’s cheap, effective pest control that requires patience for long term ant elimination.
Are Ant Baits Safe Around Pets and Children?
Yes, ant baits are generally safe around pets and children when used correctly. The active ingredients are in tiny doses, far below levels that could harm kids or pups.
Smart placement is key for any pest control bait station. Put stations out of reach, like behind appliances or under cabinets where curious hands and paws can’t get them.
Most ant baits cost under $10, so it’s easy to buy a few for complete home coverage. A curious lick or sniff isn’t a big deal since the poison is slow acting and low concentration.
Always follow the label instructions and think like a toddler when positioning your baits. For the best ant control results, place baits along ant trails and near entry points like baseboards or windowsills.
Bottom line: ant baits are safe enough for households with kids and dogs, but hide them well. If you want worry free pest management, choose tamper resistant bait stations for extra security.
Why Do Ants Return After I Treat My Home?
Ants return because you treated the workers, not the nest. A colony is incredibly resilient, with queens hiding deep and producing new ants daily.
Pheromone trail decay takes weeks, so old scent paths keep inviting fresh foragers. That is why one application never solves the problem.
To get real ant control, reapply bait every 4 to 6 weeks and rotate your products. Survey your home by placing peanut butter stakes every 10 paces to monitor activity.
A one and done approach sounds nice, but that is not how professional pest control works. If you want a guaranteed outcome, budget around $1400 per hectare for a full treatment plan.
The bottom line is to outlast the ants, not outspray them. Plan for a full year of targeted baiting to break the reproduction cycle.
How Long Until the Ant Colony Is Eliminated?
The timeline for eliminating an ant colony depends on the size of the nest and the speed of your bait. Ant traps kill worker ants quickly, but the queen can take weeks to die.
A small nest can be cleared in two to three weeks with consistent baiting. For a super colony, you will need months of baiting and reapplication every two to four weeks.
UV light breaks down the poison, so you must refresh bait stations regularly for best results. Expect a two week lag after workers vanish, because that is when the queen starves.
Budget six to twelve weeks for complete colony control and recheck monthly. Remember, patience is cheap, but professional grade pesticides aren’t.
What Should I Do if I Cannot Find the Nest?
Don’t panic if you can’t find the nest. Instead, follow the ant trails, since those little highways always lead somewhere.
Watch them at dusk when they’re most active for the best results. Then set bait placements along those paths every 10 to 12 paces.
Granular bait works well for this, it’s like leaving takeout for the colony. The ants carry it back and kill the queen, solving your pest control problem.
Reapply every 2 to 4 weeks for ongoing ant control. You’ll win eventually with this simple strategy.
Bottom line: bait the trails, not the nest. This is the most effective ant treatment method for homeowners buying ant baits.


