
Getting rid of wasps in the attic doesn’t have to mean getting stung or calling an exterminator—if you know what you’re doing. The key is treating after sunset when they’re sluggish, wearing thick clothing, and having a clear escape route ready.
Spray the nest entrance first, then the nest itself with insecticide, and double-bag everything before scrubbing the area with soapy water to erase scent trails. Seal every pencil-width crack with caulk and mesh to block future invaders, but a nest bigger than a head? That’s when you call a pro for $100–$300.
This guide walks you through the exact steps, from spotting the nest to keeping wasps out for good. Keep reading to learn the simple checks and tools that stop them from coming back.
At A Glance
- Treat nests only after sunset when wasps are sluggish and less aggressive.
- Spray the nest entrance first, then directly target the nest with insecticide.
- Seal all pencil-width or larger gaps with silicone caulk or expanding foam.
- Install fine mesh screens over every vent opening to block re-entry.
- Call a professional for nests larger than a head or aggressive species like yellowjackets.
How to Spot Wasp Infestation in Your Attic Vents?

Several telltale signs point to a wasp infestation in your attic vents, and the most obvious one is hard to miss. A steady stream of wasps buzzing in and out during warmer hours, like a tiny, angry airport.
Faint, ominous buzzing from inside the attic confirms activity. Visible paper nests, often near vents, are a dead giveaway that you need professional pest control.
Faint, ominous buzzing from inside the attic confirms activity, signaling a need for professional pest control.
Dead wasps or body parts on the floor likewise signal a problem. This matters since wasp sting allergies can turn a simple sting into a serious, even life-threatening event.
Plus, seasonal nest decay attracts other pests, creating a secondary nuisance. So, spotting these signs early isn’t just about noise.
It is about avoiding a bigger, stingier headache later by scheduling a timely attic inspection and removal service.
Using eco-friendly, chemical-free repellents in attic vents can deter wasps without harming humans or pets.
Why Attic Wasps Are More Dangerous Than Outdoor Nests
Seeing those telltale signs in your attic vents means more than a weekend DIY project. It means you might be sharing your home with a very angry, very localized hazard.
Attic wasps are more dangerous than outdoor nests since they force a close encounter. Unlike an outdoor nest, which you can avoid, an attic nest gives you zero room for error.
One wrong step near the attic access, and you are suddenly face to face with a swarm that feels trapped. They will sting repeatedly to defend their home, and your home too.
Outdoor nests die with the first hard frost, but an attic is warm and dry. This makes a seasonal reinfestation likely if the queen finds a crack in your attic access.
She survives the winter and rebuilds right where she was comfortable. Using natural deterrent sprays with volatile oils like peppermint or cinnamon can provide a non-toxic option to discourage rebuilding, though reapplication is needed every few days. You do not just deal with one nest but battle the same spot year after year if you fail to seal every gap for pest control.
The verdict is that attic wasps are a repeat threat you cannot escape. They are not a temporary nuisance you can ignore and require professional removal to stop swarming hazards.
What Kind of Wasp Is Infesting Your Attic?
Before you suit up like a discount beekeeper, it pays to know who you’re evicting. In attics, you’re usually dealing with social wasps: yellowjackets or paper wasps that build paper nests in dry, hidden spots.
Before suiting up like a discount beekeeper, know who you’re evicting: yellowjackets or paper wasps.
Yellowjackets are yellow and black, often aggressive, and build nests in wall voids or vents. Paper wasps are longer, with dangling legs, and make open, umbrella shaped nests.
Species matters since it affects control strategy. Some wasps, like paper wasps, have a mild sting reaction due to low aggression, whereas yellowjackets trigger panic.
Wasp hibernation patterns likewise vary: only mated queens survive winter, so professional pest control in fall can prevent next year’s colony. A wrong guess means wasted effort or stings, which is why accurate identification is key for effective wasp removal.
For those dealing with a milder infestation, a reusable wasp trap with bait like honey or beer can be placed away from the attic entrance to catch foraging workers.
Bottom line: spot the nest type. Open comb means paper wasp, while an enclosed gray ball likely indicates yellowjackets.
Know your foe before you fight, and call a local exterminator for safe attic wasp treatment.
The Safest Time and Way to Treat an Attic Wasp Nest

Treating an attic wasp nest after sunset is the golden rule because wasps are sluggish and mostly inside their nest, making them easier to target safely.
DIY pest control enthusiasts should wear thick clothing, long sleeves, and a veil or hat while keeping a clear escape path open in case of angry stragglers.
The safest approach to wasp nest removal is a long-pole knock-down for small nests or a targeted aerosol spray from a distance.
Avoid any midnight swing with a broom, which can trigger an attack and ruin your pest management plans.
Using a spray with quick knockdown to prevent alarm pheromone release helps keep the situation from escalating during attic treatments.
Post-Sunset Treatment
Since wasps are diurnal, they do their pillaging and patrolling by day. Post-sunset treatment is your only safe window for taking on an attic nest.
By nightfall, the colony settles down and their activity drops to near zero. That’s when you, armed with a red‑filtered flashlight or night goggles for extra safety, move in.
Night goggles let you see without white light, which can stir up drowsy wasps. Ladder safety is critical here because one shaky step carrying a can of spray is a bad idea.
Secure that ladder on level ground and have a spotter if possible. Never overreach, as the goal is simple: treat the nest during their sluggish period.
This pest control strategy avoids their daylight defending phase. It’s a calm, low‑risk operation if done right. For outdoor prevention after treatment, consider hanging brightly colored traps with honey or wine to lure any surviving hornets away from entry points.
DIY Safety Precautions
Wear thick coveralls to prevent stings through thin fabric when handling wasp nests. Use a respirator mask to avoid inhaling insecticide mist during pest control work.
Keep a clear exit path for a quick escape if wasps stir during treatment. Bring a red‑lensed flashlight to preserve nighttime visibility without agitating the colony.
Have an antihistamine on hand to treat mild allergic reactions fast. Spray the entrance hole first, then target the nest itself with insecticide.
Double‑bag the nest afterward and seal the attic vent gap to prevent re‑entry. Suit up properly, move slowly, and never shine white light because that provokes stinging pests. For best results, apply insecticide at sunrise or sunset when insects are less active and to reduce wildlife contamination.
Seal Entry Points to Keep Wasps Out for Good
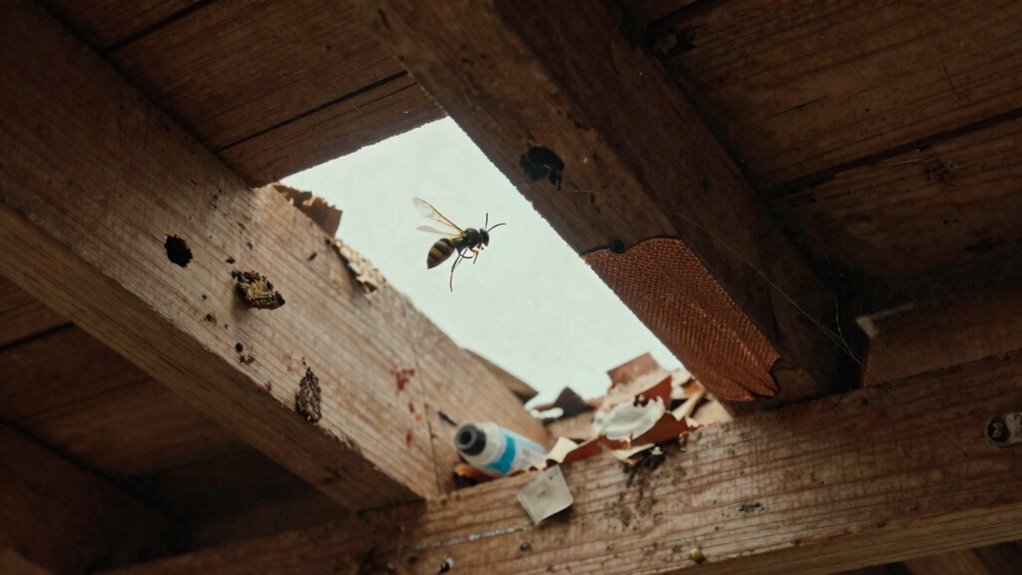
Sealing entry points is the real fix for wasp control, and it starts with a thorough inspection of the attic’s exterior. Look for gaps around vents, rooflines, and eaves to stop wasps from getting inside. Using brush seal strips with dense nylon bristles is an effective way to fill uneven gaps around attic access points and door frames. Screen all vent openings with fine mesh, like quarter-inch hardware cloth, to block pest access. Then caulk around every vent frame to seal potential wasp entry points. Close the doors, and the wasps have no welcome mat for their nest building. This simple pest proofing method keeps your home safe year after year.
Inspect and Seal Gaps
While the thrill of a wasp-free attic is undeniable, the real victory lies in keeping it that way by playing hide-and-seek with entry points.
Any gap, even a pencil-width crack, is a highway for nest relocation in spring or wasp hibernation in fall.
Armed with a flashlight and caulk, inspect the roofline, eaves, and where siding meets soffits for pest control vulnerabilities.
Use silicone-based caulk at about five dollars per tube for small gaps, and expanding foam for larger ones.
Patch holes with stainless steel wool before sealing to block future wasp entry completely.
One missed dime-sized gap invites a fresh colony to settle in your attic.
It is tedious work, but sealing now saves you from dealing with a buzzing, angry encore later.
For long term pest prevention, focus on these exclusion techniques before spring nesting season begins.
Screen All Vent Openings
Screen all vent openings to keep wasps out of your attic. Vents act like an open door and a welcome mat for pests.
Install rodent proof vent screens to block wasps and other insects. These heavy duty meshes cost around $10 per square foot and allow airflow.
Use solar powered vent fans for active attic ventilation. They pull hot air out and reduce humidity that attracts nesting pests.
A good solar fan costs between $80 and $150. It pays off with a cooler attic and fewer buzzing visitors.
Check each screen for tears or gaps every year. Even a quarter inch slit invites wasps and other pests into your home.
Screw the screens tight and flush against the frame. No exceptions for this simple but effective pest control measure.
Screened vents are your first real defense against attic pests. Skip them and you are running a wasp bed and breakfast for free.
For long-term exclusion, opt for rust-resistant stainless steel or pure copper mesh, which withstands damp conditions and prevents corrosion that could weaken your barrier over time.
Caulk Around Vent Frames
A dry, gap-free seal around every vent frame is a wasp’s worst enemy, so start by cleaning the frame surface thoroughly. Then apply a bead of non stick caulk, which won’t gum up tools and stays flexible.
For larger gaps, use foam expansion caulk; it fills voids and hardens into a solid barrier against wasp intrusion. This is a top choice for pest proofing vents where gaps exceed a quarter inch.
Silicone caulk bonds tightly to metal vent frames and resists UV damage, making it a durable solution for exterior pest control. Acrylic latex caulk works best on wood or vinyl, and it cleans up easily with water.
Butyl rubber caulk delivers superior adhesion in high moisture zones, so it’s ideal for vent frames near roofs or crawl spaces. Always fill every gap, including where the frame meets siding, because a single pinhole is a wasp highway. EPDM rubber seals maintain flexibility across extreme temperatures, preventing cracks that could reopen entry points for pests.
For a complete wasp barrier, pair caulk with fine mesh screening behind the vent cover. This two step approach stops both adult wasps and nesting queens before they settle.
Check for hidden cracks with a flashlight, and reapply caulk after heavy storms to maintain a tight seal. Seal tight, sleep tight, and keep your home wasp free all season long.
When You Should Call a Pro for Attic Wasp Removal
For many homeowners, the moment to call a professional arrives around the same time you realize that wasp nest is bigger than your head. That’s when frozen nest disposal sounds great in theory but becomes a nightmare in practice.
A pro knows how to bag and freeze it safely without getting swarmed, and they also handle live wasp removal with precision. A professional cost comparison often shows that DIY removal costs you time, risk, and possible hospital bills.
A typical pro visit runs $100 to $300, which beats an ER trip any day. They use proper gear, identify the species, and remove the nest without a single sting.
They handle large nests, hornets, or yellowjackets, and they have commercial insecticides and protective suits. They also guarantee no wasps escape into your living space, which is key for attic pest control.
Call a pro when the nest is bigger than a football or you’re allergic, especially if you need urgent wasp nest removal near me. It’s cheaper than regret, and it saves you from repeat infestations.
If you’re facing a wasp problem in insulation or near vents, a licensed exterminator will seal entry points after treatment. You get long term prevention, not just a quick fix, so your home stays safe all season. Most commercial sprays used by pros offer residual control that kills returning insects for days after the initial application.
How to Stop Wasps From Coming Back to Your Attic Vents
Stopping wasps from coming back to your attic vents is less about revenge and more about prevention. Think of it as locking the door after you have kicked the intruder out.
The key is breaking the seasonal colony cycle. Wasps do not reuse old nests, but a lingering scent can attract new queens in spring.
Breaking the seasonal colony cycle is key—wasps won’t reuse old nests, but scent can lure new queens in spring.
After removing the nest, scrub the vent area with soapy water or a vinegar solution. This erases those chemical trails that invite new wasps.
Then deploy natural deterrents like peppermint oil spray or a few sprigs of mint near the vent. Wasps hate the smell, so this is a safe DIY pest control method. These natural oil-based products can provide protection for 60 to 90 days in some conditions.
A small mesh screen sized to fit your vent cover physically blocks re-entry. Do not skip this cheap vent screen upgrade, it costs under ten dollars and takes five minutes.
Bottom line: clean, scent block, and screen. These three steps deliver a complete wasp prevention solution for your home.
Preventing Future Wasp Infestations in Attic Vents
Preventing wasps from turning your attic into a seasonal resort starts with understanding their behavior. Queens emerge in early spring, scouting for cracks to start nests, so sealing gaps is critical.
Use silicone caulk or expanding foam on every opening larger than a pencil eraser around attic vents. Install 1/8-inch mesh screening over all vent openings and staple it taut, checking for warps each year.
A simple chimney cap costs about $30 and blocks hornets from building inside flues. For persistent problem vents, try a vent cover with integrated insect screening, often sold in hardware stores for $15 to $20.
Inspect rooflines and eaves every April before nests establish. UV-stabilized polycarbonate is a weatherproof material used in bird spikes that can also withstand extreme attic temperatures when sealing gaps.
Routine caulking and mesh maintenance stops reinfestation cheaply.
Seal early, screen everything, and wasps will buzz elsewhere.
Frequently Asked Questions
Can Wasps Cause Structural Damage to My Attic?
Can Wasps Cause Structural Damage to My Attic?
Structural damage from wasps is unlikely, but their nesting habits can cause real headaches.
Wasps chew wood to build nests, which can scrape away surface layers. Think of it as cosmetic wear, not a load-bearing crisis.
Their chewing can lead to minor attic wood damage over time, especially on untreated beams. They won’t gnaw through joists, though.
The bigger issue is insulation disruption. Nests flatten and compress batts, reducing energy efficiency.
It’s irritating, not catastrophic. Yearly vent checks and sealing gaps beat patching holes later.
So inspect regularly if you want to avoid costly pest control services.
Bottom line: worry about stings and nests, not your roof collapsing.
For effective wasp prevention, look for professional pest control products like foam sprays or dust treatments.
Buyer intent phrases like “wasp nest removal” or “attic pest inspection” help you find the right solutions.
Will Vacuuming Wasps From the Attic Work Safely?
Vacuuming wasps from the attic sounds like a quick fix, but it is not a safe or effective pest control method. The vacuum hose can easily clog with angry wasps, and thin bags won’t stop them from stinging through.
Sudden swarms may escape the nozzle, putting you at serious risk of multiple stings. A shop vac might work for dead wasps, but tackling an active nest with one is a bad idea.
Professional wasp removal costs between 100 and 300 dollars and avoids this dangerous circus. Instead of winging it with a vacuum, hire a licensed exterminator who uses proper nest removal techniques.
For the safest results, search for “wasp nest removal near me” and choose a service that offers free inspections. Investing in expert pest control saves you from painful stings and ensures the infestation is fully cleared.
How Do I Find Where Wasps Are Entering From Inside?
Finding entry points from inside the attic is simple, provided you work at night.
Shine a flashlight with a red filter along the roofline, vents, and eaves, since wasps hate white light.
Look for gaps around pipes, wiring, or damaged screening.
Any tiny crack is a wasp highway and a key entry point for a wasp infestation.
These are the exact spots where pest control products like caulk or foam will block re entry.
Seal them with attic sealants to stop wasps from getting back inside during peak season.
Just don’t seal them when wasps are inside the attic, or you will have an angry, trapped colony.
That mistake turns a simple wasp control job into a dangerous removal project.
For the best pest control results, use a high quality expanding foam for large gaps and a silicone caulk for thin cracks.
This targeted approach is a smart purchase for homeowners seeking long term wasp prevention.
Are There Natural Repellents That Keep Wasps Away?
Natural repellents like peppermint oil and clove oil sprays can discourage wasps, but they require frequent reapplication to stay effective.
Apply a fresh DIY scent barrier around patios or eaves weekly for a temporary deterrent.
Birds and praying mantises are helpful natural predators, yet they won’t solve a wasp infestation inside your attic.
Think of these methods as quick fixes, not a permanent pest control solution.
For active nests, skip the essential oils and call a professional exterminator.
The reality is that scents only mask the problem, while exclusion and physical barriers truly seal the deal.
If you’re searching for the best wasp repellent for purchase, focus on products that combine residual insecticides with physical exclusion tactics.
Smart buyers know that long term pest control starts with sealing gaps and removing attractants.
What Should I Do if I Find a Nest in Winter?
A winter wasp nest in the attic is likely inactive, since colonies die off after the first freeze. Nest removal is safe to do yourself now, just knock it down with no sting risk.
A frozen nest can be bagged and tossed, but seal the entry point afterward. Otherwise, a new queen might move in come spring.
For reliable winter pest control, always inspect your attic for old nests. You can purchase a good sealant or foam to prevent future infestations.
If you find hornet or yellow jacket remnants, removal is straightforward when cold. However, for hard to reach spots, professional wasp nest removal services offer peace of mind.


