
Mice in walls usually mean they’ve found a structural opening, not just a noise problem. A single ¼-inch gap is all they need to enter, leaving greasy trails, droppings, and chewed wiring behind.
Sealing those gaps is the only permanent fix, and it’s cheaper than you’d think—copper wool and caulk or hydraulic cement can block most entry points. We’ll show you exactly where to look, what materials work best, and how to set traps that actually catch them.
No fluff, just practical steps you can use today to stop the scratching and keep them out for good. Keep reading to see how to seal every gap and track your progress.
At A Glance
- Seal all gaps larger than ¼ inch with copper wool and caulk.
- Set snap traps flush against walls, spaced six to eight feet apart.
- Remove clutter, crumbs, and pet food from wall cavities and basements.
- Monitor daily dropping counts and smudge trails to track activity.
- Hire a pest control professional for a thorough exclusion inspection.
Mice in Your Walls: A Sign of a Bigger Problem
Mice in your walls aren’t just a nuisance. They are a flashing neon sign that your home has a serious structural vulnerability.
These rodents leave greasy brown smudge trails called sebum marks along baseboards. This is proof of their regular commutes from nest to food.
A mouse’s body oil picks up dust and creates these dirty highways. You might spot tiny droppings or hear scratching at night.
The real headache is the damage behind the drywall. For a quick fix, plug small gaps with copper wool.
Unlike steel wool, it won’t rust or rot, and mice can’t chew through it. A roll costs about five bucks at a hardware store.
Just stuff it into cracks around pipes, vents, or wiring. It is a temporary patch, not a permanent solution.
As you are sealing things, that copper wool buys you time. It saves your walls from becoming rodent highways.
To stop a mouse infestation, find the gaps and plug them cheap. Call a pest control professional for a thorough exclusion inspection.
Bottom line: seal entry points now to prevent costly home damage. For a more robust, long-term rodent exclusion solution in damp or outdoor areas, choose rustproof materials like stainless steel wool or pure copper mesh. Act fast before the mess starts spreading.
Entry Points: How Small Is Too Small (¼ Inch or Larger)
A gap the width of a pencil eraser, just a quarter of an inch, is an open door to a mouse. Yes, that tiny. Mice are frustratingly flexible and squeeze through holes that seem impossible. Their nesting behavior means they find wall cavities, attics, or under kitchen cabinets irresistibly cozy. So every crack wider than ¼ inch invites them in, from foundation slits to utility entry points. For long term exclusion, sealing these holes is non-negotiable. Think of it as mouse-proofing your home. Any opening left is a welcome sign for rodent entry. Copper wool is a solid temporary plug, and it is rust-resistant unlike steel wool. But for permanent fixes, use metal or concrete where possible. Steel wool is a versatile barrier because its sharp fibers make gnawing impossible. Bottom line: measure every gap with a quarter. If a pencil fits, so does a mouse. Seal it with professional pest control products or expect unwanted housemates.
Seal Gaps Around Pipes, Vents, and Foundation Cracks
Every gap around a pipe or vent is a potential mouse superhighway straight into your walls. A mouse can squeeze through a hole the size of a dime, so sealing these routes demands serious hardware. Copper wool is ideal for temporary plugging, but concrete or metal patch kits around $10 to $15 per tube are best for permanent fixes. For a durable, weather-resistant seal around outdoor entry points, industrial-grade copper tape with a strong conductive adhesive can also block gaps and provide a non-toxic barrier against rodents.
To prevent missed entry points, consider long term rodent monitoring with a simple log. Record captures and rechecks every week to stay ahead of infestations. The table below clarifies common gaps and materials for effective pest exclusion.
| Gap Location | Material | Cost Estimate |
|---|---|---|
| Pipe gaps | Copper wool + caulk ($8) | $8 to $12 per opening |
| Vent edges | Metal mesh + screws ($15) | $15 to $25 per vent |
| Foundation cracks | Hydraulic cement ($12) | $12 to $20 per tube |
| Utility line holes | Expanding foam ($10) | $10 to $15 per can |
| Old entry points | Steel wool + silicone ($7) | $7 to $10 per patch |
Seal these gaps now, or you are just building a nicer tunnel system for your unwanted tenants. Bottom line: inspect, plug, and log for lasting rodent prevention.
Start With Sanitation and Habitat Removal
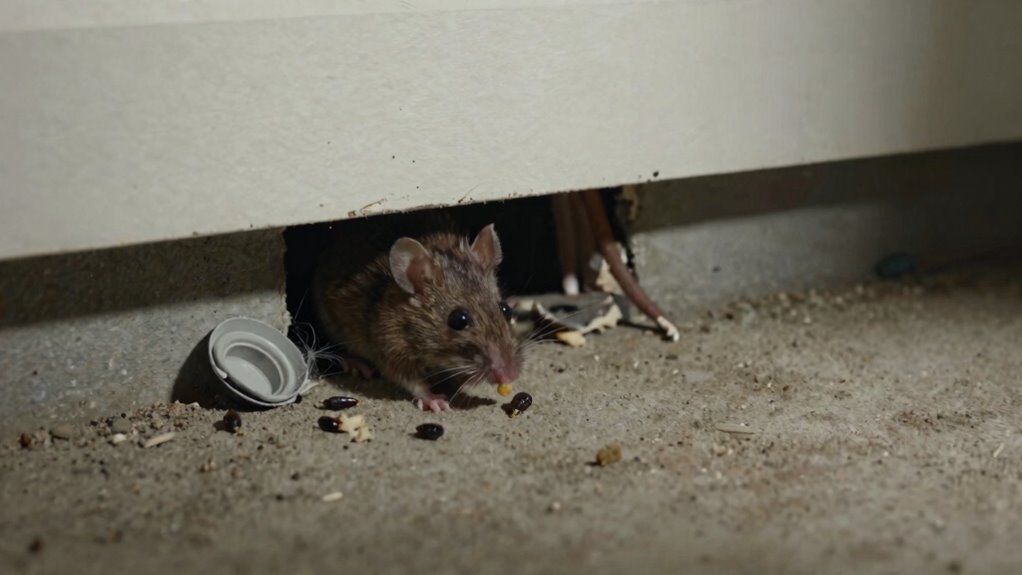
Sealing up the gaps is a solid start, but if your walls are stuffed with clutter and crumbs, the mice will just gnaw new holes through the drywall. Start by clearing out any stored boxes, old papers, or insulation scraps that serve as nesting spots.
Pull out that forgotten bag of dog food, too. It’s a buffet.
Wipe down surfaces and sweep up debris, removing the food and shelter that keep them thriving. If you spot a tiny gap, stuff it temporarily with copper wool. It’s tough for mice to chew through, unlike steel wool.
Then, seal it permanently with caulk or concrete. Remember, a clean wall cavity is an unappealing wall cavity.
No mess means no reason for mice to stay, simple as that. This rodent-proofing approach kills their food source and nesting habitat. For ongoing protection, you can also apply a natural peppermint oil spray to baseboards and entry points as a chemical-free deterrent.
Signs of Mice in Your Walls (Droppings, Smudges, Gnaw Marks)
Mice are messy creatures that leave clear signs behind. A single mouse produces 50 to 60 droppings every day, so a sudden pile indicates active infestation.
Look for oily brown smudge trails along your walls and baseboards. These grease marks reveal their regular travel paths from nests to food sources.
Gnaw marks on wood, plastic, or even electrical wiring are a major warning sign. If you need rodent control services, these clues help professionals target treatment spots quickly.
Inspect for droppings near pantry shelves and behind appliances. Calling an exterminator soon after noticing these signs can prevent costly damage and health risks. For eliminating active infestations, consider an indoor electronic rodent trap that delivers a high-voltage shock for quick, humane results.
Daily Dropping Counts
Many people search for the classic “droppings, smudges, gnaw marks” trio, but the real headline act is the daily dropping count. This metric is surprisingly precise for gauging active mouse presence.
Mice produce 50 to 60 droppings per day, so a pile of 30 suggests about half a day’s activity. That means you can estimate infestation size quickly without waiting for a pest control inspection.
| Daily Dropping Count | Mouse Presence | Action Needed |
|---|---|---|
| 0–5 | Likely old or passing | Monitor only |
| 6–20 | Low activity | Place canned baits |
| 21–50 | Moderate | Set traps, seal gaps |
| 50+ | Heavy infestation | Call a pro |
Nocturnal observations reveal fresh droppings each morning, which confirms active rodent travel paths. Canned baits work best when placed near these counts because mice revisit the same routes nightly.
A sudden jump from 10 to 40 droppings is not a mystery. It’s a clear sign of a rapidly growing rodent problem that needs immediate rodent control services.
For low counts, monitor for a few days to confirm old vs. fresh fecal matter. For moderate counts, set snap traps along walls and seal entry points to stop new mice from entering.
If you see 50 or more daily droppings, don’t attempt DIY removal alone. A professional exterminator can handle heavy infestation with targeted baiting and exclusion methods.
Start your daily count each morning before cleaning any mess. That gives you an accurate baseline for mouse activity and lets you track whether your pest management efforts are working.
Take action fast, because every day of delay means more droppings, more contamination, and more potential nesting sites. Count daily, adjust your strategy, and call a pro when the numbers don’t drop.
Oily Brown Smudge Trails
Daily dropping counts give you a clear number to work with, but they don’t tell you exactly where mice are squeezing in. That’s where oily brown smudge trails come in, those greasy dark marks along baseboards or wall corners.
Their origin is sebum, a natural oil from a mouse’s fur, mixed with dirt and urine. As mice brush against surfaces repeatedly, that residue builds up.
The travel path texture feels slightly greasy to the touch, not dusty like old dirt. I’ve mistaken these for decades-old stains, only to find a fresh mouse highway behind my fridge.
So follow those smudges to stop rodent infestations at the source. They reveal exact entry points and high-traffic routes for professional pest control.
A flashlight at a low angle makes them pop during a home inspection. Look for them near pipes or vents where mice often enter.
Don’t ignore them, they’re basically a rodent GPS for finding gaps to seal. For effective exclusion, trace these grease trails back to the hole and use copper mesh or caulk, then apply a long-lasting peppermint spray to mask the scent and repel rodents from re-entering.
Gnaw Marks on Wood
Inspect wood surfaces closely, second only to smudge trails as a directional clue.
Gnaw marks on baseboards or studs, paired with coarse sawdust, reveal active travel routes.
Each notch is a tooth highway sign, and fresh, pale wood means recent work.
High pest pressure, lots of mice, produces extensive gnawing, especially near food sources or entry points.
A solid management plan starts here. Seal any gap wider than a quarter inch.
Copper wool works for temporary plugs, but metal or concrete lasts for long term rodent exclusion.
Check corners near pipes and vents. Mice gnaw to enlarge openings.
Ignoring these marks lets the problem spread fast and attract more rodents.
Bottom line find the gnaw marks, fix the holes, and stop inviting the uninvited.
This is your first step in home pest control and preventing a full rodent infestation.
For a durable solution, apply wide copper tape with conductive adhesive to seal gaps and block entry points.
Best Traps and Baits for Mice in Walls (Where to Place Them)
Snap traps work best when placed flush against walls, since mice naturally scurry along edges. For effective coverage, set traps about six to eight feet apart for a mouse sized real estate strategy.
Prebaiting boosts your success rate by leaving traps unset with bait until the mouse takes it once. This simple pest control tactic saves you from the “empty trap, smug mouse” scenario.
Use peanut butter or bacon as high attraction baits to lure rodents out of their hiding spots. Position traps near baseboards and inside cabinets for the best results in wall infestations.
Varying bait like peanut butter one day and dried fruit the next prevents trap-shyness and keeps mice from learning to avoid traps.
Place Traps Along Walls
A mouse’s travel route is basically a tiny furry highway. Your job is to set up the tollbooths right next to it.
Mice run along walls using their whiskers for guidance. Traps must sit flush against the baseboard with the trigger facing the wall.
This forces them to step directly onto the mechanism. During cold weather, they stick to these paths seeking warmth and nesting materials like shredded paper or insulation.
Snap traps work best here. They cost about one dollar each and kill instantly.
Position them in dark corners near gaps behind appliances. Also place them along any sebum-marked smudge trail.
Avoid placing traps in open floor areas. Mice rarely cross them.
Stick to walls. Check traps daily and reset quickly.
It is simple: place the trap where the mouse walks, not where you would prefer it to go. For additional coverage, you can also use pesticide-free glue traps along the same wall pathways to capture mice that avoid snap traps.
Optimal Trap Spacing Distance
So how close should those traps actually be? A common rule is every six to eight feet along walls, never more than ten, to intercept mice quickly.
To increase trap count along known runways like inside a wall cavity, placing a trap every four feet isn’t overkill. Mice are skittish and may avoid a single trap, so tighter spacing helps.
A shorter interval likewise reduces the prebaiting duration needed. More opportunities mean quicker acceptance of the bait.
Consider this: one trap per ten feet might let a mouse slip past. Two per ten feet nearly guarantees a catch.
The goal is saturation without waste, aiming for dense coverage along droppings trails or smudge marks. For outdoor or hidden placements, choose weather-resistant construction to keep bait dry and effective. Start tight, then adjust based on what gets snapped.
Prebaiting for Better Results
For the wall dwelling mouse, the snap trap is a reliable workhorse but often needs a little persuasion. Prebaiting techniques, where traps are left baited but unset, build trust before the final strike.
This step drastically improves success in tricky spots like walls. Use small bait amounts at many stations to find what works best for rodent control.
Peanut butter dab works for 2 to 3 days along baseboards, placed 6 to 8 feet apart. A cotton ball soaked in vanilla works for 1 to 2 nights near gnaw marks or sebum smudges.
Nut or seed chunk works for 3 to 4 days in dark corners with 10 feet max spacing. Bacon bit or dried fruit works for 1 to 2 days at wall openings, flush against surfaces.
After prebaiting, set your traps and watch the catch rate climb. It is like training mice to trust your dinner invitation, making pest management far more effective.
Second-generation anticoagulants like difethialone can be placed in tamper-resistant stations along walls as a potent backup if traps fail.
Boost Success With Glue Boards and Prebaiting
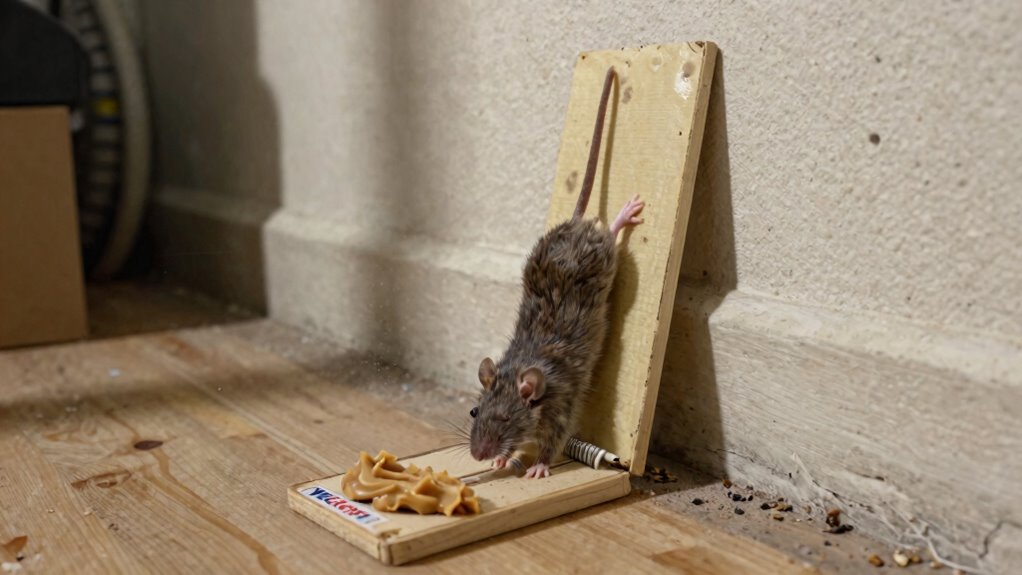
Glue boards and prebaiting are two underrated tricks that can turn a frustrating mouse hunt into a quiet victory.
Glue board placement matters most. Put them flush against walls, spaced 6 to 8 feet apart, along travel paths with droppings or smudge marks.
Tamper resistant stations like the Protector RTU, around $12 each, keep bait secure from kids and pets while allowing mice easy access.
Prebait these stations unset for a few days until mice take the bait confidently. Then set the boards.
This combo catches wary rodents that dodge snap traps. Don’t overload stations. A peanut sized dab of bait per spot works fine.
One home user saw five mice caught in two nights this way. For tough wall infestations, prebaiting plus glue boards delivers quiet, effective results.
Boric acid acts as a stomach poison ingested during grooming or feeding, making it a natural alternative for pest control in cracks and crevices.
Monitor Weekly to Keep Mice Out for Good
Once glue boards and prebaiting have thinned the herd, the next move is to keep them from coming back.
Start keeping weekly logs with a simple notebook or spreadsheet to track any new droppings, gnaw marks, or smudge trails.
This forces you to pay attention to their monitoring habits, not just the traps. Check your logs every seven days, especially near foundation cracks and pipe gaps.
If you spot fresh activity, seal those openings right away with copper wool or concrete. No point fixing something if you won’t check it again.
Mice can squeeze through a quarter inch gap, so don’t get lazy. Consistent weekly logs keep you ahead of their sneaky returns.
It is boring, certainly, but it beats finding a nest behind the fridge. Stay sharp, stay on schedule, and they will stay out.
For an extra layer of defense, consider placing peppermint oil pellets in mesh bags near these entry points to repel rodents naturally for up to 60 days.
Frequently Asked Questions
Can Mice Gnaw Through Copper Wool?
Mice can gnaw through copper wool, but it is much harder for them than steel wool. This makes copper wool a top choice for durable rodent exclusion and long term pest control.
Copper wool effectiveness is high because it does not rust, meaning it lasts longer in damp walls and crawl spaces. Steel wool, on the other hand, is cheaper at around $5 a roll but rusts and weakens over time.
Copper wool costs about $10 but stays tough like a wire scrubber that never gives up. For permanent sealing and professional grade rodent proofing, copper wool is the smarter investment.
Use copper wool for permanent sealing around pipes and foundation gaps. Steel wool works fine for quick, temporary fixes or short term pest control needs.
How Long Does It Take for Mice to Starve in Walls?
The survival duration for a mouse trapped in a wall is typically only three to five days. Without food or water, they dehydrate quickly, and the decomposition timeline begins soon after.
A mouse’s high metabolism works against it here, accelerating its decline. Expect a strong odor for about a week as the body breaks down.
Sealing those gaps with copper wool earlier would have saved you this fragrant adventure. Bottom line: act fast, or you’ll be dealing with a stinky science experiment.
Will Mice Leave if I Remove Their Food Source?
Removing a food source won’t necessarily evict mice. They’ll linger, scavenging crumbs or surviving on pet food, grease, or even cardboard.
Nesting behaviors without food still keep them around if shelter is warm and safe. So clear your kitchen, but seal entry points too.
Otherwise, you’ve just made them hungrier, not homeless. Trap them, block gaps, and don’t expect a clean exit from starving them out.
For effective rodent control, pair food removal with bait stations and snap traps. Buy the right pest control products to break the nesting cycle.
Sealing gaps with steel wool and caulk is a smart purchase for long term rodent proofing. Use exclusion as your first line of defense, not just sanitation.
Professional grade mouse traps and ultrasonic repellents can finish the job. Remember, you want them gone, not just hungry and annoyed.
How Do I Find a Dead Mouse Inside a Wall?
Finding a dead mouse inside a wall relies primarily on odor detection. That unmistakable, sickly sweet smell is the main clue, usually lasting a week or two.
For precision, a cheap heat sensing tool, like an infrared thermometer under $30, can pinpoint a cooler spot against the warmer wall. This indicates the carcass’s location right at the source of the smell.
It is not glamorous, but it cuts through guesswork. Bottom line: trust your nose, then a heat sensor to confirm where that dead rodent removal job needs to start.
If the stench lingers beyond a couple weeks, consider a professional pest control service. They use specialized rodent detection equipment to locate hidden carcasses without tearing into drywall.
Many homeowners buy infrared thermometers for this exact purpose. They are a practical, low cost option for effective dead mouse removal when you need to act fast.
Do Ultrasonic Repellents Work on Mice in Walls?
Ultrasonic repellents rarely work on mice in walls, so don’t waste your money on them.
The high-frequency sound they emit gets blocked and absorbed by drywall, wood, and insulation, which means the signal never reaches the rodents hiding inside your wall voids.
Think of it like shouting into a mattress: the sound barely travels in a straight line through solid barriers.
For a pest control device to work, the ultrasonic waves need a clear, open path to the mouse, but wall penetration is terrible for these gadgets.
A single ultrasonic unit costs $20 to $40 and covers maybe 200 square feet in open space, not inside studs or behind baseboards.
That’s a poor value for rodent control, especially when you’re guessing whether the mice even hear it.
For effective pest control solutions, skip ultrasonic gadgets and focus on proven methods like snap traps, glue boards, or electronic traps placed along wall edges.
Combine that with sealing entry points like gaps around pipes, vents, and foundation cracks to stop new mice from getting in.
This approach is cheaper, faster, and gives you visible results instead of uncertainty.
If you’re dealing with a rodent infestation, buying a quality trap and doing some home exclusion work will beat any ultrasonic repellent on the market.


