
A bed bug mattress encasement traps existing bugs inside and starves them—it’s a quarantine, not a poison. Choose one with a tensile strength above 75 PSI and breathability over 5000 MVTR (how fast dampness escapes); skip chemically treated covers.
Inspect seams and zippers before installing: bed bugs squeeze through gaps thinner than a credit card. Leave the encasement on for 18 full months since bed bugs can wait that long to feed.
Wash only every 3–6 months on cool and dry on high heat, skipping fabric softener. Keep reading to avoid three mistakes that ruin the whole effort.
At A Glance
- Inspect and scrub mattress seams before installing to remove hidden bed bugs and eggs.
- Choose a durable encasement with zipper stoppers and tensile strength over 75 PSI.
- Seal the encasement completely; check for gaps smaller than a credit card’s edge.
- Leave the encasement on for 18 months to starve trapped bed bugs completely.
- Wash only when soiled, on cold gentle cycle, then high heat for 30 minutes.
Why You Need a Mattress Encasement for Bed Bugs
If you have bed bugs, a mattress encasement is not a luxury. It is a non-negotiable tool for pest control.
These pests have a lengthy lifespan, surviving up to 18 months without feeding. Trapping them is critical to ending an infestation.
These pests can survive up to 18 months without feeding, so trapping them is critical.
An encasement cuts off their food source, forcing them to starve inside the sealed fabric. But don’t worry about sweating, modern encasement breathability uses a moisture vapor transmission rate above 5000 g/m²/24hrs.
This keeps air flowing while blocking bugs, think of it as a tiny, bug-proof tent for your mattress. Really, it is that simple for effective bed bug treatment.
It traps live bugs and eggs, stopping new bites immediately. It prevents hiding in seams and crevices where they thrive.
The encasement must stay on for 18 months to break the cycle completely. Without professional treatment, an encasement alone won’t solve everything.
Bed bugs hide in furniture too, but for your mattress it is your first and best defense. Get one with tight zippers and no gaps for maximum protection, and be sure to look for reinforced seams and a secure zipper flap to ensure the barrier holds.
You’ll sleep better knowing they are stuck and can’t reach you. This practical step is a key part of any integrated pest management plan.
How to Choose the Right Encasement for Your Mattress
Avoid non-woven materials. They tear easily and fail to protect your mattress.
Choose options with tensile strength above 75 lbs per square inch. This ensures durability against rips and bed bug escapes.
Skip “chemically treated” covers. They don’t kill bugs and may expose you to unnecessary toxins.
A quality encasement costs between $30 and $60. Spend the extra few dollars for reliable protection.
A torn cover makes your bed bug problem worse. It gives pests easy access and traps them inside.
Prioritize breathable fabric to prevent heat buildup. Your sleep comfort matters as much as bug defense. For instance, knitted polyester or cotton fabrics release heat better for comfortable sleep.
How to Inspect Your Bed for Bed Bugs Before Installation
A thorough pre inspection is your first line of defense and the part most people skip. Don’t be one of them.
A thorough pre-inspection is your first line of defense—don’t skip the step most people ignore.
Check for signs before you encase. The box spring inspection is critical for finding bed bug infestations.
Look along fabric edges and wooden frame cracks for dark spots or shed skins. Perform a mattress seam scrubbing with a stiff brush to dislodge hiding bugs and eggs.
Wipe up what falls with a damp paper towel. Seal everything in a plastic bag immediately.
Skipping this step means trapping bed bugs inside your new encasement. That defeats the purpose of pest control protection.
A proper visual check takes just ten minutes. It saves weeks of frustration and costly extermination treatments.
Inspect both mattress and box spring thoroughly. Do this before sealing anything up for effective prevention. For even better detection, consider using lure-based detection kits that mimic human scent to attract any hidden pests.
Step-by-Step Guide to Installing a Bed Bug Encasement
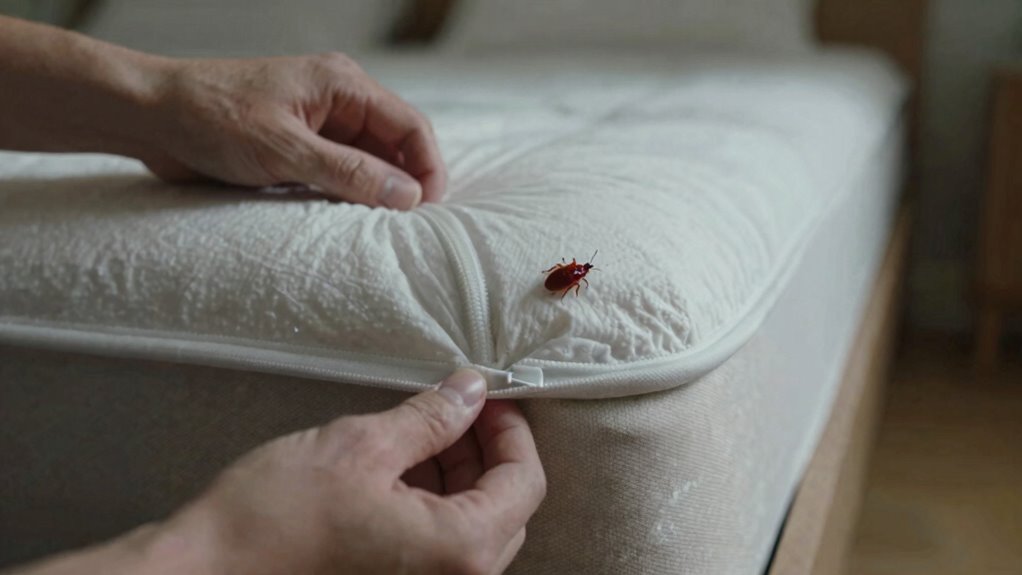
Installing a bed bug encasement is straightforward, but the two steps that actually matter happen before you zip and after you seal. A thorough pre-install inspection means hunting down every last bug and egg on the mattress surface.
Encasing live pests just turns your bed into a sealed buffet, so take your time with a flashlight and a stiff brush. For post-install care, check the cover monthly for any tears or holes.
Leave the encasement on for a full 18 months, because those hungry survivors inside won’t starve overnight. This long-term protection is key to complete bed bug elimination and mattress safety.
Regular mattress cover maintenance helps you spot damage early and avoid reinfestation. Stick with this routine to ensure your treatment plan stays effective. Sealed chambers contain pests during treatment, preventing escapes and messes.
Pre-Install Inspection
Before you zip up that bed bug prison, there’s a messy, tedious but critical step: pre-install inspection. This isn’t a quick glance; it’s a thorough hunt for every hidden nymph and egg.
The goal is trapping all bugs inside, not sealing them in with you, so treat this as your last line of defense against a reinfestation.
Scrub seams with a stiff brush to dislodge bugs and eggs hidden in stitching. Vacuum thoroughly after, paying attention to dust collection along the mattress edge.
Wipe up all debris with a damp paper towel and seal it in a plastic bag immediately. This prevents escapees from scuttling off into your carpet or baseboards.
Check pillow compatibility by confirming your pillows are likewise encased or don’t rest against raw mattress fabric. A single gap defeats the whole plan, so inspect zipper tracks and corner seams for any breach.
Once the mattress is clean and dry, the encasement slide begins. No shortcuts here; patience pays off with a truly sealed sleep surface.
For peace of mind, consider a professional heat treatment if you spot any live activity during this sweep.
Buyer-intent shoppers often ask about encasement durability, so verify the zipper lock and reinforced stitching before purchase.
Every crack and fold matters, so use a flashlight and magnifying glass on dark crevices.
Finish by running a sticky tape test along the mattress perimeter to catch any stragglers that survived your cleaning.
Your future bed bug free nights depend on this careful prep, so take your time and don’t rush the inspection.
Once the encasement is on, keep it zipped tight for a full year to starve out any remaining eggs that might hatch.
For egg-killing power, a steam temperature of 180°F is the minimum needed to ensure no hatchlings survive.
Post-Install Care
With the mattress now scrubbed and every bug sealed in a bag, it is time to move from the hunt to the wrap.
Post-installation care is where most people slip up, letting a tiny tear ruin months of work.
Check the zipper seal weekly to rule out escape gaps for bed bugs.
Wipe down the fabric monthly to spot early wear or damage.
Inspect the tear strength quarterly to prevent rips from sharp springs.
Ensure encasement breathability stays above 5000 MVTR to keep the sleep cool and avoid a sauna effect.
Replace the encasement every 18 months to maintain protection and avoid a second infestation.
Remember to inspect regularly, but do not obsess; let the encasement do the heavy lifting.
You can also apply diatomaceous earth in cracks and crevices around the bed frame for extra defense.
How to Fully Seal the Encasement and Block All Escape Points
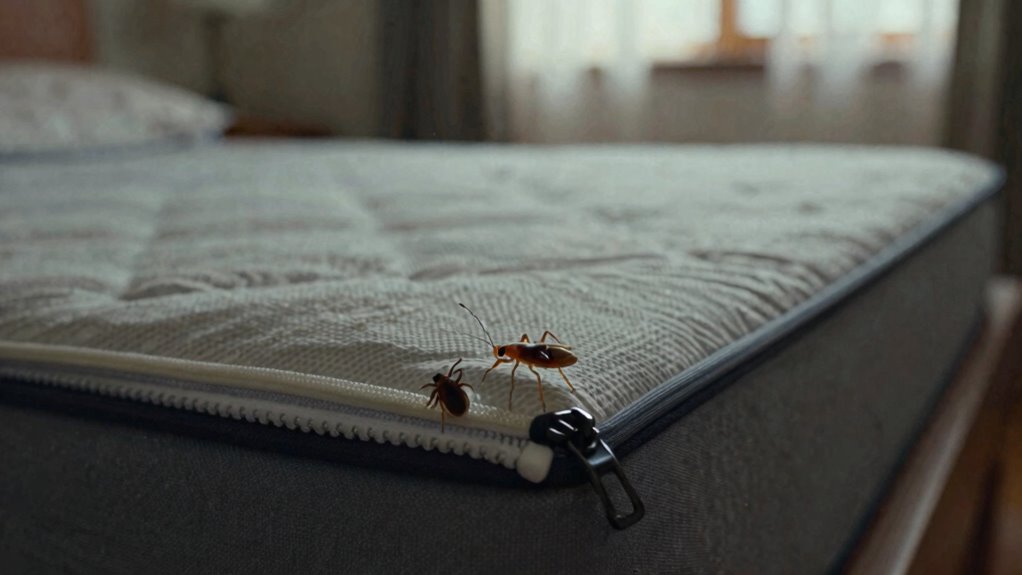
First, inspect the zipper seal along its entire length for any gaps, since even a tiny opening invites bed bug infestations.
Then, guarantee the end-stop is fully closed, pressing it down until it clicks or locks, a final satisfying snap for complete bed bug protection.
Finally, run a hand over the encasement to confirm no openings exist.
Double-check the corners and seams, as a successful seal means no escape routes remain.
This thorough inspection ensures your mattress encasement purchase provides total bed bug elimination.
For long-term pest control, perform this check monthly to maintain a secure barrier.
Consider applying a thin, barely visible layer of boric acid powder around the zipper seal to deter any bed bugs attempting to escape.
Zipper Seal Inspection
A zipper’s end-stop is the single most critical escape point in a bed bug encasement. Most people never give it a second thought until an infestation occurs.
This tiny gap, if imperfectly sealed, becomes a five-star hotel for bed bugs. Inspect that zipper like a hawk eyeing a field mouse to prevent pest entry.
Run a flashlight along every inch of the zipper track looking for frayed threads or fabric puckering. Check for gaps wider than a credit card’s edge because bed bugs can squeeze through 1/16 inch.
Zip the encasement completely and then slowly unzip it one inch. Listen for a click at the end stop because a silent zip means a loose seal.
After zipping, press on the encasement near the zipper to test the moisture barrier. If you feel air escaping, bugs can too and a proper seal feels like a vacuum pack.
A flawless zipper seal is your best defense for long term bed bug control. Ignore it and you are basically hosting a bug brunch inside your mattress protector. Using a laundry additive in your wash routine can help kill bed bugs on fabrics that come into contact with the infested area.
End-Stop Full Closure
The zipper’s end-stop is where the seal lives or dies, and a proper stopper forces the pull to click tightly with no gap left behind. That snug finish stops even a newborn bed bug from squeezing through, while a weak seal turns your mattress protector into just a fancy cover, not a real barrier. Check for a reinforced end stop, because cheap encasements often leave a half-inch gap that’s perfect for escape artists. A quality stopper adds about two dollars to the cost, but it blocks that gap completely and saves you from a repeat infestation. Press the pull flush against the stop and listen for the click, then run a fingernail along the seam. If you feel no gap, there’s no exit route, and this one-second check prevents an eighteen-month headache of bed bug treatment. For best results when buying a new encasement, ask for zipper end stops with a metal or thick plastic core, not a flimsy crimp. A durable end stop also survives repeated washing, which matters for long-term allergen control and pest prevention. Bottom line: don’t skip the end stop, because a weak seal here makes the whole product useless for bed bug proofing. A firm click means you’re buying a genuine barrier, not just a mattress cover with a zipper attached. Consider adding passive interceptor traps under furniture legs for comprehensive protection, as these devices use a textured surface to lure bugs in while preventing escape.
No Openings Check
Check corner seams for puckering. A loose stitch creates a microscopic doorway that bed bugs can easily detect.
Tug gently on the encasement fabric around zipper tracks. Cheap models stretch, leaving gaps a pencil eraser could slip through.
Inspect fold lines from packaging. Stubborn creases can hold open tiny gaps and defeat the seal’s purpose.
If there is any bunching, smooth it flat. A snug, gap-free fit is not optional; it is the barrier’s entire job. For ongoing protection, place pesticide-free interceptor traps under furniture legs to monitor for any escaped bugs.
When and How to Wash Your Bed Bug Encasement
Wash your bed bug encasement only when truly needed, like after a spill or visible dirt. This is not a weekly chore; over washing wears out the fabric and zipper seal.
For the wash cycle, use cold water on gentle setting. This protects the mattress protector and keeps the bed bug barrier strong.
The dryer heat is the critical step for pest elimination. Set your dryer to high heat, at least 120°F (49°C) for 30 minutes, to kill any lingering bed bugs.
Skip fabric softener completely; it clogs the material’s breathability. A good rule is to wash only every 3 to 6 months maximum, and only when soiled.
Air drying is not an option; heat is non negotiable for bug eradication. A clean encasement is useless if bed bugs survive the wash, so never skimp on the dryer heat.
Think of it this way: delicate washing plus high heat drying preserves your bed bug protection. Over cleaning invites failure, but natural plant-based sprays can provide an additional protective barrier for travel.
Why You Must Keep the Encasement On for 18 Months
You have to leave that encasement on for at least 18 months. It’s not a suggestion; it’s bed bug biology.
Those little vampires can enter a dormant state, surviving without a blood meal for up to 18 months. Rip the cover off early, and you’re inviting a reunion.
Those little vampires can hibernate for 18 months—rip the cover off early, and you’re inviting a reunion.
This isn’t long term storage for your mattress; it’s a siege. The trapped bugs starve inside, but only if you hold the line.
Feeding cycles slow down dramatically at cooler temps, stretching survival time. Eggs can take weeks to hatch, and late bloomers need extra waiting.
Bugs hiding in seams die slowly, needing the full duration. Set a calendar reminder, not a guess.
Your patience is the cheapest pesticide for bed bug control. For best results, use a quality mattress encasement to trap them.
Stick with the 18 month timeline to ensure complete eradication. This is a key step in your bed bug treatment plan.
Common Mistakes That Ruin Your Bed Bug Encasement
Three common mistakes turn a good bed bug encasement plan into a feeding ground for these pests.
First, installing the encasement after treatment begins covers treated surfaces and traps bugs alive, leading to encasement failure.
Second, removing it too early, before 18 months, releases dormant survivors and creates major trapping issues.
Third, buying cheap encasements with weak zippers or non bite proof fabric lets tiny nymphs escape through tears or gaps.
To avoid these errors install encasements before any pest control treatment starts.
Keep them sealed for the full 18 months with no exceptions.
Choose encasements with tight zippers and tear strength above 8 lbs per square inch.
Do it right or you will just be feeding the bed bugs instead of eliminating them.
Using imidacloprid or other lawn chemicals incorrectly can also lead to pest survival if not applied according to the product’s timing and coverage guidelines.
Frequently Asked Questions
Can a Bed Bug Survive Inside an Encasement?
Yes, a bed bug can survive inside an encasement, but only under very specific conditions. The airtight seal cuts off their access to human blood, which creates a major feeding constraint.
However, their survival duration can stretch up to 18 months without a meal, so patience is key. Trapped bugs will eventually starve, but they won’t die quickly.
A quality bed bug encasement traps them indefinitely, but don’t rip it off early. You must wait out the full timeframe to ensure all bed bugs are dead.
For serious infestations, still pair the encasement with professional pest control treatment. Encasements alone won’t solve everything, especially if you need a total bed bug elimination strategy.
If you are looking for a bed bug proof mattress cover, choose one with a zipper lock and thick fabric. This is a smart purchase for long term bed bug prevention and protection.
Should I Treat My Mattress Before Putting on an Encasement?
Yes, treating your mattress before encasing is a smart move for bed bug control. But you have to do it the right way to maximize your pest prevention efforts.
Use a vacuum attachment to suck up loose bugs and eggs from the surface. Then scrub the seams with a stiff brush to dislodge hidden bed bugs before sealing.
This physical pest removal step boosts the encasement’s barrier effectiveness. Avoid chemical sprays because they can degrade the encasement fabric and shorten its lifespan.
Instead, let the mattress encasement starve any survivors that remain inside. The real trick for complete bed bug eradication is keeping the encasement sealed for 18 months.
If you open it too soon, you risk releasing dormant hitchhikers back into your home. Bottom line: prep physically, skip pesticides, and let the zipper do the dirty work for long lasting protection.
Will an Encasement Trap Smells or Odors From Dead Bugs?
Encasements do trap some odor from dead bug decomposition, but the smell is usually faint and fades within a few weeks.
Dead pests break down slowly, releasing compounds that linger in the fabric.
The odor absorption timeframe depends on room ventilation and how many bugs were inside.
Expect a mild, musty scent at first after sealing them in.
You can wash the mattress encasement only if needed, per care tags.
Bottom line is this is not a dealbreaker for bed bug control.
Just keep the encasement fully zipped and air out the room regularly.
For effective pest management, this simple step helps you sleep easier.
How Do I Inspect Under an Encasement Without Removing It?
They cannot inspect under an encasement without breaking the seal, so visual confirmation of gaps stays hidden. Instead, run a flashlight along the zipper track, feeling the fabric’s surface for bumps or tears. That is your cheat code for spotting bed bug damage without violating the barrier.
Look for ripples hinting at bugs trapped beneath, but do not unzip the cover. Encasement inspection is a surface game, not a peek a boo one. If you suspect a tear or a bed bug bite through the material, patch it, do not open it.
That seal is your only shield against re infestation and future pest control headaches. For buyers searching for “how to check mattress encasement without removing,” this method saves time and money on replacement. Trust the zipper track test as a pro level trick for ongoing bed bug prevention.
Can I Use a Mattress Encasement if I Already Have a Mattress Topper?
Yes, you can use a mattress encasement if you already have a mattress topper, but the setup must be done correctly. The topper needs to go under the encasement, not on top, to maintain a proper bug proof seal.
If you place the topper on top of the encasement, the fit will fail, creating gaps that allow bed bugs to enter. For complete pest control protection, encase both your mattress and box spring while sealing the topper inside the encasement.
Keep in mind that if your topper is too thick, the encasement zipper may not close fully, which defeats its purpose. In that case, consider a better solution: temporarily remove the topper or buy a larger encasement that can accommodate the extra thickness.
The bottom line is to always keep your mattress topper inside the encasement to avoid creating a bug highway. This approach ensures your mattress encasement effectively blocks bed bugs, dust mites, and other allergens while extending your mattress lifespan.


