
Dealing with carpenter ants in your wood trim or beams is more about moisture control than ant warfare. These ants don’t eat wood, they just carve out nests in damp, rotting timber.
Before you drill anything, confirm you aren’t facing termites—ants have pinched waists and bent antennae. A simple moisture meter can flag trouble zones, and fixing leaks is your first real win.
This guide covers how to find nests, treat cavities, and stop colonies from coming back. Keep reading for the tools and steps that actually work.
At A Glance
- Locate and directly inject insecticide into visible nest cavities.
- Drill a ¼-inch hole for wall void foam or dust treatment.
- Fix moisture issues above 15% to prevent ant attraction.
- Vacuum ants and debris from walls, then empty canister far from house.
- Reapply perimeter barrier spray every four to six weeks or after rain.
Tell Carpenter Ants Apart From Termites
How do you tell a carpenter ant from a termite without a biology degree? Look at the waist and wings. For termite comparison, carpenter ants have a pinched, narrow waist, whereas termites have a thick, straight body.
Visual identification is straightforward: ants have bent, elbow-like antennae. Termites have straight, bead-like ones. Carpenter ants are larger, up to half an inch, with dark bodies and two pairs of unequal-length wings. To confirm your suspicions, targeted products like a gel bait can be applied near trails to eliminate the colony at its source.
Termites are pale, soft-bodied, and shed wings in pairs. If you see sawdust, that is carpenter ant frass, signaling ant damage. Termites leave mud tubes along foundations or wood.
A simple rule: ants look like they work out. Termites look like pale, flimsy cousins. Bottom line: check the waist and antennae first, no biology degree needed, just good eyes.
A professional pest control inspection can confirm an infestation quickly. Call a local exterminator for wood-destroying insect treatment.
Where Carpenter Ants Hide Inside Your Home
Carpenter ants, those six-legged homewreckers, don’t just crash anywhere. They pick damp, hidden spots that feel like a spa.
Carpenter ants don’t crash anywhere. They pick damp, hidden spots that feel like a spa.
Focus your home pest inspection on moisture-damaged wood around leaks. Check near bathtubs, dishwashers, and skylights first.
Wall voids are prime real estate behind walls. These hollow spaces are especially tempting near pipes that sweat.
Hollow doors with cardboard interiors offer cozy, easy to excavate hideouts. They are lightweight and often overlooked.
Eaves and soffits with leaky roofs create damp wood. This is a perfect spot for nesting colonies to thrive.
Chimney flashing can let water seep in and rot the wood. This attracts ants, and you might spot winged ants swarming inside.
For termite identification, look for mud tubes and kicked off wings. Carpenter ants leave sawdust piles instead.
Unlike these pests, if you have Japanese beetle grubs in your lawn, a targeted treatment like milky spore can provide safe, long-lasting control for up to 20 years.
Schedule a professional inspection if you see any of these signs. Early pest control treatment saves your home from major damage.
Track the Trail Back to the Outdoor Nest
Track the ants after dark using a flashlight. Watch where they disappear outdoors near your home.
You will see patterns around tree bases, stumps, or landscaping timber. For effective pest control, focus on these key locations.
Ants moving up and down tree trunks. Check hardwood trees over six inches in diameter.
Sawdust piles at the base of trees. Look near dead or damaged trees for these signs.
Ants entering cracks in the ground. Search along foundation edges or walkways for the nest entrance.
This trace leads directly to the outdoor nest. Do not skip this step for a successful ant extermination.
Spraying indoors alone wastes your effort and time. Find that source to stop the infestation for good.
Once you find the nest, you can protect nearby plants using ultra-fine mesh netting to block any other pests from entering the area.
Treat Outdoor Carpenter Ant Nests for Good
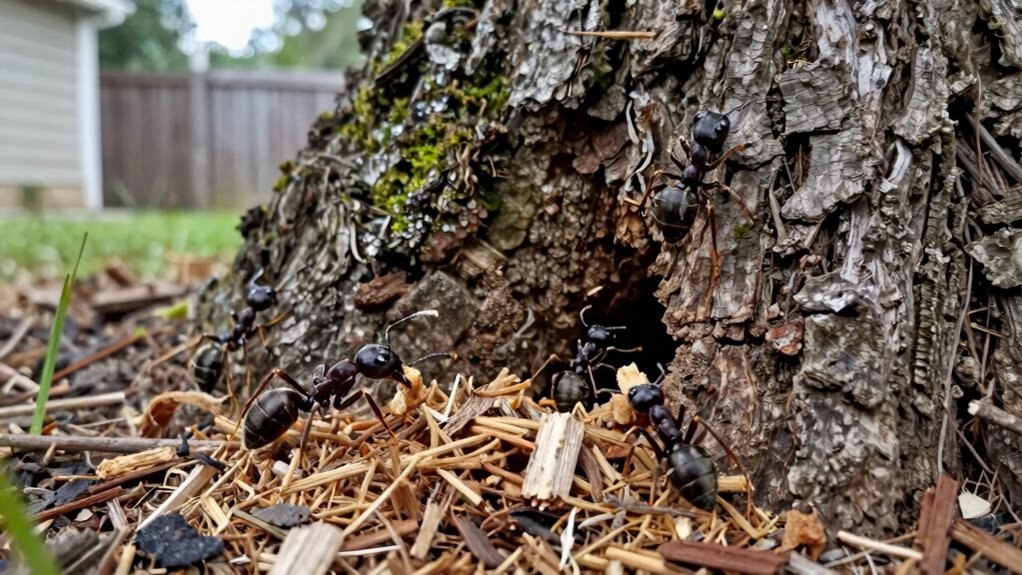
Treating outdoor carpenter ant nests for good means targeting the source directly. Saturation is key, so pour one gallon of water based insecticide right into visible nest cavities.
For hard to reach spots, drilling a small half inch hole provides a perfect entry point for liquid treatments. A perimeter barrier spray applied two to three feet up the wall and five feet out on the ground works best.
Reapply this chemical fence every four to six weeks or after heavy rain. This stubborn barrier tells ants no vacancy and helps you achieve long term carpenter ant control. However, overuse risks include burning or redness, so follow product label directions for pest management.
Use this approach for effective outdoor pest management and complete nest elimination. You can confidently handle these wood destroying insects with these simple pest control solutions.
Direct Nest Saturation
Pouring insecticide into a nest is like flooding a gopher’s tunnel. You want to hit every hidden chamber, not just the entrance.
The trick is choosing the right weapon for the job. Start with a liquid drench using a water-based insecticide for pest control.
Pour at least one gallon directly into tree holes or cavities. This floods all galleries deep inside the nest.
For nests in awkward spots or wall voids, use foam injection. Expanding foam fills gaps liquid can’t reach, smothering ants where they hide.
When the nest is angled oddly, drill a ¼-inch hole first. This lets liquid flow downward without pooling at the rim.
Heavy rain washes treatments away, so reapply after a downpour. Check within a week and hit it again if needed.
Foam works best for tricky spots during active ant control. A simple liquid drench does the job on open tree nests.
The verdict for effective pest solutions is to saturate thoroughly or don’t bother.
For even faster elimination, Fipronil-based baits can kill ants within hours and cause colony collapse in days.
Drill Access Points
Drill a ¼- to ½-inch hole into the nest cavity at a slight downward angle. This becomes your liquid insecticide gateway, letting the treatment seep deep into galleries where ants roam.
For nests tucked in tree crotches or under eaves, this drill access route beats prying apart wood, which just creates a splintered mess. Moisture detection is your first clue; a damp spot on a trunk often marks the nest’s soft entry point.
Professional tools, like a cordless drill with a long auger bit, make this targeted ant control job quick and clean. A solid drill setup is worth the $50 investment for repeat outdoor pest elimination.
Pour a steady stream of liquid insecticide through the hole, aiming for a slow, even flow so it travels the full tunnel network. Then plug the opening with plumber’s putty to seal out rain and curious critters. Residual products create a chemical barrier lasting up to 6 months.
Bottom line: drill smart, treat once, and those outdoor ant nests are toast without repeat applications. For DIY pest control buyers, this access point method saves time and prevents half‑done treatments.
Perimeter Barrier Sprays
To get it right, focus on these four steps. Spray the foundation walls two to three feet up, not just the base.
Treat the ground five feet out from the house, covering mulch and soil. Hit shrubs and tree trunks that touch the structure, since ants use them as bridges.
Reapply every four to six weeks, or after heavy rain, because water ruins the barrier. A gallon of water-based insecticide, about $15, does the job.
This creates a solid perimeter barrier spray that stops ant trails and protects your home’s entry points. For lasting termite control and general pest prevention, this cheap insurance keeps your dry home safe. Products like Talstar One, with up to three months residual, provide heavy-duty protection against carpenter ants when applied correctly.
Inject Insecticide Into Indoor Wall Voids
Injecting insecticide directly into a wall void is the fastest way to eliminate an indoor carpenter ant colony, but it calls for steady hands and a willingness to patch a few small holes.
Drill a 1/4 inch hole near the suspected nest site, then puff a dust formulation or squirt a water based liquid spray deep into the cavity.
Dusts cling better to vertical surfaces, so they remain the top choice for wall void treatments. Before you inject, fix any leaks or moisture issues, because damp wood is exactly what attracted the ants in the first place.
Ant baiting can support this approach, but direct void injection targets the colony’s core for immediate results.
Wear a dust mask, keep children and pets out of the room, and patch the holes with spackle or drywall compound afterward.
It’s a bit messy, sure, but it beats tearing out entire sections of wall to find the nest.
The bottom line is that precise void injection stops carpenter ant infestations fast, so skip the spray and pray routine and go straight for the source.
For lasting protection, combine this with a perimeter treatment and regular moisture checks around windows, pipes, and eaves.
If you’re unsure about nest location, tap along the wall to hear hollow sounds or look for fine sawdust piles near baseboards.
That pinpoint approach saves time and reduces the number of injection points you’ll need to drill.
After patching, monitor the area for a week to confirm no new frass appears, which means the colony is finished.
This method works best with a professional grade insecticide dust like boric acid or deltamethrin, so ask your local supplier for the right product.
Vacuum the Nest to Remove Ants and Debris
Vacuuming the nest is a chemical free way to remove ants and debris from walls or hollow doors. It gives your home a deep clean without using pesticide.
Start with a shop vac and a crevice tool for the best results. Drill a small hole near frass piles to suck out ants, eggs, and sawdust for 5 to 10 minutes. Empty the canister far from your house to prevent reinfestation.
Seal the hole with painter’s tape or putty to buy time. Check the hole daily for fresh frass, which means survivors are still active.
Repeat vacuuming until you see more debris. Tap walls to listen for rustling sounds that indicate hidden activity.
If you still hear scuttling, keep vacuuming to evict the colony. Vacuuming alone rarely wins, so combine it with insecticide for best results. It is a solid first punch for long term pest control. For best results, this method works well alongside ultrasonic deterrent devices that cover large areas without needing ongoing costs.
Dry Out the Damp Wood That Brought Them In
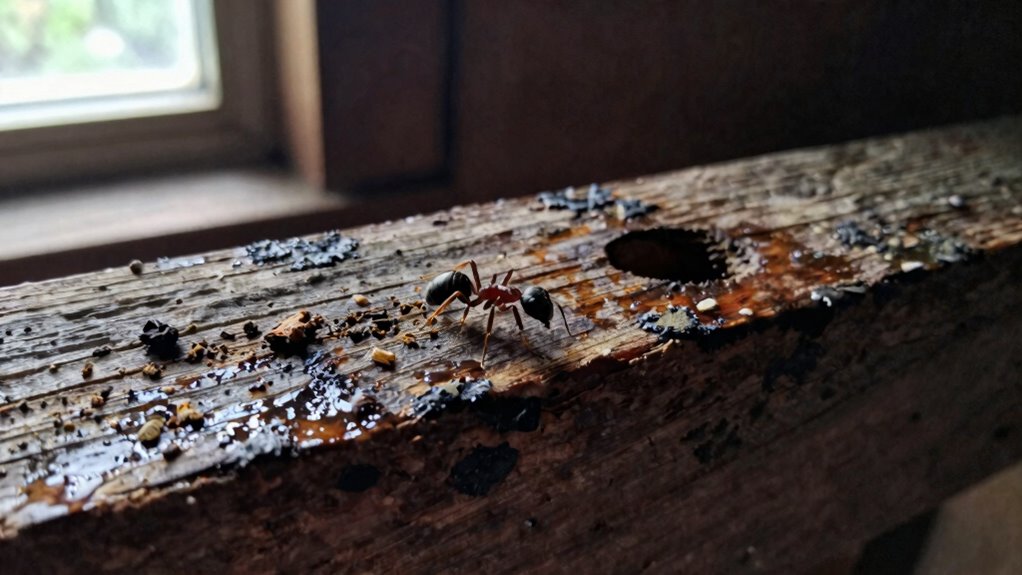
Vacuuming is a solid first move, but it treats the symptom, not the cause. Carpenter ants didn’t wander in for the decor, they came for the damp rotting wood that’s a buffet and nursery.
Skip the guesswork and grab a moisture detection tool like a pinless meter for around $30 at any hardware store. Run it along baseboards, window frames, and under sinks to find high moisture areas. These devices use high-frequency electromagnetic waves to measure dampness without damaging finished surfaces.
Anything reading above 15 percent moisture is a welcome mat for ant infestations. Fix those leaks, reroute gutters, or improve ventilation to take away their nesting site.
Let the wood dry out for a week after making those repairs. Pair that with regular ant monitoring and check trails weekly to track any remaining activity.
Apply a targeted ant control treatment around the dried areas if you spot stragglers. The colony will pack up once the damp wood is gone.
Bottom line, dry wood equals ant free zones. Chase the wet spots, not the workers, for long term pest prevention.
Seal Entry Points So They Can’t Get Back In
After drying out the wood, you must seal every possible entry point to block ant trails.
Trim branches and bushes away from the house so ants cannot use them as bridges into your home.
Caulk any gaps around roofs, walls, and pipes to stop reinfestation.
A few tubes of exterior caulk and a ladder are affordable pest control tools for lasting protection.
For larger gaps, use steel wool with spray foam to create a dual-layer seal that resists gnawing and insulates against drafts.
Trim Branches Away
A branch scraping against the siding acts like a dinner bell for carpenter ants. They will absolutely use it to find a way inside.
Overhanging limbs create a direct ant superhighway into your home. This bypasses all your careful sealing efforts against pests.
Damaged branches invite decay that weakens tree health. This decay provides perfect nesting material for these insects.
They don’t need a welcome mat, just a touch point to start an infestation. To shut down this pest highway, follow these tree trimming tips.
Trim every branch that touches or hangs within three feet of your roof or siding. Focus on dead or cracked limbs first for effective pest control.
Branch decay is prime real estate for nests and ant colonies. Cut at a 45 degree angle leaving no stubs that could rot.
Rotting stubs attract more insects and wood destroying pests. Clear all clippings immediately to avoid leaving ant friendly debris.
A six foot pruning saw costs about 20 dollars. Use it to prevent sawdust indoors and stop carpenter ant damage.
Combining visual deterrents with physical barriers near entry points can further discourage nesting pests.
Seal Roof and Wall Gaps
Carpenter ants are clever, but they cannot chew through steel wool or silicone caulk. Seal roof and wall gaps to block their re-entry, as these pests use cracks as small as a pencil line.
Focus on vulnerable spots like a low slope roof with gaps near flashing or vents. A missing vapor barrier in walls invites the dampness that carpenter ants love.
Use silicone caulk for narrow cracks and expanding foam for larger ones. Stuff steel wool into openings before sealing, because ants hate chewing metal.
Cost is minimal, with caulk running under $10 per tube. Check your home quarterly, especially after storms, to maintain a pest-free fortress.
A sealed home denies them entry, so they cannot return. This simple pest control step protects your home from wood damage. For long-lasting defense, consider applying granular perimeter barriers around the foundation, which can remain effective for up to 90 days.
Why Treating the Main Nest Isn’t Enough: Call a Pro for Satellite Colonies
Destroying the main nest is not enough for total ant control. Satellite colonies in walls or eaves can keep an infestation alive for months after you treat the queen.
A professional exterminator knows these hidden outposts thrive independently. Each satellite colony has its own workers and brood, so DIY pest control often fails.
Satellite nests prefer dry wood, unlike the damp main colony. They spread far through invisible trails that connect each group.
Treating one spot leaves others untouched, so ants simply relocate. Pros use dampness meters and thermal imaging to find every hidden colony.
Calling a pro costs $200 to $500 but saves the headache of a repeat invasion. They will hunt every satellite, not just the obvious one.
Skip the guesswork and get the job done right the first time.
For satellite colonies that require specialized treatment, a pro may use a slow-acting poison to ensure workers carry bait back to every hidden nest.
Frequently Asked Questions
Do Carpenter Ants Bite Humans?
Yes, carpenter ants can bite, and they do so with strong jaws designed for chewing wood. However, it is not a common occurrence and typically happens only when they feel threatened.
The bite itself feels like a sharp pinch, and for most people, the reaction is mild with just a little redness. Unlike a bee sting, the bite severity is usually low and rarely a big deal.
To prevent these defensive bites in your home, focus on carpenter ant control through moisture reduction and sealing entry points.
If you spot signs of an infestation, like sawdust piles or rustling in walls, it is time to consider pest control treatments.
For smart purchase decisions, look for targeted ant baits and insecticidal dusts that professionals recommend for carpenter ants.
Buying a quality product now can stop a colony before they damage your wood structures.
What Does Carpenter Ant Frass Look Like?
Carpenter ant frass looks like a coarse pile of sawdust like debris.
Its color is typically a mix of light brown and beige, resembling finely shredded wood.
The texture is rough and fibrous, often containing bits of dead ants and insect parts.
This isn’t just simple wood dust, it’s a telltale sign of an active infestation.
If you spot a small heap near a baseboard, window frame, or tree trunk, you’re looking at ant garbage.
Unlike termite droppings, which are pellet shaped, carpenter ant frass is irregular and crumbly.
Knock the pile aside and you might reveal the nest entrance.
That’s the moment to call a pest control professional or grab a targeted carpenter ant treatment.
For effective removal, use a product that kills the colony, not just the visible workers.
Look for a fast acting bait or foam spray designed for wood nesting ants.
Buying the right pest control product now can save you from costly structural repairs later.
Always check for frass in dark, damp areas like attics, crawl spaces, and behind wall voids.
How Fast Do Carpenter Ants Damage Wood?
Carpenter ants damage wood slowly, over years, not months. Wood decay accelerates their tunneling, but structural failure from nests alone is rare unless moisture is already rotting things.
Think of them as lazy renovators, not demolition crews. They prefer damp wood, so fixing leaks is key for effective pest control.
Nests in wall voids can weaken framing after 3 to 5 years. A one gallon insecticide pour into a tree hole halts them fast when you need immediate ant treatment.
Bottom line: worry about moisture first. Ants are the symptom, not the cause, so targeting humidity with a moisture control solution is your smartest purchase.
Can Carpenter Ants Nest in Insulation?
Yes, carpenter ants can nest in insulation, though they prefer wood. They chew through it to create galleries, especially when the insulation is damp.
- Check for frass mixed with insulation bits near vents or pipes. Fix leaks pronto, since dampness control is your best defense.
- Injecting a water-based insecticide into wall voids works, but vacuuming nests is often faster and more reliable. Bottom line: dry insulation discourages them, so patch dampness sources first.
Are Carpenter Ants Active in Winter Indoors?
Yes, carpenter ants can be active in winter indoors. Heated homes keep them moving along winter ant trails, which are permanent paths along pipes or wires.
They seek indoor food sources like crumbs or pet dishes, so your kitchen and pantry are prime targets. These ants don’t hibernate, they just slow down their activity.
If you spot one in January, odds are a satellite nest is cozy in your wall void. That means a hidden colony is already established and needs professional ant treatment.
Don’t ignore it, treatment still works in cold months. Use a targeted baiting system or a residual spray to eliminate the nest and stop pest damage.
For reliable home pest control, choose a gel bait that ants carry back to the colony. Also consider crack and crevice treatments to block their travel routes.
Winter ant infestations are more common than people think, and a quick extermination plan saves your home from structural harm.


